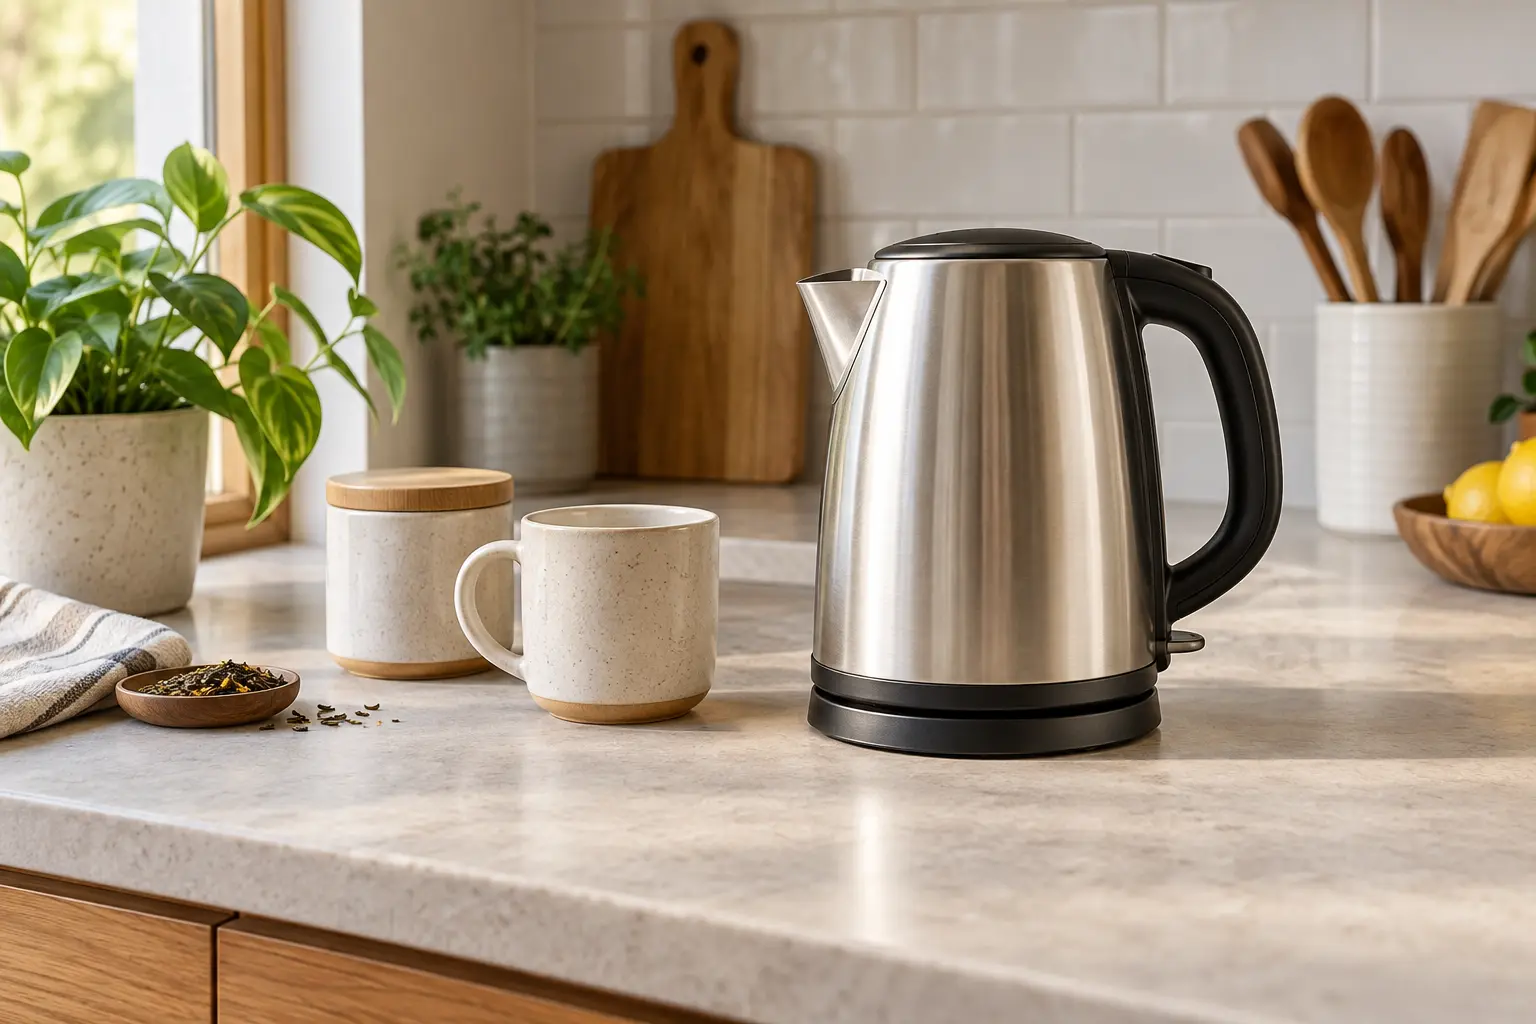
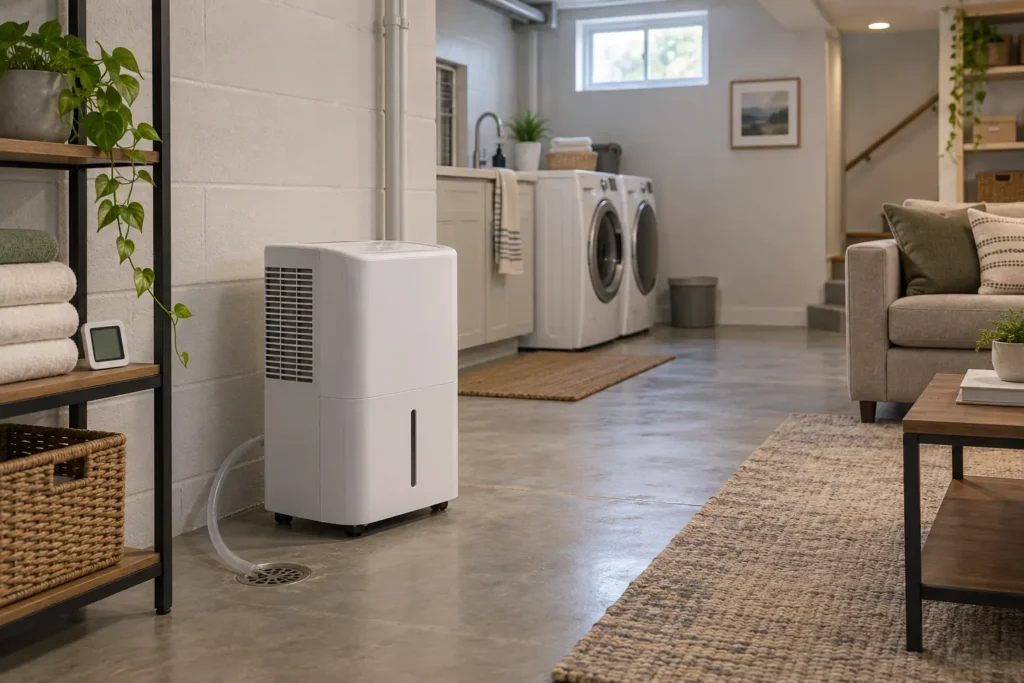
Portable dehumidifier with drain hose in a clean finished basement laundry area
Bedroom & Comfort, Laundry & Cleaning

What Size Dehumidifier Do I Need?

Disclosure: This post contains affiliate links. If you buy through one of our links, we may earn a commission at no extra cost to you. A dehumidifier manages airborne moisture; it does not repair leaks, stop water intrusion, or replace proper mold remediation.

Dehumidifier size is measured by how many pints of water the machine can remove in 24 hours under specified test conditions—not by the physical size of the cabinet. The right capacity depends on the area, how damp it is, the room temperature, air leakage, laundry or shower moisture, and whether you can drain the collected water continuously.

Square footage is only the beginning. A moderately damp 1,000-square-foot basement can need less capacity than a much smaller room with seepage, wet laundry, or very high relative humidity. This guide helps you choose a practical portable dehumidifier and set it up safely.

Quick answer

For a small-to-medium space under about 2,000 square feet, ENERGY STAR’s current buying guidance suggests roughly:

Condition without dehumidification Typical relative humidity Starting capacity
Slightly to moderately damp; intermittent musty odor About 50–75% RH 20–30 pints/day
Very damp; persistent odor or damp spots About 75–90% RH 25–40 pints/day
Wet; sweating surfaces, seepage, or high moisture load About 90–100% RH 30–50 pints/day

For spaces over 2,000 square feet, the same guidance starts at 30+ pints for moderately damp conditions, 40+ for very damp conditions, and 50+ for wet conditions. Treat these as estimates. Persistent water, visible mold, or a structural moisture problem needs diagnosis—not merely a larger appliance.

Start by measuring humidity

Use a separate hygrometer to observe relative humidity over several days. Check morning, evening, rainy weather, and after activities such as showering or drying laundry. A single reading can miss the real pattern, and the sensor built into a dehumidifier may read the air immediately around the unit rather than the whole room.

The U.S. Environmental Protection Agency recommends keeping indoor relative humidity below 60%, ideally around 30% to 50% where practical. ENERGY STAR also describes 30% to 50% RH as a generally desirable building range. Very low humidity can feel uncomfortable, so more drying is not always better.

Capacity is water removal, not tank size

A “35-pint” dehumidifier does not necessarily have a 35-pint bucket. The capacity rating describes water removal over 24 hours at a defined temperature and humidity; the bucket may hold only a fraction of that. In a damp room, you could empty it several times a day unless you use continuous drainage.

Newer capacity labels may look lower than older ones because federal test conditions changed. ENERGY STAR explains that portable units began using a cooler, more realistic test condition, so a newer 30-pint model may be comparable to an older model labeled much higher. Compare products using the same current standard whenever possible.

How room conditions change the size you need

Basement seepage or wet walls

Stop the water source first. Correct grading, gutters, plumbing leaks, cracks, drainage, or waterproofing as appropriate. A dehumidifier can help with residual airborne moisture, but running continuously against active seepage wastes energy and can conceal a worsening problem.

Laundry drying indoors

Wet clothes add a significant intermittent moisture load. Choose more capacity, improve exhaust or ventilation where appropriate, and consider continuous drainage. Keep the appliance clear of splashes and follow electrical-safety instructions.

Cool basement or garage

Compressor dehumidifiers can lose performance or frost in cool air. ENERGY STAR advises considering a model specified for lower-temperature operation when the space often falls below about 65°F (18°C). An automatic defrost function helps, but check the exact rated operating range.

Open floor plan

A portable unit works best in a reasonably contained area. Open stairs, frequently opened exterior doors, or multiple closed rooms make one unit’s job harder. Air needs a return path; a machine in one closed room will not reliably control humidity behind other closed doors.

Bathroom

Fix or upgrade exhaust ventilation first. Many portable dehumidifiers are not designed to sit in wet zones, and electrical clearances matter. Never place one where it can be splashed or reached from a tub or shower unless the product and installation are explicitly rated for that use.

Choose the drainage method before the capacity

Drainage Best for Watch for
Manual bucket Occasional use and easy access Frequent emptying; unit stops when full
Gravity hose Nearby floor drain lower than outlet Continuous downhill slope; kinks and trip hazards
Built-in pump Sink or drain above the unit Pump lift limit, hose routing, added noise and maintenance
External condensate pump Flexible permanent drainage Separate equipment, overflow protection, safe installation

A gravity hose must slope downward the entire way; it cannot push water uphill. Secure the hose at the drain, keep it away from electrical cords, and periodically inspect for slime, kinks, or blockage. Never route drainage where a leak could damage finished surfaces.

Features worth paying for

  • Accurate adjustable humidistat: lets the unit cycle instead of running constantly.
  • Automatic restart: helpful after a power interruption, provided settings are retained safely.
  • Low-temperature or defrost control: important in cool basements.
  • Continuous-drain connection: valuable for persistent moisture.
  • Washable, accessible air filter: easier routine maintenance.
  • ENERGY STAR certification: provides a verified efficiency basis for comparison.
  • Full-bucket shutoff: standard on many models and essential for bucket use.

Efficiency, noise, and heat

Dehumidifier efficiency is expressed as Integrated Energy Factor, or liters of water removed per kilowatt-hour. A higher IEF means more water removal for the electricity used under the test method. Compare models within an appropriate capacity class.

Every refrigerant dehumidifier adds some heat to the room while operating. That can be welcome in a cool basement but uncomfortable in a warm bedroom. For sleeping spaces, compare low-fan sound levels, compressor cycling character, display dimming, and whether the unit resumes loudly after a power interruption.

Portable vs whole-home dehumidifier

A portable unit makes sense for one basement, bedroom, storage room, or another defined area. A whole-home unit connects to ductwork and is intended to manage moisture across a larger conditioned area. Whole-home sizing, duct design, condensate disposal, and controls should be handled by an HVAC professional.

If you need portable units in many rooms or the central air conditioner leaves the entire home clammy, the building envelope and HVAC system may need assessment. Oversized air conditioning, air leakage, duct problems, or inadequate ventilation can contribute to humidity issues.

Placement and setup

  1. Use a grounded outlet that meets the manual’s requirements; avoid extension cords unless the manufacturer explicitly permits one.
  2. Leave the specified clearance around air intakes and exhaust. Do not crowd the unit behind furniture.
  3. Close windows and exterior doors while operating, unless a ventilation plan says otherwise.
  4. Keep the unit away from dust-producing work, which can clog coils and filters.
  5. Place it on a stable, level surface and protect the drainage route.
  6. Set an initial target around 45% to 50% RH, then confirm with a separate hygrometer.

For official capacity and placement guidance, see ENERGY STAR’s dehumidifier guide. For moisture and mold fundamentals, consult the EPA’s mold resources.

Maintenance that protects performance

  • Clean the filter on the manufacturer’s schedule.
  • Wash and dry the bucket regularly to control residue and odors.
  • Inspect the hose and drain connection for blockage or leakage.
  • Vacuum dust from accessible grilles with the unit unplugged.
  • Allow the appliance to stand as directed after transport before turning it on.
  • Check the model number against current recall information and register the product if desired.

When a dehumidifier is not the solution

Investigate urgently if you see active flooding, sewage, significant visible mold, a persistent plumbing leak, structural damage, or electrical equipment exposed to water. Porous materials that remain wet can be damaged even when room humidity later drops. A musty smell that persists at acceptable RH may indicate hidden moisture.

For a recent water event, prioritize safety, stop the source when it is safe to do so, document damage, and seek qualified help. Do not power an appliance in a wet area or handle electrical equipment while standing in water.

Frequently asked questions

Can a dehumidifier be too large?

A unit with an adjustable humidistat can cycle off at the target, so modest oversizing may provide useful reserve. But an unnecessarily large unit costs more, occupies more space, may be louder, and still will not fix a leak.

What humidity should I set?

Around 45% to 50% RH is a practical starting point for many homes. Adjust for comfort, condensation risk, climate, and building conditions while generally keeping below 60%.

Why does my dehumidifier blow warm air?

That is normal for a refrigerant dehumidifier. It removes moisture and rejects heat into the room, so discharge air feels warmer.

Will one dehumidifier handle several rooms?

Only if air circulates freely and the connected area is within the unit’s real capability. Closed doors and separate levels limit moisture transfer.

Should I run it continuously?

Use a humidistat target so the compressor can cycle as humidity falls. Continuous fan or drain operation varies by model. Persistent nonstop operation may signal an undersized unit, open windows, a blocked filter, low-temperature frosting, or an unresolved moisture source.

Shop dehumidifiers

Compare current pints-per-day ratings, rated operating temperature, IEF efficiency, drainage options, noise, filter access, and product dimensions. Confirm the capacity uses the current test standard.

Shop Amazon USA
Shop Amazon Canada

Final answer

Choose dehumidifier capacity from both the area and the dampness level. For a small-to-medium room under about 2,000 square feet, roughly 20 to 30 pints per day suits slight-to-moderate dampness, 25 to 40 pints suits very damp conditions, and 30 to 50 pints suits wet or high-load conditions. Increase capacity for larger or more demanding spaces, confirm cool-temperature performance, and choose drainage you will actually maintain. Most importantly, repair the moisture source rather than asking the appliance to fight it forever.

If humidity is mainly a bedroom comfort issue rather than a dampness problem, compare the opposite-use case in our bedroom humidifier guide.
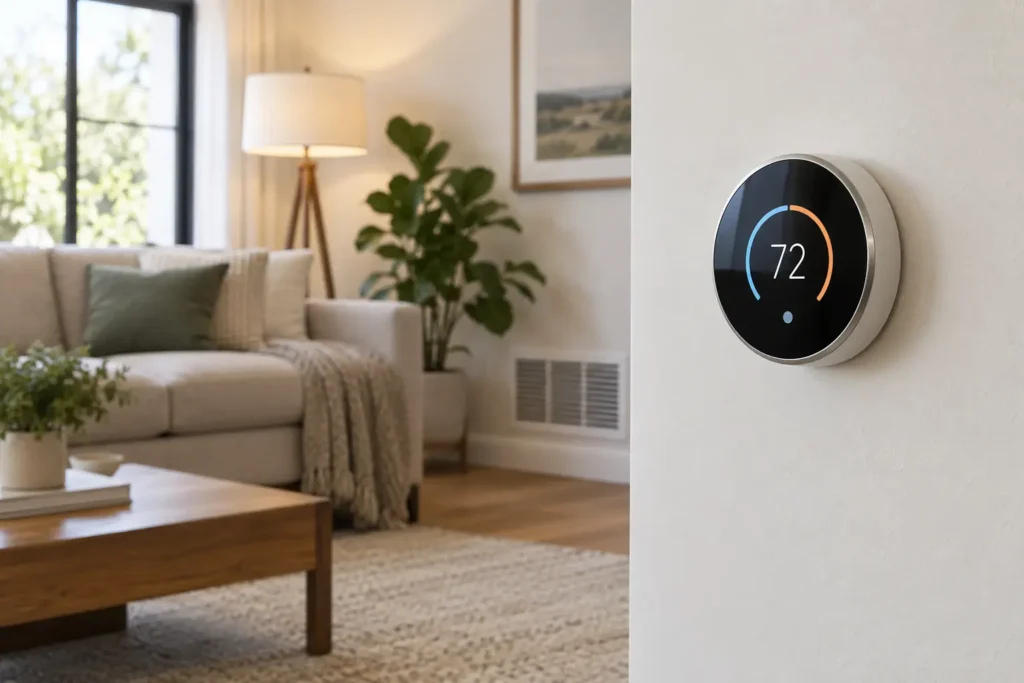
Generic smart thermostat mounted in a comfortable modern living room
Smart Home

Will a Smart Thermostat Work in My Home?

Disclosure: This post contains affiliate links. If you buy through one of our links, we may earn a commission at no extra cost to you. Thermostat wiring controls heating and cooling equipment; when system type, voltage, or wiring is uncertain, use a qualified HVAC or electrical professional.

A smart thermostat can add scheduling, remote control, energy reports, and convenient temperature adjustments. But compatibility is not as simple as matching wire colors. Before buying, you need to identify the HVAC equipment, control voltage, number of heating and cooling stages, available wires, and whether the existing thermostat uses proprietary communication.

This guide walks through those checks without asking you to guess. The safest rule is simple: use the prospective thermostat manufacturer’s current compatibility checker with your exact equipment and wiring, then confirm any ambiguous result with a professional.

Quick verdict

Most popular smart thermostats are designed for conventional low-voltage 24-volt HVAC systems, including many furnaces, central air conditioners, boilers, and heat pumps. Compatibility becomes less certain with electric baseboard heating, high-voltage thermostats, proprietary communicating systems, multi-stage equipment, millivolt heaters, and heat pumps with auxiliary or emergency heat.

A C-wire is common and often preferred because it supplies continuous power, but some models can work without one or include an approved power accessory. Never assume an unused wire is connected at the HVAC control board.

Compatibility checklist

Check What you need to know Why it matters
System type Furnace, boiler, heat pump, central AC, baseboard, fan coil Thermostats support different equipment families.
Control voltage Low voltage, line voltage, or millivolt Using the wrong thermostat can damage equipment or create a hazard.
Stages Single-stage, two-stage, variable, auxiliary heat The thermostat needs enough compatible terminals and logic.
Wire terminals Letters on the old thermostat base Terminal labels are more useful than wire colors.
Power C-wire, supported power extender, or approved alternative Smart features need reliable continuous power.
Communication Standard on/off terminals or proprietary data bus Communicating systems may require their matching controller.
Network Supported Wi-Fi band and phone platform Remote features depend on network and app compatibility.

Step 1: identify the system, not just the thermostat

Find the model numbers on the indoor and outdoor HVAC equipment, then check the manuals or manufacturer documentation. A home may have a gas furnace with central air, an air-source heat pump with electric auxiliary heat, a boiler with radiators, or separate systems for different zones. Two thermostats in the same home may control entirely different equipment.

If you rent or live in a condo, ask the property manager or building maintenance team before changing controls. Shared fan-coil systems, building automation, and landlord-owned equipment may not accept a retail smart thermostat.

Step 2: distinguish low voltage from line voltage

Many central HVAC thermostats use small-gauge low-voltage wires and terminals labeled with letters such as R, C, W, Y, and G. Electric baseboard and some wall heaters often use a line-voltage thermostat with thicker wires and wire connectors inside an electrical box.

Do not remove or probe a thermostat if you are unsure of the voltage. Turn off the correct power source before any inspection directed by the manufacturer. A typical low-voltage smart thermostat must never be connected to a line-voltage circuit. Use a thermostat specifically rated for your heating voltage and load, or hire a qualified professional.

Step 3: photograph terminal labels before disconnecting anything

If the manufacturer’s instructions say it is safe to remove the faceplate, take a clear photo of the existing wiring while every wire is still connected. Record the terminal letters printed on the base. Wire colors are conventions, not proof of function; an installer may have used a different color or repurposed a conductor.

Look for labels such as:

  • R, Rc, Rh: power from the HVAC transformer
  • C: common return used for continuous thermostat power
  • W or W1/W2: heating calls or stages
  • Y or Y1/Y2: compressor or cooling stages
  • G: indoor fan
  • O/B: heat-pump reversing valve
  • AUX or E: auxiliary or emergency heat

These are common conventions, not a universal wiring plan. Follow the equipment and thermostat documentation for your exact system.

Do you need a C-wire?

Smart thermostats need power for the display, Wi-Fi radio, sensors, and processor. A dedicated C-wire usually provides the most straightforward power path. If a wire is connected to C at the old thermostat, that is a good sign—but still verify the complete system against the compatibility tool.

If there is no C-wire, possible solutions include:

  • Using an extra conductor already in the wall cable and connecting it correctly at both ends
  • Installing the manufacturer’s approved power-extender or C-wire adapter
  • Running a new thermostat cable
  • Selecting a model explicitly compatible with your system without a C-wire

“Power stealing” designs draw small amounts of current through control circuits. Whether that works reliably depends on the thermostat and equipment. Symptoms of a poor match can include reboots, Wi-Fi dropouts, relay chatter, unexpected cycling, or depleted batteries. Do not improvise with an unapproved transformer or jumper.

Heat-pump compatibility needs extra attention

A heat pump can have a reversing valve, one or more compressor stages, and auxiliary or emergency heat. The thermostat must support the exact configuration and be set up correctly. A mistake can trigger expensive backup heat too often, run the system inefficiently, or prevent proper heating and cooling.

ENERGY STAR notes that certified smart thermostats may work with common systems, but equipment compatibility still varies—particularly for variable-speed and specialized heat-pump setups. Review the current guidance and certified products at ENERGY STAR, then use the thermostat maker’s system checker.

What about variable-speed and communicating HVAC?

Some premium HVAC systems use proprietary digital communication between the thermostat and equipment. Instead of several conventional call wires, the control may exchange detailed operating data over a small number of terminals. Replacing it with a conventional smart thermostat may remove modulation, diagnostics, humidity control, or efficiency features—even if an adapter is possible.

If the current controller has unusual terminal labels, a brand-specific interface, or advanced equipment menus, contact the HVAC manufacturer or an authorized technician before purchasing.

Zoned systems, boilers, and accessories

Zoned HVAC

The thermostat may connect to a zone-control panel rather than directly to the furnace or air handler. Compatibility depends on the panel, transformer capacity, dampers, and number of zones. Check each zone separately.

Boilers and hydronic heat

Many low-voltage boiler systems can work with smart thermostats, but millivolt controls, zone valves, circulators, and multiple transformers complicate the picture. A C-wire may not be present at the wall.

Humidifiers, dehumidifiers, and ventilators

Only some smart thermostats directly control whole-home accessories. Count the accessory terminals and verify supported wiring. A thermostat that handles temperature perfectly may still require separate controls for humidity or ventilation.

Smart features worth comparing

  • Flexible scheduling: useful if your routine is predictable.
  • Remote room sensors: can prioritize occupied rooms or average temperatures.
  • Heat-pump controls: important for auxiliary heat thresholds and balance settings.
  • Local controls: the thermostat should remain usable when internet service is down.
  • Energy reports: helpful when they explain runtime and schedule changes clearly.
  • Geofencing and occupancy: useful only if every household member’s privacy and routine fit the feature.
  • Smart-home integration: verify your preferred platform and region before buying.

Privacy and long-term support

A connected thermostat can collect temperature, occupancy, equipment runtime, location-related, and account data. Read the current privacy policy, learn which features require cloud service, enable multi-factor authentication when available, and use a unique password.

Also look beyond the purchase date. Check the maker’s software-support record, whether basic scheduling works without a subscription, how account deletion works, and whether the thermostat retains essential manual control if a cloud service changes.

DIY installation or professional help?

A straightforward low-voltage, single-stage replacement may be within reach for an experienced homeowner who follows the product and HVAC instructions precisely. Professional installation is the better choice when:

  • Voltage is uncertain or the existing thermostat controls electric baseboard heat
  • There are multiple transformers, jumpers, splices, or unlabeled wires
  • The system is communicating, variable-speed, dual-fuel, or multi-stage
  • A heat pump uses auxiliary or emergency heat
  • A new cable or control-board connection is required
  • The equipment is under warranty and installation terms matter
  • You simply do not feel confident identifying the circuit

Before-you-buy workflow

  1. Record indoor and outdoor equipment model numbers.
  2. Identify the existing thermostat make and model.
  3. Turn off power as directed before inspecting any wiring.
  4. Photograph terminal labels and connected wires.
  5. Run the exact information through the prospective manufacturer’s compatibility checker.
  6. Confirm C-wire or approved power-accessory requirements.
  7. Check Wi-Fi, phone, voice-assistant, and regional service compatibility.
  8. Review rebates only after confirming the exact eligible model and installation rules.
  9. Hire a qualified professional if any result is ambiguous.

Frequently asked questions

Can any smart thermostat replace any old thermostat?

No. Voltage, HVAC type, stages, power, accessories, and communication method all have to match.

Can I tell what a wire does by its color?

No. Use the labeled terminal where the wire is connected and the equipment documentation. Colors are helpful clues, not definitive identification.

Will a smart thermostat work without Wi-Fi?

Most retain basic local temperature control, but remote access, weather data, reports, and some automations may stop. Confirm offline behavior for the exact model.

Can a smart thermostat control electric baseboard heaters?

Only a model specifically rated for that line-voltage application and electrical load. Standard 24-volt smart thermostats are generally not direct replacements.

Will a smart thermostat lower my energy bill?

It can help by making schedules and setbacks easier, but savings depend on climate, equipment, insulation, household behavior, and the settings you use. Compatibility and correct configuration come first.

Shop smart thermostats

Do not order until you have run your HVAC and wiring information through the exact model’s current compatibility checker. Then compare support for stages, heat pumps, sensors, privacy controls, and approved power accessories.

Shop Amazon USA
Shop Amazon Canada

Final answer

A smart thermostat will likely work if your home has a compatible 24-volt conventional HVAC system, the model supports every heating and cooling stage, and it has an approved power solution. But do not buy from wire colors or a C-wire check alone. Confirm the equipment type, voltage, terminals, stages, and manufacturer compatibility result. For line-voltage, communicating, dual-fuel, variable-speed, or uncertain systems, get professional confirmation first.

After setup, pair a sensible schedule with the comfort-first ideas in My Home Feels Warmer—and It Has Nothing to Do with the Thermostat.

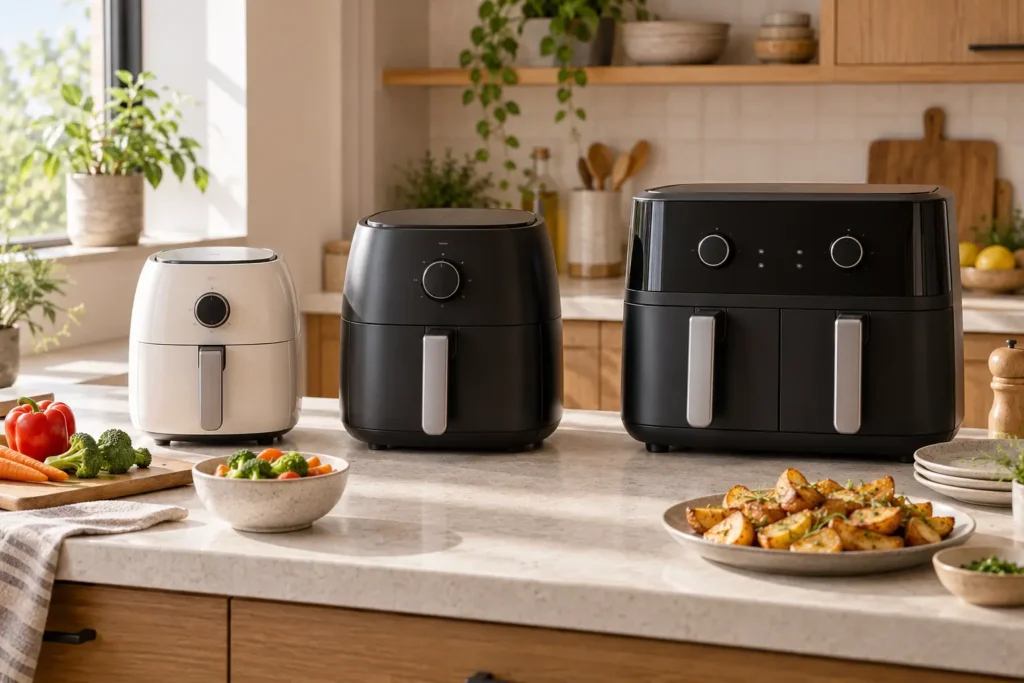
Three unbranded air fryers in compact, medium, and dual-basket sizes on a kitchen counter
Kitchen & Dining

What Size Air Fryer Do I Need?

Disclosure: This post contains affiliate links. If you buy through one of our links, we may earn a commission at no extra cost to you. Capacity labels are not standardized, so always compare basket dimensions and exterior measurements—not quarts alone.

The most common air-fryer mistake is buying by household size without considering what you actually cook. A compact basket may handle one person’s vegetables beautifully but require several batches for two chicken breasts. A large dual-basket model can cook a full dinner, yet take up more counter and storage space than a small kitchen can comfortably spare.

This air fryer size guide translates the usual capacity ranges into real kitchen decisions for one, two, or four people. The goal is not the biggest appliance you can afford. It is the smallest one that cooks your normal meal in a useful number of batches.

Quick answer

Household Useful starting range Best for
1 person 2–4 qt Snacks, vegetables, reheating, one main portion
2 people 4–6 qt Two portions, a few chicken pieces, shared sides
3–4 people 6–8 qt or dual basket Family portions, larger proteins, two foods at once
4+ or frequent entertaining 8+ qt, dual basket, or oven style Larger batches and multi-item meals

These ranges are starting points, not guarantees. A wide 5-quart basket may hold more food in a single layer than a tall 6-quart basket. Interior shape is often more important than the number printed on the box.

The rule that matters most: food needs surface area

Air fryers move hot air around food. For browning and crisping, pieces generally perform best with some room between them. A deep basket can advertise impressive volume while offering limited cooking surface. If your favorite foods are chicken cutlets, salmon fillets, or roasted vegetables, look for a wide, square basket.

Think in “single-layer servings” rather than quarts. Before buying, check the basket’s usable width and length and compare them with the food you cook most often. Product photos can be misleading, so look for published interior dimensions or review images with familiar foods.

Best air fryer size for one person

A 2- to 4-quart model is usually the practical range for one person. The smaller end works well for snacks, reheating leftovers, a portion of vegetables, or one small protein. Moving closer to 4 quarts gives you room to cook a main and side in one batch or prepare two portions for planned leftovers.

Choose 2–3 quarts if:

  • Counter and cabinet space are extremely limited
  • You mainly reheat pizza, fries, or small portions
  • You are comfortable cooking one component at a time
  • Low weight and easy storage matter most

Choose 3–4 quarts if:

  • You want a little breathing room around food
  • You meal-prep two servings at once
  • You regularly cook a protein plus vegetables
  • You would rather avoid replacing an undersized model later

Best air fryer size for two people

For two adults, 4 to 6 quarts is the most flexible range. A wide 5- or 6-quart basket can often accommodate two modest portions without stacking. This is also a useful size for a couple who cooks once and saves leftovers.

Do not assume a larger capacity always means a much larger footprint. Some models gain volume by becoming taller; others grow wider. For countertop use, measure the appliance width, depth, and height, then add the manufacturer’s required clearance for ventilation.

A single basket works best when:

  • Both people eat the same meal
  • Foods use similar temperatures and timing
  • You value one large cooking surface
  • You want simpler cleaning and storage

A dual basket works best when:

  • You often cook a main and side at different settings
  • Household members prefer different foods
  • You use sync-finish features regularly
  • You have enough counter depth and width

Best air fryer size for four people

Start around 6 to 8 quarts, then judge the basket layout. A family that cooks wings or vegetables may benefit from one wide basket. A family that wants chicken in one zone and potatoes in another may prefer a dual-basket model.

For four full portions, even a large basket may require batching—especially when crispness matters. An oven-style air fryer offers multiple racks and more visual capacity, but results can vary by rack position and the appliance is more involved to clean. Choose it for flexibility, not because it automatically cooks every food better.

Basket, dual-basket, or oven style?

Style Strengths Tradeoffs
Single basket Fast, simple, compact, easy to shake One temperature; may require batches
Dual basket Two foods, separate settings, synchronized finish Wider footprint; each zone may be narrow
Flexible divider One large zone or two smaller zones More parts; verify usable area in both modes
Oven style Multiple racks, toast and bake functions, larger flat foods More cleaning; rack position may affect browning

Measure your kitchen before buying

Write down four measurements:

  1. Counter footprint: the appliance’s width and depth.
  2. Operating clearance: the free space required around and above it.
  3. Drawer clearance: the extra depth needed to pull the basket out fully.
  4. Storage opening: cabinet or pantry height, including the handle and cord.

Do not operate an air fryer inside a closed cabinet or directly under a surface that conflicts with the manual’s clearance requirements. Hot exhaust needs a safe path away from walls, cabinets, curtains, paper, and other heat-sensitive materials.

Capacity labels can be confusing

Depending on the market and manufacturer, capacity may be listed in quarts, liters, pounds of food, or an example such as “fits a whole chicken.” These descriptions are not directly interchangeable. A claimed chicken size does not tell you how well vegetables spread out, and total volume does not reveal usable basket area.

When comparing two models, prioritize:

  • Usable basket width and length
  • Exterior footprint and open-drawer depth
  • Whether the insert is easy to lift and clean
  • Replacement basket, tray, and accessory availability
  • Warranty and return window

Features worth paying for

  • A useful temperature range: helpful for reheating, roasting, and lower-temperature cooking.
  • Simple controls: a clear time and temperature adjustment is more valuable than dozens of presets.
  • Dishwasher-safe removable parts: useful if the material and your dishwasher instructions allow it.
  • Easy-to-grip basket: especially important when hot and loaded.
  • Dual-zone sync: worthwhile only if you routinely cook two different foods.
  • Accessible replacement parts: extends the appliance’s useful life.

Features you may not need

  • Wi-Fi controls for a task that still requires hands-on food loading
  • Many one-touch presets that simply select time and temperature
  • A viewing window if it adds cleaning work you dislike
  • A very high capacity when you mostly cook one portion
  • A large accessory kit before you know which accessories you will use

Food-safety basics

An air fryer is a small convection oven, not a guarantee of doneness. Cooking time varies with food thickness, starting temperature, load size, and appliance design. Use a food thermometer in the thickest part of meat or poultry and follow current safe-temperature guidance from FoodSafety.gov.

Avoid overfilling the basket, keep raw foods separate from ready-to-eat foods during preparation, and clean removable parts after greasy or raw-meat cooking. Let the appliance cool before deep cleaning and follow the manual for any nonstick surface.

Common sizing mistakes

  • Buying for rare parties: a daily appliance should fit daily life; occasional extra batches may be easier than storing an oversized unit.
  • Ignoring basket shape: wide and square often beats narrow and tall.
  • Forgetting open-drawer depth: the appliance may fit the counter but block a walkway in use.
  • Assuming dual baskets double convenience: two narrow zones can limit larger foods.
  • Counting servings from marketing alone: appetites and recipes vary.

A simple decision method

  1. List the three foods you expect to cook most often.
  2. Estimate how many portions you want per batch.
  3. Decide whether those foods need one large surface or two separate zones.
  4. Measure the permanent counter or storage space.
  5. Choose the smallest model that fits the food in a useful arrangement.

If your counters already feel crowded, apply the layout ideas in The Small-Kitchen Habits That Keep Counters Looking Clean before committing to a large appliance.

Frequently asked questions

Is a 4-quart air fryer big enough for two people?

It can be, especially for smaller portions or foods that do not need much surface area. A wider 5- or 6-quart basket offers more flexibility and may reduce batching.

What size air fryer fits a whole chicken?

It depends on both the chicken and the basket’s internal dimensions. Check the manufacturer’s maximum food-size guidance and ensure the chicken does not touch the heating element. Verify doneness with a thermometer.

Does a larger air fryer take longer to cook?

Not necessarily. Food load, airflow, power, preheating, and basket shape all affect time. Follow the recipe as a starting point and check food early.

Is a dual-basket air fryer better for a family?

It is better when you regularly need different temperatures or times. One large basket may be better for a single large batch such as vegetables, wings, or cutlets.

Can I keep an air fryer in a cabinet?

You can store a cool, unplugged appliance in a cabinet if it fits safely. Operate it only in a location that meets the manual’s ventilation and clearance instructions.

Shop air fryers by size

Use the capacity range as a filter, then compare the actual basket dimensions, exterior measurements, clearance instructions, and included parts.

Shop Amazon USA
Shop Amazon Canada

Final answer

For one person, start at 2 to 4 quarts; for two people, 4 to 6 quarts; and for three or four people, 6 to 8 quarts or a dual-basket model. Then override that rule if your favorite foods need more flat cooking area. Basket dimensions, counter footprint, and the number of batches you will tolerate matter more than the capacity label alone.

For a calmer cooking space, continue with The No-Renovation Kitchen Upgrade.

Layered neutral blackout curtains drawn across a cozy bedroom window
Bedroom & Comfort, DIY & Decorating

Best Blackout Curtains for a Bedroom

Disclosure: This post contains affiliate links. If you purchase through one of our links, we may earn a commission at no extra cost to you. Product dimensions, materials, and care instructions should always be confirmed before ordering.

Blackout curtains can make a bedroom feel calmer, reduce early-morning glare, and give you more control over privacy. But the word “blackout” on a package does not guarantee a truly dark room. Fabric density matters, yet most disappointing results come from light leaking above, beside, or between the panels.

The best setup is a system: correctly sized curtains, enough fabric fullness, thoughtful rod placement, and—when needed—a wraparound rod, side channel, or layered shade. This guide shows you how to choose and hang blackout curtains so they work as well as they look.

Quick verdict

For most bedrooms, choose two machine-washable, triple-weave or lined panels totaling 1.5 to 2 times the width of the curtain rod. Hang the rod 4 to 8 inches above the window frame and extend it 4 to 8 inches beyond each side where wall space allows. A wraparound rod and floor-length panels usually block more edge light than a standard rod with short curtains.

Who blackout curtains are best for

  • Light sleepers whose windows face streetlights or early sunrise
  • Shift workers who sleep during daylight hours
  • Nurseries and children’s rooms where flexible nap conditions help
  • Bedrooms that need more nighttime privacy
  • Renters seeking a reversible change with a large visual impact

They are less useful if your main light leak comes from a door, skylight, or bright electronics. Curtains also do not soundproof a room; heavy fabric may soften echoes slightly, but it cannot block traffic or neighbor noise the way structural changes can.

Blackout curtain buying checklist

Decision What to look for Why it matters
Light blocking Dense triple-weave or separate blackout lining Darkens the glass area; edge control completes the job.
Width Total panel width 1.5–2× rod width Creates fullness and prevents stretched-flat gaps.
Length Floor length or slightly longer Reduces light below the window and looks more intentional.
Rod Wraparound or return-style rod Brings fabric closer to the wall at both sides.
Header Grommet, rod pocket, back tab, or rings Changes light gaps, movement, and overall style.
Care Machine washable if practical Bedroom textiles collect dust and need periodic cleaning.
Safety Cord-free design and secure hardware Especially important in children’s rooms.

Blackout vs room-darkening curtains

Room-darkening curtains reduce a noticeable amount of light but may still glow in direct sun. They can be enough for a guest room or a bedroom where you want softened morning light.

Blackout curtains use dense fabric, a woven dark layer, or an applied lining to block much more light through the panel. Even a strong blackout panel will not stop light entering around its edges.

Thermal curtains focus on slowing heat transfer and drafts. Some are also blackout curtains, but the terms are not interchangeable. Verify both claims if you want both functions.

How to measure correctly

1. Measure the window and the usable wall

Record the outside width of the trim, the height from your planned rod position to the floor, and the clear wall space on both sides. Check for vents, radiators, outlets, furniture, and baseboard heaters before deciding on length.

2. Choose the rod width

A practical starting point is the window’s outside width plus 8 to 16 inches. That lets the rod extend 4 to 8 inches past each side, giving the curtain room to cover the edges and stack away from the glass when open.

3. Calculate panel fullness

Multiply the finished rod width by 1.5 for a cleaner, tailored look or by 2 for fuller folds and better coverage. For a 60-inch rod, aim for 90 to 120 inches of total fabric width. With two panels, each panel would ideally be about 45 to 60 inches wide.

4. Select the finished length

Measure from the point where the curtain will actually hang—not simply from the top of the rod. Rings, clips, grommets, and rod pockets change the drop. Common lengths are 63, 84, 95, and 108 inches, but your measurement should make the decision.

Which curtain header blocks light best?

A rod pocket or back-tab curtain can sit relatively close to the rod, but it may be slower to open and close. Grommets slide easily, yet their top edge often sits below the rod and can admit small arcs of light. Rings and clips are flexible and polished-looking, though they may create a larger gap above the fabric.

If maximum darkness matters, mount the rod higher and choose a pelmet, cornice, or layered shade to control the top gap. The header style alone will not overcome poor placement.

Fabric, color, and lining

Dark colors often appear more opaque, but construction matters more than face color. A well-made lined cream curtain can outperform a thin black panel. Hold a sample toward a bright window if possible and inspect the seams, lining, and pinholes.

Triple-weave curtains place a dense inner layer between decorative faces. Separately lined curtains may feel heavier and drape more formally. Foam-backed options can block light effectively, but confirm care directions because some coatings should not be ironed or machine dried.

How to get a darker room

  1. Mount high and wide. Give the fabric enough overlap around the window.
  2. Use a wraparound rod. Returning the panel toward the wall closes side gaps.
  3. Close the center overlap. Arrange the panels to overlap slightly or use discreet magnetic closures designed for fabric.
  4. Add a shade. A blackout roller or cellular shade inside the frame tackles the glass while curtains cover the edges.
  5. Control the top. A valance, cornice, or higher rod helps with overhead glow.
  6. Check other light sources. Cover bright device lights and address door gaps where appropriate.

Best setup by bedroom type

Small bedroom

Choose curtains close to the wall color to keep the room visually calm. A ceiling-near rod and floor-length panels can make the wall feel taller without adding furniture.

Rental bedroom

Use properly rated no-drill brackets only when the surface and curtain weight are compatible. Tension rods work best inside a sturdy recess, but they may leave edge gaps. Keep all original hardware so the room can be restored later.

Nursery or child’s room

Prefer cord-free window coverings, secure every bracket into suitable structure or anchors, and keep beds and climbable furniture away from the window. Avoid loose tiebacks or accessible cords.

Hot, sunny bedroom

Close curtains before strong sun reaches the glass. If heat control is the priority, compare products specifically designed for thermal performance and consider a light-colored exterior-facing surface. Do not block heating or cooling vents.

Shift-worker bedroom

Layer an inside-mounted blackout shade with wide, floor-length curtains on a wraparound rod. This addresses the center, sides, top, and bottom instead of relying on fabric alone.

Common mistakes to avoid

  • Buying panels equal to the window width: the fabric pulls flat and may separate in the center.
  • Mounting directly on the trim: this often leaves bright side and top gaps.
  • Ignoring the pair count: some listings are sold as one panel, others as two.
  • Choosing length before header style: the hanging method changes where the hem lands.
  • Covering a heater or vent: keep fabric clear of heat sources and airflow.
  • Skipping care instructions: heat can damage some blackout backings.

Installation tips for a polished result

Use a level, measure both bracket positions from the ceiling or floor, and select anchors appropriate for the wall and total curtain weight. Heavy lined panels need stronger hardware than sheers. After hanging, steam or iron only as the care label permits. Train the folds by arranging the fabric evenly and loosely tying it for a day or two.

If the bedroom still feels visually busy, pair the curtains with the furniture-editing approach in How to Organize a Bedroom Without Buying More Furniture.

Frequently asked questions

Do blackout curtains make a room completely dark?

The panels may block nearly all light through the fabric, but complete darkness depends on controlling gaps around the window. Layering and wider coverage usually make the biggest difference.

Should blackout curtains touch the floor?

Floor-length panels generally look finished and reduce light below the window. Keep them safely clear of heaters, vents, damp surfaces, and anything that could soil or overheat the fabric.

Are blackout curtains always black?

No. They come in many colors. Construction and lining determine performance more than the decorative face color.

Can blackout curtains help with temperature?

Heavy, well-fitted window coverings can reduce drafts and solar heat entering the room, but results vary with the window, climate, fabric, fit, and time of day. Choose a product with specific thermal information if energy performance is your main goal.

How should blackout curtains be cleaned?

Follow the label. Some are machine washable; coated or lined panels may require gentle washing, air drying, or spot cleaning. Vacuuming with an upholstery attachment can remove surface dust between washes.

Shop blackout curtains

Compare panel quantity, individual panel dimensions, header style, lining, care instructions, and return policy before ordering. Measure the rod—not only the glass—and buy enough combined width for full coverage.

Shop Amazon USA
Shop Amazon Canada

Final answer

The best blackout curtains for a bedroom are wide enough to hang with full folds, long enough to cover the bottom edge, and mounted high and wide on a rod that brings the fabric close to the wall. For most rooms, lined or triple-weave floor-length panels at 1.5 to 2 times the rod width offer the best balance of darkness, style, and everyday ease. If you need near-total darkness, layer them with an inside-mounted blackout shade.

For more bedroom comfort ideas, see Why My Bedroom Finally Started Feeling Like a Place to Rest and our guide to choosing a bedroom humidifier.

Slim cordless vacuum stored in a bright small apartment living room
Laundry & Cleaning

Best Cordless Vacuum for a Small Apartment

Disclosure: This post contains affiliate links. If you buy through one of our links, we may earn a commission at no extra cost to you. We recommend choosing by fit, floor type, and serviceability—not by the biggest number on the box.

A cordless vacuum can be a near-perfect match for a small apartment: it is quick to grab, easy to steer around furniture, and far simpler to store than a full-size upright. The catch is that “compact” does not always mean convenient. A top-heavy body, awkward charging dock, tiny dust bin, or non-replaceable battery can turn a promising purchase into daily friction.

This guide focuses on the details that matter in a smaller home. You will learn which features earn their space, which specifications deserve skepticism, and how to choose a vacuum that fits both your floors and your routine.

Quick verdict

For most small apartments, the sweet spot is a lightweight cordless stick vacuum with a motorized floor head, a washable pre-filter, a sealed exhaust path, a removable battery, and a crevice tool. Choose a soft roller or switchable brush for mostly hard floors; choose a stronger brush roll with easy hair removal for rugs, carpet, or pets. A stable freestanding dock or wall mount matters almost as much as suction when closet space is limited.

Who this guide is for

  • Renters who need a vacuum that stores in a narrow closet or corner
  • Studio and one-bedroom residents cleaning mostly hard floors and a few rugs
  • Pet owners who need fast, frequent pickup without dragging out a large machine
  • Anyone replacing a broom-and-dustpan routine with something quicker

You may be better served by a corded canister or upright if your home is carpet-heavy, you need long uninterrupted cleaning sessions, or you do not want to manage battery charging. Cordless convenience is valuable, but it is not automatically the best fit for every floor plan.

Small-apartment cordless vacuum checklist

What to check Good target Why it matters
Weight in hand Comfortable for a full-room test Total weight can hide a tiring, top-heavy design.
Floor head Low profile with swivel steering Helps reach under beds, sofas, and tight chair legs.
Battery Removable and replaceable Extends useful life and makes a spare battery possible.
Filtration Sealed path plus washable pre-filter Reduces dusty exhaust and keeps maintenance manageable.
Dust bin Easy one-step emptying A small bin is acceptable only if it is simple to empty cleanly.
Storage Wall dock or stable floor stand Keeps the vacuum secure without sacrificing much floor area.
Attachments Crevice tool; mini motorized tool if needed Covers edges, upholstery, stairs, and pet hair without clutter.
Parts support Filters, batteries, and brush rolls sold separately A replaceable wear part can prevent replacing the whole vacuum.

Start with your floors, not the marketing

The right cleaning head is more important than a dramatic “maximum power” claim. Hard floors need good edge pickup and a brush that does not scatter crumbs. A soft roller can be excellent on wood, vinyl, and tile, while a switchable or gentle brush roll helps protect delicate surfaces. Check your flooring manufacturer’s care instructions before using any powered brush.

Low-pile rugs usually benefit from a motorized brush head. If you have thicker carpet, confirm that the head can move freely without sealing itself to the surface. Homes with long hair or pets should prioritize a brush roll that can be removed or cleared without a complicated teardown.

How much runtime do you really need?

Published runtime is usually measured under favorable conditions, often on the lowest power setting without the most demanding powered head. Real cleaning time can be shorter. Instead of shopping for the largest advertised number, estimate how long your normal cleaning loop takes.

  • Studio or compact one-bedroom: a practical cleaning session is often short enough for one battery, provided the vacuum is not used on maximum power throughout.
  • More rugs, pets, or upholstery: favor a removable battery or a model with a readily available spare.
  • Whole-home deep cleaning: consider whether a corded machine would be more dependable.

Keep the charger in a ventilated, dry area and use the manufacturer-supplied charging equipment. If a battery is damaged, unusually hot, swollen, or has been dropped hard, stop using it and follow the manufacturer’s service guidance.

Filtration: look at the whole airflow path

A fine filter is useful only when air cannot simply leak around it. Look for language describing a sealed system or sealed filtration path, then check whether replacement filters are easy to obtain. A washable pre-filter can reduce ongoing cost, but it must be completely dry before it goes back into the machine.

If someone in your household has significant allergies or asthma, do not rely on the word “HEPA” alone. Check what part of the system is actually rated, whether the body is sealed, and whether emptying a bagless bin will expose you to dust. In some homes, a sealed bagged vacuum may be the cleaner choice.

Storage is a buying criterion

Before ordering, decide exactly where the vacuum will live. Measure the height and width of that space, confirm that an outlet is nearby, and check whether drilling is permitted in your lease. A wall dock saves floor space, but a freestanding stand is easier for renters. Some vacuums fold or stand on their own, though stability varies.

Also count the attachments. A vacuum that fits neatly but leaves four loose tools in a drawer is not truly compact. The best apartment setup usually includes only the tools you use every week.

Best feature set by household

Mostly hard floors

Prioritize a soft roller or gentle multi-surface head, strong front-edge pickup, a low-profile neck, and easy steering. Maximum suction matters less than controlled pickup that does not snowplow larger crumbs.

Rugs and mixed flooring

Choose a powered brush roll with at least two practical power levels. A brush on/off control is helpful when moving from rugs to delicate hard floors.

Pets or long hair

Look for a removable or anti-wrap brush roll, a mini motorized upholstery tool, and a bin that opens without reaching into collected debris. Replacement filters should be affordable and easy to find.

Very limited storage

Favor a narrow charging solution, onboard attachment storage, and a design that converts cleanly to a handheld. Measure first: product photos can make docks look smaller than they are.

Features worth paying for

  • Replaceable battery: the strongest long-term value feature for many cordless models.
  • Serviceable brush roll: makes hair removal and routine maintenance easier.
  • LED floor lights: genuinely useful for seeing dust under furniture, though not essential.
  • Two or three useful power modes: more helpful than a long list of modes you will not use.
  • Reliable parts availability: filters and batteries should be easy to purchase from a traceable seller.

Features you can usually skip

  • An oversized bundle of specialty tools with no onboard storage
  • A screen that adds information but not better cleaning
  • Extreme maximum-power claims without realistic runtime context
  • A mop attachment if you already have a simple floor-cleaning method you like
  • Automatic modes that add cost but do not match your flooring

Before you buy: the five-minute fit test

  1. Map your flooring: hard floor, low-pile rug, carpet, and upholstery.
  2. Measure the intended storage spot and the distance to an outlet.
  3. Check the assembled weight and, if available, the handheld unit’s weight.
  4. Confirm that filters, battery, and brush roll can be purchased separately.
  5. Read the warranty terms and return policy, especially for battery coverage.

How to keep a cordless vacuum working well

Empty the bin before debris reaches the maximum line. Clear hair from the brush roll, inspect the intake for clogs, and clean filters on the schedule in the manual. Never reinstall a damp filter. Wipe charging contacts with the vacuum unplugged and store the battery away from excessive heat.

A quick maintenance rhythm fits naturally into a small-home reset: empty the bin after use, inspect the brush once a week, and check the filter monthly. Pair it with our 10-minute evening reset to keep cleaning from becoming a weekend project.

Frequently asked questions

Can a cordless vacuum replace a full-size vacuum?

Yes, in many small homes with mostly hard floors and low-pile rugs. Carpet-heavy homes, large shedding pets, or long deep-cleaning sessions may still benefit from a corded machine.

Is a bigger dust bin always better?

No. A slightly smaller bin that empties cleanly and keeps the vacuum balanced can be a better apartment choice. Ease of emptying matters more than capacity alone.

Should I mount the charger to the wall?

Only if your lease permits it and the location is convenient. A freestanding dock or stand can offer nearly the same convenience without drilling.

Do I need a HEPA filter?

Fine filtration can help, but the complete system matters. Check for a sealed airflow path, correctly fitted filters, and a dust-emptying process you can tolerate.

How often should the filter be washed?

Follow the manufacturer’s instructions because filter materials differ. Overwashing, using soap when it is not recommended, or reinstalling a damp filter can damage performance.

Shop cordless vacuums

Use the checklist above while comparing current models, then verify dimensions, included tools, battery availability, and warranty details on the product page.

Shop Amazon USA
Shop Amazon Canada

Final answer

The best cordless vacuum for a small apartment is not necessarily the most powerful or expensive. It is the one that matches your floors, feels comfortable in your hand, stores without becoming an obstacle, and has replaceable wear parts. For most people, a lightweight multi-surface model with a sealed filtration path, removable battery, crevice tool, and tidy dock is the most dependable starting point.

If you want to automate more of the floor cleaning, compare the tradeoffs in our robot vacuum guide for small apartments. For a broader low-effort routine, see the small-kitchen habits that keep counters looking clean.

Unbranded heated blanket lying flat on a neatly made bed with a controller on the nightstand
Bedroom & Comfort

Best Heated Blanket: What to Look For

Disclosure: This article contains affiliate links. If you buy through them, My Indoor Space may earn a commission at no extra cost to you.

Unbranded heated blanket lying flat on a neatly made bed with a controller on the nightstand

A heated blanket can provide comfortable, targeted warmth without making the entire room hotter. The best one is not simply the softest or the hottest. It should fit the way you intend to use it, carry recognized electrical certification for your market, include sensible temperature controls and remain easy to inspect, clean and store safely.

Quick Verdict

Best choice for most people: a machine-washable heated throw with several heat levels, automatic shutoff, overheat protection, a detachable controller and a clear warranty.

Best for couples: a full-size heated blanket with separate left and right controls so each sleeper can choose a different setting.

Best value: a simple single-controller throw from a reputable seller with recognized certification and replacement support. Extra app features matter less than dependable controls and safe construction.

Who a Heated Blanket Is Best For

  • Adults who want focused warmth while reading or relaxing.
  • Couples who prefer different temperatures on each side of the bed.
  • People who want to pre-warm a bed while they are awake.
  • Anyone prepared to inspect the blanket and follow its care instructions.

Who May Want to Skip It

  • Infants and anyone unable to recognize excessive heat or operate the controls safely.
  • Homes where pets may chew cords, scratch the fabric or lie on top while it is operating.
  • People who routinely bunch, fold or tuck blankets tightly around themselves.
  • Anyone planning to use a secondhand model with an unknown history or missing instructions.
  • People whose clinician has advised against direct heat because of reduced sensation, circulation or another medical concern.

Heated Throw, Blanket or Mattress Pad?

Product typeBest forMain trade-off
Heated throwSofa, chair and personal useToo small for full-bed coverage
Heated blanketWarmth over the body or pre-warming a bedMust remain flat and be used exactly as directed
Heated mattress padWarmth from beneath on a compatible mattressDifferent construction and placement rules
Dual-zone blanketCouples with different preferencesTwo controllers and more cords
Wearable heated wrapSeated use around shoulders or legsNot intended as bedding

These products are not interchangeable. A heated blanket designed to lie over you should not be placed beneath you unless its instructions explicitly allow that use. A heated mattress pad is designed for the opposite position. Follow the label rather than assuming that any electrically heated fabric works anywhere.

Nine Features That Matter Most

1. Recognized Electrical Certification

Choose a product intended for the country where it will be used and look for a certification mark recognized in that market. Buy from a seller that clearly identifies the manufacturer, model and warranty. A vague marketplace listing with no support information is not worth the risk.

2. Automatic Shutoff

A timer reduces the chance of the blanket staying on indefinitely, but it does not make unsafe use safe. Compare the shutoff duration and confirm whether it can be adjusted. Follow the manufacturer’s supervision and sleep instructions even when an automatic timer is included.

3. Overheat Protection

Look for a design that monitors abnormal heat and shuts the unit down when a fault is detected. Overheat protection is important, but the blanket still needs to remain flat, uncovered and undamaged while operating.

4. Useful Heat Levels

Several well-spaced settings are more useful than a long list of nearly identical steps. A low setting matters because gentle warmth is usually more comfortable over time than maximum heat. Fast preheat can be convenient when used while you are awake and following the instructions.

5. Easy-to-Use Controls

The controller should be readable in low light without glowing brightly all night. Raised buttons are easier to identify by touch than a smooth panel. Check whether the control remembers the last setting or always starts from a safe default.

6. Dual Controls for Larger Beds

For couples, independent zones prevent one person from controlling the entire blanket. Confirm that each side has its own connector and that the cords can reach suitable outlets without crossing a walkway or being pinched by the bed frame.

7. Correct Size and Coverage

A throw is ideal for one person on a sofa but may leave large gaps on a bed. A full-size blanket should cover the intended area without needing to be stretched, tucked tightly or folded. Compare actual dimensions instead of relying only on labels such as full, queen or king.

8. Detachable Cords and Clear Wash Instructions

Many modern blankets can be washed after the controllers and cords are removed, but the exact method varies. Read the care label before buying. If the cleaning process sounds too complicated for your routine, choose a simpler material or a removable cover designed for the product.

9. Warranty, Registration and Recall Support

Keep the receipt and model number, register the product when registration is offered and check official recall databases. The ability to identify your exact model is more important with an electrical bedding product than with an ordinary throw.

Material: Softness Without Trapping Too Much Heat

Plush fleece and sherpa feel warm before the heat is turned on, but thicker fabric may feel bulky. Microfleece is lighter and easier to fold loosely for storage. The wiring should not create hard ridges, although some texture may still be noticeable.

Do not judge only by softness in a product photo. Check the total weight, wash instructions and whether the controller connection sits where it will avoid pressure from your body or furniture.

Essential Safety Checklist

  1. Read the complete manual before the first use.
  2. Inspect the fabric, connector, controller, plug and cord for wear or damage.
  3. Lay the blanket flat—never operate it folded, bunched or tightly tucked.
  4. Do not place pillows, heavy bedding, pets or other objects on top while it is operating.
  5. Keep cords where they cannot be pinched by a bed frame, recliner or furniture.
  6. Never use the blanket when it is wet or damp.
  7. Do not combine it with a heating pad, hot-water bottle or another heated product.
  8. Plug it in and operate it only as directed by the manufacturer.
  9. Turn it off and unplug it when the instructions require or when it is not in use.
  10. Stop using it immediately if you notice hot spots, discoloration, an unusual smell or inconsistent heating.

The Electrical Safety Foundation International advises against folding an electric blanket while it is operating, placing anything on top of it or using damaged bedding. Its general guidance also says heated blankets should not be left unattended or used while sleeping. Follow the most cautious applicable guidance along with the instructions supplied with your exact model.

Can You Sleep With a Heated Blanket On?

The safest general approach is to use it for targeted warmth or to pre-warm the bed while you are awake, then turn it off before sleeping. Safety organizations caution against unattended or sleeping use. An automatic shutoff is a backup feature, not permission to ignore the manual.

If you need overnight warmth, improve the room and bedding first or discuss suitable options with a qualified professional when health or mobility is involved. A regular breathable blanket may be the better overnight solution.

Washing and Storage

  • Disconnect every removable controller and cord before cleaning.
  • Use only the wash and dry method printed on the care label.
  • Never plug the blanket in until it is completely dry.
  • Inspect the connector and fabric again after washing.
  • Store it loosely rolled or folded according to the manual.
  • Do not place heavy boxes on top during summer storage.

Keeping the bedroom uncluttered makes safe cord routing and storage easier. See Why My Bedroom Finally Started Feeling Like a Place to Rest for simple ways to make the room calmer without adding more furniture.

Best Value vs. Upgrade Worth Buying

Best value: a certified heated throw with automatic shutoff, overheat protection, a detachable controller and straightforward care instructions.

Upgrade worth buying: independent dual controls for a shared bed, a longer warranty and a controller that is easy to use in low light.

Upgrade most people can skip: app control. It adds complexity without replacing inspection, safe placement or direct access to the controller.

Frequently Asked Questions

Is a heated throw the same as a heated blanket?

The technology is similar, but throws are smaller and intended mainly for one person while seated or relaxing. Full heated blankets are sized for beds and may include dual controls.

Can a heated blanket go under another blanket?

Do not add layers above it unless the manufacturer specifically says that arrangement is safe. Trapped heat can create overheating. Use the product exactly in the position and layering arrangement shown in its manual.

Can pets lie on a heated blanket?

Pets can trap heat, damage wiring with claws or teeth and prevent you from noticing a problem. Keep pets off while the blanket is operating and choose a product made specifically for animals if a veterinarian recommends one.

Should you buy a used heated blanket?

Avoid one with an unknown age, missing controller, damaged label or uncertain storage history. New electrical bedding from a reputable seller provides a clearer model number, warranty, recall trail and current instructions.

Availability, prices and specifications change. Confirm certification, intended use, automatic shutoff, wash instructions, warranty and recall status before purchasing.

Final Answer

For most people, the winner is a simple heated throw or correctly sized blanket with recognized certification, automatic shutoff, overheat protection, several useful heat settings and a detachable controller. Choose dual controls for a shared bed, but never trade basic safety and easy inspection for unnecessary smart features.

Sources and Further Reading

Unbranded cool-mist humidifier on a wooden nightstand in a calm bedroom
Bedroom & Comfort, Laundry & Cleaning

Best Bedroom Humidifier: What to Look For

Disclosure: This article contains affiliate links. If you buy through them, My Indoor Space may earn a commission at no extra cost to you.

Unbranded cool-mist humidifier on a wooden nightstand in a calm bedroom

A bedroom humidifier can make dry indoor air feel more comfortable, but only when the machine is correctly sized, easy to clean and used without pushing humidity too high. The best model is not the one that produces the biggest cloud of mist. It is the one you can maintain consistently and control accurately through the night.

Quick Verdict

Best choice for most bedrooms: a quiet cool-mist humidifier with a built-in humidistat, automatic shutoff, adjustable output and a tank that opens widely for cleaning.

Best value: a simple evaporative or ultrasonic model paired with a separate digital hygrometer so you can see the room’s actual relative humidity.

Upgrade worth considering: top-fill construction, dishwasher-safe parts where permitted, a reliable humidistat and an easy-to-read display that can be dimmed completely at night.

Who a Bedroom Humidifier Is Best For

  • Homes where heated winter air regularly feels uncomfortably dry.
  • People who want controlled moisture rather than simply running mist continuously.
  • Bedrooms where a hygrometer confirms that relative humidity is low.
  • Anyone willing to empty, refill and clean the tank on schedule.

Who May Want to Skip It

  • Rooms that already stay humid or show condensation on windows.
  • Anyone unlikely to clean a water tank and wetted parts regularly.
  • Bedrooms with an unresolved leak, damp carpet or visible mold.
  • People expecting a humidifier to diagnose or treat a health condition.

Start With a Hygrometer

Before buying a humidifier, measure the bedroom’s relative humidity with a small digital hygrometer. General indoor-air guidance often places comfortable home humidity around 30% to 50%, but the practical target can vary with outdoor temperature, insulation and condensation. If windows become wet or the room smells damp, reduce the setting or stop the machine.

A humidifier without a humidity reading can easily run longer than needed. A separate hygrometer is inexpensive, can be placed away from the mist stream and lets you check whether the built-in sensor is behaving realistically.

Choose the Right Humidifier Type

TypeBest forMain trade-off
Ultrasonic cool mistQuiet bedrooms and low power useMay leave mineral dust when used with hard water
EvaporativeNatural output that slows as humidity risesFan noise and replacement wick costs
Warm mistPeople who prefer a warm visible mistHot water and steam create a burn risk
Dual mistHouseholds wanting warm and cool optionsHigher price and more parts to clean
Whole-room consoleLarge rooms or connected spacesBulky for a normal bedroom

Eight Features That Matter Most

1. Room-Size Rating

Measure the bedroom floor area before shopping. Multiply length by width to get square footage. Treat advertised coverage as a starting point rather than a guarantee because ceiling height, ventilation, door position and outdoor dryness all affect performance. An oversized unit can raise humidity too quickly, while an undersized one may run constantly.

2. A Real Humidistat

A humidistat lets you choose a target and allows the machine to cycle instead of producing mist without feedback. The sensor should not sit directly in the mist path. Compare it with a separate hygrometer during the first few nights and adjust the target if the readings differ.

3. Easy Tank Access

A wide top opening makes daily emptying, wiping and refilling much easier. Check whether your hand can reach the interior surfaces and whether the tank stands securely in a sink. Narrow decorative tanks may look elegant but can be frustrating to clean thoroughly.

4. Low-Water Automatic Shutoff

The unit should stop when the tank is empty. This is especially important overnight, when you may not notice that the water has run out. A clear indicator is useful, but it should dim or turn off in sleep mode.

5. Quiet Operation

Ultrasonic models are usually quiet, although some produce faint bubbling or electronic sounds. Evaporative models contain a fan and may be more noticeable. Look beyond a single decibel claim: fan speed, water movement and button beeps can matter just as much in a quiet bedroom.

6. Adjustable Output and Mist Direction

Variable output helps you match the machine to changing weather. A rotating nozzle lets you direct mist into open air instead of toward bedding, walls or electronics. The goal is even room humidity, not a damp zone around the machine.

7. Manageable Filter and Part Costs

Evaporative humidifiers need replacement wicks, and some ultrasonic models use demineralization cartridges. Check availability and cost before buying. A low-priced machine can become expensive if it requires a proprietary part every few months.

8. Controls That Disappear at Night

Sleep mode should reduce fan speed, dim the display and silence unnecessary alerts. Physical buttons are often easier to use in the dark than a touchscreen. App control can be convenient, but it is not a substitute for simple controls on the machine.

How Large Should the Tank Be?

A bigger tank does not automatically mean better performance. It mainly means fewer refills. For a normal bedroom, choose enough capacity to cover your usual sleep period at the setting you actually need. Published runtime is commonly measured on the lowest output, so maximum-output runtime may be much shorter.

Also consider lifting weight. One litre of water weighs about one kilogram before the tank itself is added. A huge tank can be awkward to carry, turn over and fit beneath a faucet.

Ultrasonic Humidifiers and White Dust

Ultrasonic humidifiers can disperse minerals found in tap water, leaving pale dust on nearby furniture. The amount depends on the water and machine. Distilled or demineralized water may reduce it, and some models accept a demineralization cartridge. Follow the manufacturer’s water instructions rather than adding treatments or fragrances that are not approved for the tank.

Where to Place a Humidifier in a Bedroom

  1. Use a stable, level and water-resistant surface.
  2. Keep it away from the edge where it could be knocked over.
  3. Leave clearance from walls, curtains, books and electronics.
  4. Point the mist into open room air rather than at the bed.
  5. Protect wood furniture according to the manufacturer’s placement instructions.
  6. Keep the cord away from walkways and never route it beneath a rug.
  7. Follow the manual’s minimum clearance and height guidance.

If the bedroom feels crowded, first simplify the surface around the unit. The ideas in How to Organize a Bedroom Without Buying More Furniture can help you create a safer dedicated spot.

Cleaning Is Not Optional

Standing water and residue can allow microorganisms to grow. Empty leftover water, wipe accessible surfaces dry and refill with fresh water regularly. Clean and descale on the schedule and with the method specified in the manual. Unplug the base before filling or cleaning, and never submerge electrical parts.

The U.S. Consumer Product Safety Commission advises regular cleaning and warns against over-humidifying; moisture on windows or walls is a clear sign to reduce output. Its indoor-air guidance also recommends fresh water and frequent cleaning for cool-mist and ultrasonic units.

Best Value vs. Upgrade Worth Buying

Best value: a correctly sized cool-mist unit with adjustable output, low-water shutoff, a wide tank opening and a separate hygrometer. Easy maintenance is more valuable than a long list of modes.

Upgrade worth buying: a dependable built-in humidistat, top-fill tank, fully dimmable display and parts that are genuinely easy to remove and clean.

Upgrade most people can skip: voice control and elaborate mood lighting. Neither improves moisture control, tank hygiene or bedroom comfort.

Frequently Asked Questions

Should a humidifier run all night?

Only if the room needs it and humidity remains controlled. Use a humidistat or hygrometer, choose a moderate setting and stop if condensation appears. Continuous mist without measurement can make the room too damp.

Is cool mist or warm mist better for a bedroom?

Cool mist is the practical choice for most bedrooms because it avoids a hot-water and steam hazard. Warm mist may appeal to some adults, but it requires extra care and is a poor choice where children or pets could reach it.

Can a humidifier replace an air purifier?

No. A humidifier adds moisture; an air purifier filters airborne particles. They perform different jobs. If you use both, give each appliance open space and follow the placement guidance in Best Places to Put an Air Purifier.

Can essential oils go in the water tank?

Only when the manufacturer explicitly allows it and provides a dedicated tray or compartment. Oils can damage ordinary humidifier plastics, seals and ultrasonic components. Never assume an aroma diffuser and a humidifier are interchangeable.

Availability, prices and specifications change. Confirm the room-size rating, safety features, cleaning instructions, electrical certification and warranty on the retailer’s page before purchasing.

Final Answer

For most bedrooms, choose a quiet cool-mist humidifier sized for the room, with a built-in humidistat, low-water shutoff, adjustable output and a tank you can easily reach and clean. Pair it with a separate hygrometer, keep the room below the point where condensation appears and treat daily water care as part of owning the machine.

Sources and Further Reading

Unbranded stainless steel electric kettle on a bright apartment kitchen counter
Kitchen & Dining

Best Electric Kettle: 7 Features to Look For

Disclosure: This article contains affiliate links. If you buy through them, My Indoor Space may earn a commission at no extra cost to you.

Unbranded stainless steel electric kettle on a bright apartment kitchen counter

The best electric kettle is not automatically the most expensive one. For most kitchens, a dependable kettle with automatic shutoff, boil-dry protection, a comfortable handle and an easy-to-clean interior delivers better everyday value than a complicated model filled with settings you may never use.

Quick Verdict

Best choice for most homes: a 1.5- to 1.7-litre cordless kettle with a wide lid, clear water-level markings, automatic shutoff and boil-dry protection.

Best upgrade: a variable-temperature kettle if you regularly prepare green tea, delicate tea, French-press coffee or pour-over coffee.

Best for a small kitchen: a compact 1-litre model with a small base and cord storage. It heats only the water you need and gives more counter space back.

Who an Electric Kettle Is Best For

  • Tea and instant-coffee drinkers who heat water several times a day.
  • Anyone who wants hot water without using a saucepan or microwave.
  • Small households that value speed and a compact countertop footprint.
  • People who prepare oatmeal, soup cups, hot chocolate or pour-over coffee.

Who May Want to Skip It

  • Homes that already have an instant hot-water dispenser.
  • Anyone who rarely heats water outside normal cooking.
  • Very small kitchens where even a compact appliance would remain unused.
  • People who need a travel appliance; a full-size household kettle may not suit different voltages or hotel rules.

Choose the Right Type

Kettle typeBest forMain trade-off
Basic boil-onlyEveryday tea, instant coffee and simple valueNo temperature control
Variable temperatureDifferent teas and specialty coffeeHigher price and more controls
GooseneckControlled pour-over coffeeUsually slower to pour for general kitchen use
Compact 1-litreOne or two people and small countersMore refills for guests
Large 1.7-litreFamilies, entertaining and batch useLarger footprint and heavier when full
Double-wallHeat retention and a less-hot outer surfaceHeavier and harder to see the water level

Seven Features Worth Paying For

1. Automatic Shutoff and Boil-Dry Protection

These are the first features to check. Automatic shutoff turns the kettle off after the water boils. Boil-dry protection stops heating when there is too little water. Neither replaces careful use, but both are more important than decorative lights or app controls.

2. The Right Capacity

A 1-litre kettle is usually enough for one or two people and roughly three or four generous mugs. A 1.5- to 1.7-litre kettle makes more sense for a family, a home office with frequent refills or anyone who serves guests. Buying a kettle much larger than you need takes more space and encourages overfilling.

3. A Comfortable Handle and Controlled Pour

A good handle should feel balanced when the kettle is full and keep your hand comfortably away from the body and lid. The spout should pour in a clean stream without dribbling. If grip strength is a concern, compare the empty weight as well as the capacity.

4. An Easy-to-Clean Interior

Look for a lid that opens wide enough for cleaning and a concealed heating element that leaves a smoother base inside. A removable scale filter at the spout is also useful, especially in areas with hard water. Complicated seams and narrow openings make mineral buildup harder to remove.

5. Useful Water-Level Markings

Clear markings help you boil only what you need. Check whether the scale is visible from the side you naturally use. Some handsome kettles hide the window behind the handle, which can make filling less convenient.

6. A Stable Cordless Base

A 360-degree base lets you return the kettle from either direction, which is helpful for left- and right-handed users. A broad, non-slip base and cord storage keep the appliance steadier and the counter neater. Measure the full base, not just the kettle body, before buying for a narrow counter.

7. Recognized Electrical Certification and a Clear Warranty

Choose a model intended for your country and look for recognized electrical certification for your market. Check the warranty length, return policy and whether the company provides replacement filters or other small parts. A bargain is less appealing if support disappears when the lid or base develops a problem.

Is Variable Temperature Worth It?

Variable temperature is worthwhile when the drink changes with the day. Delicate teas can taste harsh when the water is too hot, while black tea and many instant foods benefit from hotter water. Coffee drinkers may also prefer control below a full rolling boil.

If you simply want boiling water for ordinary tea, instant coffee or cooking, one-button operation is faster to understand, easier to live with and usually less expensive. Temperature presets are a genuine upgrade only when you will use them.

Stainless Steel, Glass or Plastic?

Stainless steel is durable, hides mineral marks and suits most kitchens. Single-wall metal can become very hot, so keep hands on the handle.

Glass makes the water level easy to see and can look attractive on the counter. It also shows scale quickly and is heavier and more breakable.

Plastic keeps weight and price down. Look for a well-made model from a reputable seller and check which surfaces contact the water if material choice matters to you.

What About Speed and Wattage?

Higher-wattage kettles generally heat water faster, but the result also depends on household voltage, water quantity and starting temperature. In a North American kitchen, a good full-size kettle is often designed to use much of the power available from a standard outlet. Avoid sharing an overloaded circuit with other high-draw countertop appliances.

Small-Kitchen Buying Checklist

  1. Measure the counter area, including the base and handle.
  2. Check the height beneath upper cabinets with the lid fully open.
  3. Decide whether one litre is enough for normal use.
  4. Choose a cord length that reaches without crossing a sink or walkway.
  5. Make sure steam will not vent directly onto a cabinet or wall.
  6. Pick a finish you will be comfortable leaving visible every day.

If your counters already feel crowded, combine the kettle with the simple habits in The Small Kitchen Habits That Keep Counters Looking Clean. A defined appliance zone can also make a kitchen feel more intentional without a renovation.

Best Value vs. Upgrade Worth Buying

Best value: a straightforward cordless kettle with automatic shutoff, boil-dry protection, a wide lid and a removable scale filter. This covers the needs of most households without adding controls that complicate a basic job.

Upgrade worth buying: a variable-temperature model with a simple display and keep-warm function if you prepare several types of tea or coffee throughout the day.

Upgrade most people can skip: app control. Heating water is quick, and the kettle still needs to be filled before use. Reliable physical controls usually matter more.

Use It Safely

  • Place the base on a dry, level surface away from the sink and counter edge.
  • Do not fill above the maximum line.
  • Keep the spout pointed away from cabinets, people and pets.
  • Never immerse the kettle, base, plug or cord in water.
  • Descale according to the manufacturer’s instructions.
  • Stop using the kettle if the cord, plug, lid or base is damaged.
  • Follow the manual for outlet, cleaning and extension-cord guidance.

Frequently Asked Questions

Is a 1-litre kettle big enough?

For one or two people, usually yes. It saves counter space and is lighter to lift. A larger kettle is more convenient when several people want hot drinks at the same time.

Does a keep-warm function use a lot of electricity?

It uses additional energy because the kettle reheats or maintains temperature. The exact amount varies by model and duration. If you rarely return for a second drink, boil fresh water instead.

How often should an electric kettle be descaled?

There is no single schedule for every home. Hard water and frequent use create scale faster. Inspect the interior regularly and follow the cleaning interval and method in the manual.

Is a gooseneck kettle better?

It is better for slow, controlled pouring over coffee grounds. For filling a teapot, soup cup or saucepan, a conventional spout is often quicker and more practical.

Availability, prices and specifications change. Confirm the current capacity, safety features, electrical certification and warranty on the retailer’s page before purchasing.

Final Answer

For most kitchens, the winner is a simple 1.5- to 1.7-litre cordless kettle with automatic shutoff, boil-dry protection, a comfortable handle and a wide opening for cleaning. Choose a compact 1-litre version if counter space matters more than serving a crowd. Pay extra for variable temperature only when different teas or specialty coffee are part of your normal routine.

Unbranded robot vacuum moving from wood flooring onto a low-pile rug in a small apartment
Laundry & Cleaning, Smart Home

Robot Vacuum for a Small Apartment: What Actually Matters Before You Buy

Disclosure: This article contains affiliate links. If you buy through them, My Indoor Space may earn a commission at no extra cost to you.

Unbranded robot vacuum moving from wood flooring onto a low-pile rug in a small apartment

A robot vacuum can be especially useful in a small apartment because dust, crumbs and pet hair become noticeable quickly. The right model keeps open floors under control without taking up much storage space. The wrong one gets trapped, misses edges or creates more work than it saves.

Quick Verdict

For most apartments, navigation quality, compact size, replacement-part cost and reliable everyday pickup matter more than the longest feature list. Buy for your actual flooring and furniture—not the largest advertised coverage area.

Who a Robot Vacuum Is Best For

  • People who want light daily maintenance between deeper cleanings.
  • Homes where crumbs, dust or pet hair appear quickly.
  • Open layouts with clear paths beneath tables and chairs.
  • Anyone who finds frequent manual vacuuming tiring or easy to postpone.

Who May Want to Skip It

  • Rooms with many loose cords, tassels, small toys or lightweight objects on the floor.
  • Very thick rugs or tall transitions the vacuum cannot cross.
  • Furniture with clearance just low enough to trap the machine.
  • Anyone expecting a robot to replace occasional edge, stair and upholstery cleaning.

Seven Features That Actually Matter

1. Reliable Navigation

Basic bump-and-turn robots can work in a simple room, but mapping models usually clean more methodically. In an apartment filled with chair legs and narrow passages, dependable navigation prevents repeated collisions and wasted time.

2. Height and Furniture Clearance

Measure the lowest sofa, bed frame and cabinet the robot may enter. A small difference in height determines whether it cleans underneath or repeatedly wedges itself in place.

3. Performance on Your Floors

Hard-floor homes need good edge cleaning and a brush system that collects fine dust without scattering crumbs. Mixed-floor homes need smooth transitions and enough pickup for low-pile rugs. Thick carpet demands more power and may reduce battery life.

4. Pet-Hair Handling

If pets live in the home, check how easily hair can be removed from the main roller and side brush. A brush that takes thirty seconds to clean is far better than one that requires tools and patience every few days.

5. Noise

In a compact apartment, the vacuum is rarely far away. Look for adjustable power levels and schedule it when the sound will not interrupt sleep, calls or television.

6. Bin and Dock Size

A self-emptying dock is convenient, but it costs more and occupies valuable floor space. A small manually emptied dock may be the better fit when storage and open wall space are limited.

7. Replacement Parts

Before buying, check the price and availability of filters, rollers, side brushes and bags. An inexpensive vacuum becomes poor value when basic maintenance parts are hard to find.

Robot Vacuum and Mop Combos

A combination model can wipe light dust from sealed hard floors, but it is not the same as scrubbing. Look for controllable water flow, washable pads and no-mop zones if rugs share the room. Never use cleaning liquids unless the manufacturer specifically allows them.

Prepare the Apartment First

  1. Lift charging cables and blind cords off the floor.
  2. Remove socks, pet toys and small objects.
  3. Tuck rug tassels underneath or create a no-go zone.
  4. Leave enough open space around the charging dock.
  5. Run the first cleaning while you are home so you can identify trouble spots.

Best Value vs. Worthwhile Upgrade

Best value: a dependable vacuum-only model with systematic navigation, app scheduling and easy-to-buy replacement parts.

Upgrade worth considering: object avoidance, room-specific maps or a self-emptying dock when pets, frequent debris or physical limitations make daily bin emptying inconvenient.

Availability and prices change. Confirm current product details, electrical certification and warranty information on the retailer’s page before purchasing.

Final Answer

Choose the smallest dependable model that navigates your layout well, handles your flooring and has affordable replacement parts. In a small apartment, reliable daily cleaning beats oversized docks and features you will rarely use. Pair it with a simple 10-minute evening reset to keep the whole space easier to manage.

Smart plugs controlling a lamp and small fan in a comfortable living room
Smart Home

Smart Plugs for Beginners: 9 Useful Ways to Automate Your Home

Disclosure: This article contains affiliate links. If you buy through them, My Indoor Space may earn a commission at no extra cost to you.

Smart plugs controlling a lamp and small fan in a comfortable living room

A smart plug is one of the easiest ways to automate an ordinary home device. Plug it into the wall, connect a compatible lamp or appliance, and use schedules, an app or voice control—without replacing the device itself.

Quick Verdict

Smart plugs are best for simple devices that return to their previous state when power is restored, such as many lamps and small fans with physical switches. They are not a safe shortcut for every appliance, especially high-wattage heating equipment.

Nine Useful Smart-Plug Ideas

  1. Turn on an entryway lamp before sunset.
  2. Create a simple bedtime lighting routine.
  3. Control a compatible small fan.
  4. Schedule indoor or outdoor holiday lights with the correct plug type.
  5. Add varied “away” lighting.
  6. Shut off suitable low-power entertainment accessories.
  7. Put a charging station on a schedule. See our charging-station guide.
  8. Track energy use with a monitoring model.
  9. Make hard-to-reach switches easier to control.

Safety Rules That Matter

  • Check the plug’s voltage, amperage and maximum-wattage rating.
  • Do not use one with a space heater, hot plate or other high-wattage heating device unless both manufacturers explicitly approve it.
  • Never daisy-chain smart plugs, extension cords or power bars.
  • Use indoor models indoors and weather-rated models outdoors.
  • Keep plugs dry, visible and accessible.
  • Stop using any plug that feels unusually hot, smells burnt or shows damage.

What to Look for

  • Compatibility: confirm the app works with your phone and preferred voice assistant.
  • Wi-Fi: many plugs use 2.4 GHz networks; check before buying.
  • Physical design: choose a compact plug that does not block the second outlet.
  • Schedules: look for reliable timers.
  • Energy monitoring: useful when you want real consumption data.
  • Certification: choose recognized electrical safety certification for your country.

Bottom Line

Start with one lamp or fan you already use every day. A small, reliable automation is more valuable than filling the house with gadgets you rarely need.

Scroll to Top