
meal prep

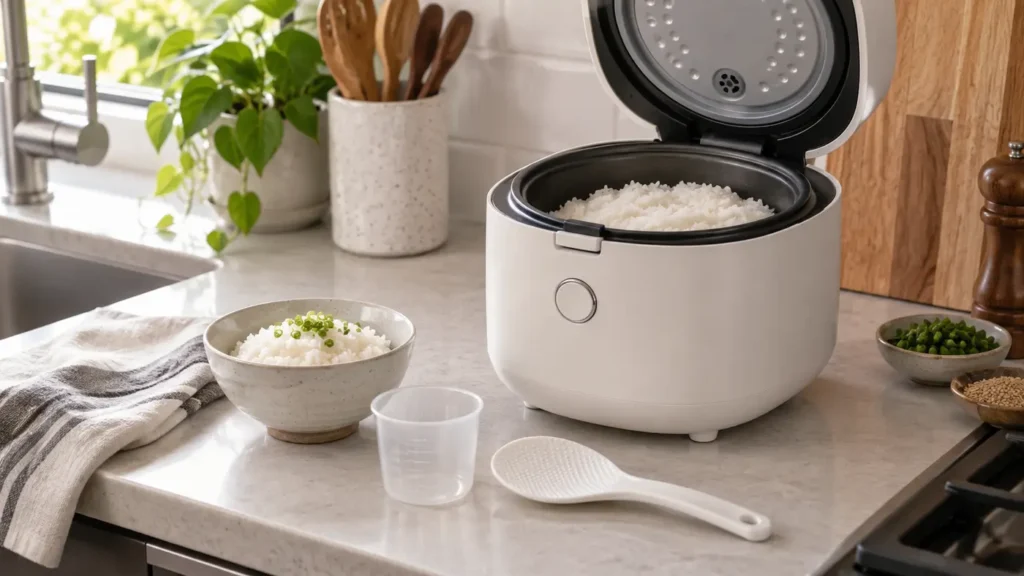
Compact rice cooker open with cooked rice on a modern kitchen counter
Kitchen & Dining

Best Rice Cooker for a Small Kitchen: Size and Features Guide

Disclosure: This post contains affiliate links. If you buy through one of our links, we may earn a commission at no extra cost to you. Follow the appliance instructions for measuring, steam release, food holding, cleaning and electrical safety.

A rice cooker can turn a basic side dish into a dependable part of meal preparation. Add measured rice and water, start the cycle and let the appliance switch to warm when cooking is complete. The challenge is choosing a cooker that matches your household without occupying more counter space than it earns.

Capacity labels can be confusing, fuzzy logic is not essential for everyone, and a long menu of programs can hide awkward cleaning. This guide focuses on practical size, bowl quality, controls and keep-warm performance.

Quick verdict

For one or two people, a compact three-cup cooker is usually enough; larger households and batch cooks often suit a five- or six-cup model. Choose a removable inner lid or easy-to-clean lid area, a clearly marked bowl and controls you will use. A simple one-touch cooker is excellent value for white rice, while fuzzy-logic models better suit several rice types and people who want more automatic adjustment.

Rice cooker types

Type Best for Advantages Tradeoffs
Basic switch cooker White rice and simple meals Affordable, quick to learn, few controls Less adjustment for different grains
Fuzzy-logic cooker Several rice varieties Adjusts time and temperature during the cycle Higher cost and longer programs
Pressure or induction cooker Enthusiasts seeking texture control Advanced heating and specialized programs Expensive, heavier and more complex
Multi-cooker Homes replacing several appliances Rice plus pressure, slow-cook or steam functions Larger footprint and more complicated interface

Understand the cup measurement

Many rice cookers include a small measuring cup that is not the same as a standard North American cup. Capacity is commonly stated in uncooked rice using the supplied cup. The cooked amount becomes much larger.

Use the included cup and the bowl’s matching water lines unless the recipe or manual says otherwise. Replacing it with a standard kitchen cup while following the same markings can produce poor results. Keep the supplied cup with the cooker or note its volume before it disappears into a drawer.

Choose capacity from real meals

A small cooker is easier to store and may handle small portions better. An oversized cooker can perform poorly below its minimum quantity and wastes counter space. Think about the largest normal batch, not a once-a-year gathering.

  • One or two people: a compact three-cup uncooked capacity is a practical starting point.
  • Three or four people: five to six cups offers room for leftovers.
  • Batch cooking: choose enough capacity for several meals, but confirm storage and minimum batch size.

Marketing varies, so compare the stated uncooked and cooked capacities as well as the physical dimensions.

Inner bowl materials and coatings

Most household rice cookers use an aluminum-based bowl with a nonstick coating. These release rice easily but should be used with the supplied plastic or silicone paddle. Replace a bowl when its coating is deeply scratched, peeling or damaged.

Stainless-steel bowls avoid a nonstick coating but can require more careful water ratios and cleanup. Ceramic-coated bowls may feel substantial, though they can still chip or wear. Check whether replacement bowls are sold before choosing an expensive model.

Keep-warm quality matters

Automatic keep-warm is convenient, but it is not a license to leave rice indefinitely. Good models hold an even temperature without drying the top or browning the bottom too quickly. The safe and recommended holding time depends on the appliance and food-safety guidance.

If you usually serve rice immediately, a basic warmer is enough. If family members eat at different times, look for an elapsed-time display, an easy reheat function and owner feedback about texture after several hours.

Programs you may actually use

  • White rice: the everyday standard.
  • Brown rice: uses a longer hydration and cooking cycle.
  • Quick cook: useful when texture can be slightly less refined.
  • Porridge: designed for higher water ratios and longer cooking.
  • Steam: can cook vegetables or proteins in a basket, subject to the manual.
  • Reheat: restores warm rice more gently than starting a full cycle.

Cake, yogurt and specialty programs add value only when you plan to use them. A clear interface with four useful modes beats a confusing panel with fifteen.

Lid design and cleaning

Steam carries starch into the lid and vent. A removable inner lid and detachable steam cap make thorough cleaning easier. Fixed lids can still work well if the accessible surfaces are smooth and the condensation collector is simple to empty.

Wash the bowl and accessories as directed, wipe the heating plate after it cools and keep the temperature sensor free of rice grains. The outside of the bowl should be dry before it returns to the cooker. Never immerse the main body.

Counter space and cord storage

Measure the cooker with the lid fully open. Steam needs clearance from upper cabinets, and the lid should not hit a shelf. A retractable or detachable cord can make storage easier, while a carrying handle is useful if the cooker moves between a cupboard and counter.

Place the cooker on a stable, heat-resistant surface away from a wall that could be damaged by repeated steam. Do not operate it beneath a closed shelf without the clearance required by the manual.

Common buying mistakes

  • Confusing the supplied rice cup with a standard measuring cup
  • Buying capacity for rare events instead of normal meals
  • Ignoring the minimum batch size
  • Choosing many programs with a difficult interface
  • Using metal utensils in a coated bowl
  • Forgetting to clean the inner lid, vent and condensation collector
  • Assuming keep-warm means unlimited safe storage

Getting better rice

  1. Measure with the supplied cup.
  2. Rinse only as appropriate for the rice type and package directions.
  3. Use the matching bowl line or recommended water ratio.
  4. Level the rice before cooking.
  5. Keep the outside of the bowl clean and dry.
  6. After the cycle, rest the rice as directed, then fluff with the proper paddle.

Freshness, rice variety, altitude and water hardness can change the ideal ratio. Make small adjustments and record what works instead of changing several variables at once.

Frequently asked questions

Is a three-cup rice cooker enough for two people?

Usually, yes. Confirm whether the rating refers to uncooked rice and compare it with your normal serving size and desire for leftovers.

Is fuzzy logic worth it?

It is useful when you cook several rice types or want the cooker to compensate for small measuring differences. For basic white rice, a simple model can be excellent.

Can I cook quinoa or oatmeal?

Many cookers can handle other grains, but ratios and foaming behavior vary. Use a program and recipe approved for the model.

Can I leave rice on warm overnight?

Do not assume so. Follow the manufacturer’s holding-time guidance and food-safety recommendations. When in doubt, cool leftovers promptly and refrigerate them.

Why does rice stick to the bottom?

Possible causes include an unsuitable ratio, damaged coating, incorrect program, very long warming or starch buildup. Check the bowl and repeat the manual’s standard method.

Shop rice cookers

Compare true uncooked capacity, minimum batch, bowl replacement, removable lid parts, keep-warm controls and lid-open dimensions.

Shop Amazon USA
Shop Amazon Canada

Who should buy it—and who should skip it

Buy it if: you cook rice regularly and want repeatable results with less stove attention.

Skip it if: you rarely make rice, already get consistent stovetop results, or do not have storage room for another appliance.

Best value

A compact three-cup class cooker with dependable keep-warm performance is the best value for one or two people.

When the upgrade is worth it

Pay more for better fuzzy-logic control, useful grain settings, a removable lid, and easier cleaning when rice is a frequent staple. Large capacity is not an upgrade for a small household.

Final answer

Pick the smallest rice cooker that comfortably handles your normal largest batch. A simple three-cup model is strong value for one or two people, while a five- or six-cup fuzzy-logic cooker suits families and multiple rice types. Prioritize easy lid cleaning, a replaceable bowl and useful keep-warm controls over a long program list.

Organize the results with our food storage container guide, and compare another compact appliance in our immersion blender guide.
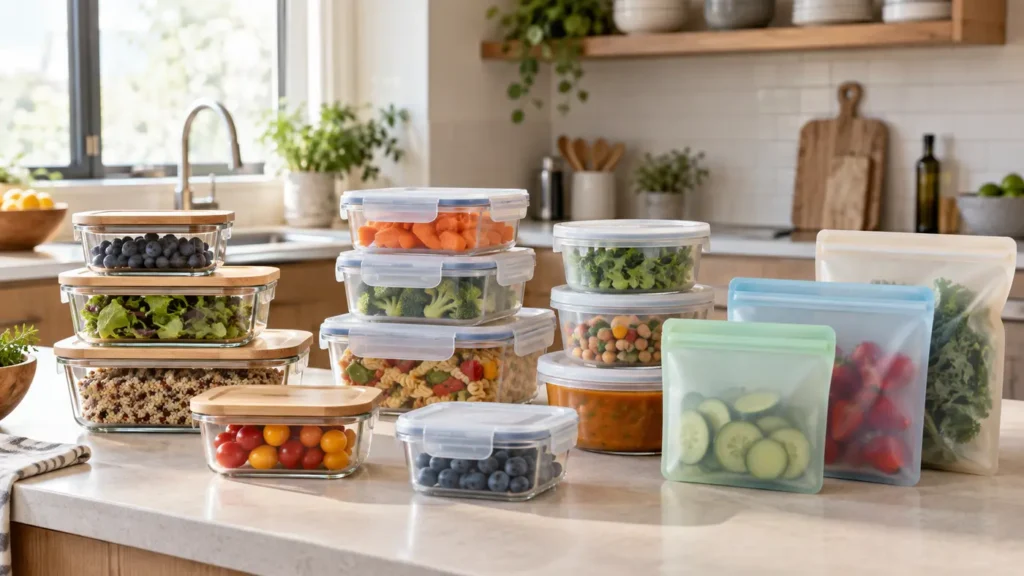
Glass, plastic and silicone food storage containers arranged in a bright kitchen
Kitchen & Dining

Best Food Storage Containers: Glass vs Plastic vs Silicone

Disclosure: This post contains affiliate links. If you buy through one of our links, we may earn a commission at no extra cost to you. Always follow the container maker’s temperature, microwave, freezer, dishwasher and oven instructions.

The best food storage containers are not simply the set with the most pieces. A useful set fits your refrigerator, stacks without wasting cabinet space, closes without a wrestling match and matches the way you actually cook. Glass, plastic and reusable silicone each solve different problems, which is why many kitchens work best with a small mix instead of one enormous matching collection.

This guide compares the three main materials, explains which lid and shape details matter, and helps you avoid paying for sizes that will sit unused.

Quick verdict

Choose glass for leftovers, reheating and stain resistance; lightweight plastic for lunches and everyday portability; and silicone bags or collapsible containers for snacks, freezer organization and space-saving storage. For most homes, the best starting set is a stackable rectangular glass set for meals plus a few lightweight containers for travel.

Glass vs plastic vs silicone

Material Best for Main advantages Watch for
Glass Leftovers, meal prep, reheating Resists odors and stains; easy to see contents; sturdy feel Heavier; can chip or break; lids are usually not oven-safe
Plastic Work lunches, children’s snacks, lightweight storage Light, affordable and easy to carry Can stain, scratch or retain odors; heat limits vary
Silicone Snacks, freezer storage, travel and compact cabinets Flexible, reusable and often space-saving Can be slower to dry; seals and support vary by design

Who should choose glass containers?

Glass is the strongest all-round choice for people who cook several portions at once and want to move food from refrigerator to microwave without changing containers. It does not absorb tomato, curry or garlic odors as readily as many plastics, and the clear sides make forgotten leftovers easier to spot.

Look for tempered glass from a reputable manufacturer, but remember that no household glass is indestructible. Sudden temperature changes, chips and hard impacts can cause breakage. Do not move a frozen glass container directly into a hot oven or onto a hot surface unless the instructions explicitly permit that use. The plastic or bamboo-style lid is normally not oven-safe, even when the glass base is.

Glass is less convenient for commuting. A full container adds noticeable weight to a lunch bag, and a drop onto concrete can end its useful life. If you carry meals daily, keep glass at home and use a lighter travel container.

Who should choose plastic containers?

Plastic makes sense when low weight and easy handling matter most. It is practical for lunches, snacks, picnics and sending leftovers home with family. A carefully chosen set can also cost less than glass while offering more sizes.

Do not assume every plastic container is suitable for every kind of heating. Check the exact microwave and dishwasher directions. Vent the lid as directed, avoid heavily scratched containers and replace pieces that are warped, cracked or no longer seal correctly. A microwave-safe label describes intended use under specified conditions; it does not mean the container is immune to staining, wear or overheating.

Square and rectangular plastic containers use refrigerator space more efficiently than round ones. Transparent bodies are easier to manage than opaque containers because you can see what needs to be eaten first.

When silicone storage works best

Reusable silicone bags are useful for chopped produce, sandwiches, snacks and freezer portions. Their flexible shape can squeeze into gaps that rigid boxes cannot, and some designs stand upright for filling. Collapsible silicone bowls can save cabinet room in an RV, apartment or small kitchen.

The tradeoff is structure. A soft bag filled with soup can be awkward to carry, and a shallow closure can open if it is packed carelessly. Test the seal over a sink before transporting liquid. Dry silicone fully before putting it away, especially around folded edges and closure tracks.

Shape matters more than piece count

A 24-piece set may mean 12 bases and 12 lids. More importantly, half the bases may be too small or too large for your normal portions. Before buying, list the jobs you need covered:

  • Two-portion dinner leftovers
  • Single lunch portions
  • Cut fruit or vegetables
  • Sauces and toppings
  • Freezer-ready batch cooking
  • Dry snacks or pantry ingredients

Rectangles are usually the best use of shelf space. Round containers are excellent for soups and stirring, but they leave gaps when lined up. Shallow containers cool food faster and make stacked leftovers easier to identify. Tall containers suit soups and bulky produce but can become unstable when stacked.

Look closely at the lids

The base may last for years while the lid becomes the weak point. Hinged locking tabs can create a reassuring seal, but the hinge area can eventually fatigue. Press-on lids are fast and compact, though they may loosen if the rim warps. Flexible stretch lids fit several bowl sizes but are not always ideal for transport.

Check whether replacement lids are sold separately. That one detail can extend the life of the entire set. Also look for:

  • A removable gasket that can be cleaned and dried completely
  • Tabs large enough to open without straining fingers
  • Lids that nest or clip together for storage
  • A vent designed for microwave use, if you reheat often
  • A seal description that distinguishes leak-resistant from genuinely leakproof

Stacking and nesting: two different things

Stacking describes how securely filled containers sit on top of one another in the refrigerator. Nesting describes how empty containers fit inside each other in the cabinet. A set can be good at one and poor at the other.

For a small kitchen, measure your cabinet shelf and the refrigerator space you normally use. Straight-sided containers may not nest as tightly, but they often stack neatly when full. Deeply tapered containers nest well but sacrifice some usable interior volume. The best compromise keeps two or three common footprints across several heights.

Freezer, microwave and oven use

Read the instructions for every component rather than assuming the base and lid share the same limits. Leave expansion space when freezing liquids. Cool hot food as recommended before sealing and refrigerating it, and avoid thermal shock with glass.

Microwave venting matters because steam pressure builds under a tight lid. Loosen or open the specified vent and use short heating intervals, stirring when practical. Even when a container is dishwasher-safe, the top rack may be recommended for lids and flexible components.

Food storage habits matter too

A good container cannot make unsafe storage practices safe. Refrigerate perishable food promptly, label leftovers with the date and discard food when you are unsure how long it has been stored. Use first-in, first-out organization so older portions remain visible.

A simple erasable label system prevents mystery containers. Put the food name and date on the lid, then group ready-to-eat items on one refrigerator shelf. This small routine works well alongside our guide to small kitchen habits that keep counters looking clean.

Features worth paying for

  • Replaceable lids: protects the value of the bases.
  • Consistent footprints: makes refrigerator stacking more stable.
  • Clear capacity markings: useful for meal prep and portioning.
  • Removable gaskets: allows better cleaning around the seal.
  • Useful medium sizes: generally earn more use than novelty mini containers.
  • A restrained set: fewer well-chosen pieces are easier to store than a giant bundle.

Common buying mistakes

  • Counting lids as full pieces without checking the number of actual containers
  • Buying mostly tiny sizes because the set looks generous
  • Assuming every glass base is oven-safe
  • Transporting soup in a container described only as airtight
  • Ignoring the stored height of nested lids
  • Choosing a complicated gasket that is difficult to remove and dry
  • Buying a brand that offers no replacement lids

Care that keeps containers usable

Let oily or strongly colored food cool before storing it in plastic, provided food-safety timing is respected. Wash soon after use. A baking-soda paste may help with some odors or stains, but follow the manufacturer’s care directions and avoid abrasive tools that scratch the surface.

Inspect glass rims for chips and plastic for deep scratches, clouding or warping. Dry lids and gaskets separately before reassembly. Store containers with lids loose or off when possible so trapped moisture and odors can escape.

Frequently asked questions

Are glass containers always better than plastic?

No. Glass is excellent for home storage and reheating, while plastic is lighter and easier to carry. The better material depends on the job.

Do airtight containers prevent all leaks?

Not necessarily. Airtight usually refers to air exchange, while leakproof describes resistance to liquid escaping. Check the product’s exact wording and test before carrying soup or sauce.

Can I freeze food in glass containers?

Many are designed for freezer use, but leave room for expansion and follow the temperature-change instructions. Do not use chipped glass or force a frozen container into sudden high heat.

How many containers does a household need?

Start with the number of leftover and lunch portions you normally store over two or three days. A modest set of frequently used sizes is usually easier to manage than a large set with duplicates.

Are reusable silicone bags hard to clean?

Wide-opening, stand-up designs are easier to wash and dry. Turn them only if the manufacturer permits it, and make sure seams and closure tracks are fully dry.

Shop food storage containers

Compare usable sizes, stored dimensions, replacement-lid availability and temperature instructions before ordering.

Shop Amazon USA
Shop Amazon Canada

Who should buy it—and who should skip it

Choose glass if: you prioritize stain resistance, reheating, and long service life. Choose plastic if: low weight and drop resistance matter most. Choose silicone if: collapsible storage is the priority.

Skip replacing what you own if your current containers seal well, are food-safe, and still fit your routine.

Best value

A small matched set in the material you use most is better value than a huge assortment of odd sizes. Replace only the sizes you repeatedly reach for.

When the upgrade is worth it

Pay more for dependable seals, replaceable lids, stackable shapes, and oven/freezer compatibility you will actually use. Premium branding alone does not improve storage.

Final answer

For most homes, glass rectangular containers are the best core set because they handle leftovers, reheating and stains well. Add a few lightweight plastic containers for travel and reusable silicone bags for snacks or flexible freezer storage. Buy by the sizes you use, not by the piece count, and prioritize replacement lids, secure stacking and care instructions you will actually follow.

Building a compact cooking setup too? See our air fryer size guide and electric kettle buying guide.

Scroll to Top