
small kitchen appliances

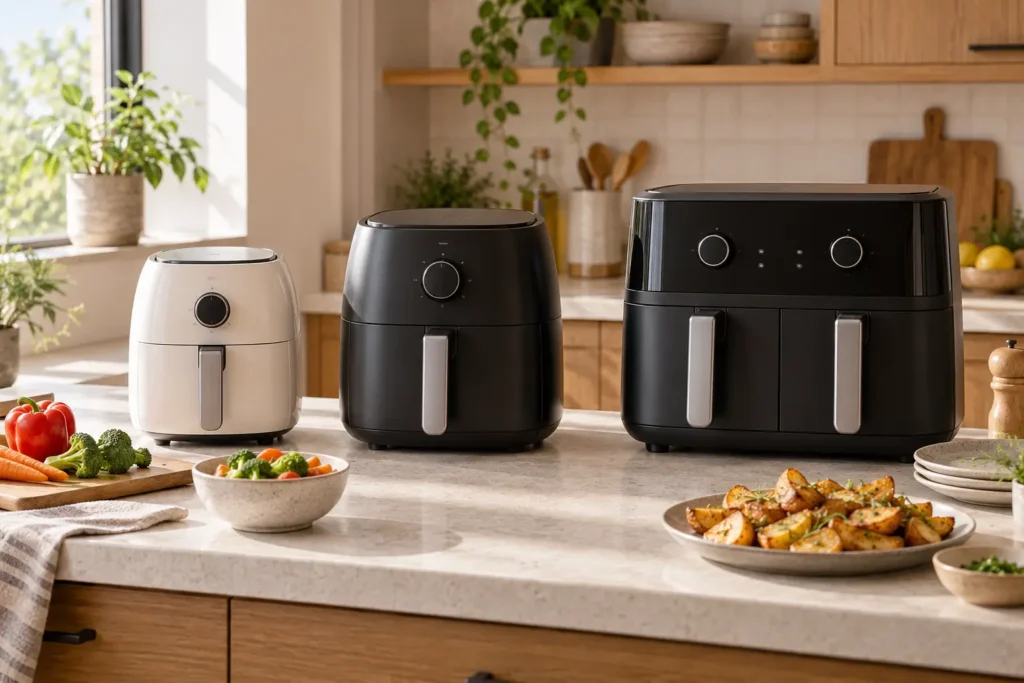
Three unbranded air fryers in compact, medium, and dual-basket sizes on a kitchen counter
Kitchen & Dining

Air Fryer Oven vs Basket Air Fryer

Disclosure: As an Amazon Associate, My Indoor Space may earn from qualifying purchases made through links in this guide, at no extra cost to you.

An air fryer toaster oven handles toast, baking, reheating, and larger flat foods. A basket air fryer is usually faster, easier to shake, and better at concentrating hot airflow around smaller portions. The better choice depends less on the word “air fryer” and more on what you cook most often.

Quick verdict

Choose a basket air fryer for the best combination of speed, compact cooking volume, simple cleanup, and reliable crisping. Choose an air fryer toaster oven when you need toast, open-face foods, wider pans, and one appliance to replace several countertop functions.

Who each style is for

A basket model is ideal for one to four people cooking fries, vegetables, wings, reheated pizza slices, and smaller proteins. It is also the better fit when you want fast preheating and parts that go to the sink easily.

An oven-style model suits someone who makes toast daily, wants to cook on a wider tray, or hopes to replace an older toaster oven. It needs more permanent counter space and more interior wiping.

Side-by-side comparison

Factor Basket air fryer Air fryer oven
Speed Usually faster for small portions Larger cavity can take longer
Crisping Strong concentrated airflow Depends on tray position and load
Food shape Deep basket Wide, flat trays
Toast Not practical Built for it
Cleanup Removable basket and plate More walls, racks, and crumb areas
Counter use Smaller footprint, often taller Wider and deeper

Best value: single-basket air fryer

A well-sized single basket is the value winner for most people. The removable cooking plate and compact chamber make it easier to load, shake, and clean. Straightforward temperature and time controls matter more than dozens of presets.

Choose capacity by usable cooking area, not only litres or quarts. A wider basket can cook food in one layer more effectively than a deeper basket with the same advertised volume.

Upgrade worth it: quality oven with easy-clean interior

An air fryer oven is worth the upgrade when it replaces both an air fryer and toaster oven. Look for a removable crumb tray, accessible interior, clear rack-position guidance, and enough height for the foods you actually make.

Extra rotisserie cages and specialty racks sound impressive but add storage and washing. Pay for even temperature control, useful tray size, and cleanability first.

Cooking performance

Basket air fryers surround a smaller load with fast-moving air. Shaking or turning exposes more surfaces and helps browning. Overfilling blocks circulation and produces softer results.

Oven models spread food across trays. They are useful for flat items but may require tray rotation when cooking on multiple levels. Read the manual’s recommended rack positions rather than treating every shelf as equal.

Real capacity

“Family size” is not a precise measurement. Lay out the chicken pieces, vegetables, or frozen food you normally cook and estimate the single-layer area required. Stacking saves space but can reduce crisping.

For oven styles, measure the baking dish, pizza, or number of toast slices you expect to fit. External dimensions also need room for the door, heat clearance, and ventilation.

Cleanup and coatings

Basket and crisper plates collect rendered fat and crumbs, but they can usually be removed. Check whether parts are dishwasher safe and whether the coating requires non-metal tools.

Oven interiors have more surfaces, heating elements, racks, and corners. A removable crumb tray helps, but grease splatter still needs prompt wiping after the appliance cools.

Controls and daily use

Separate time and temperature controls are faster than scrolling through many menus. A pause function that remembers the cycle when the basket opens is convenient. On an oven, independent toast shade and cooking controls prevent guesswork.

Smartphone control is not essential for an appliance that still requires safe loading, food checks, and hands-on cleanup.

Common buying mistakes

  • Comparing volume without checking usable cooking area.
  • Buying an oven too deep for the counter and wall clearance.
  • Expecting identical crisping from overloaded trays.
  • Ignoring the difficulty of cleaning the oven ceiling and elements.
  • Paying for accessories that will remain in storage.

Frequently asked questions

Which air fryer is easier to clean?

A basket model generally wins because the food-contact parts lift out and the cooking chamber is smaller.

Which is better for toast?

An air fryer toaster oven. Basket models are awkward for toast and do not provide the same broad heating layout.

Does an oven-style air fryer cook more food?

It can hold wider items or multiple trays, but crowded levels may require more time and rotation. Usable capacity matters more than exterior size.

Which is better for a small kitchen?

A basket model uses less counter area if you already own a toaster. An oven model can save space only when it genuinely replaces another appliance.

Final winner

The basket air fryer is the overall winner for speed, crisping, value, and cleanup. The air fryer toaster oven wins for households that make toast, cook wide flat foods, and will remove another countertop appliance rather than adding one more.

Choose the right capacity with our air fryer size guide, then compare other compact appliances in our small-kitchen rice cooker guide.
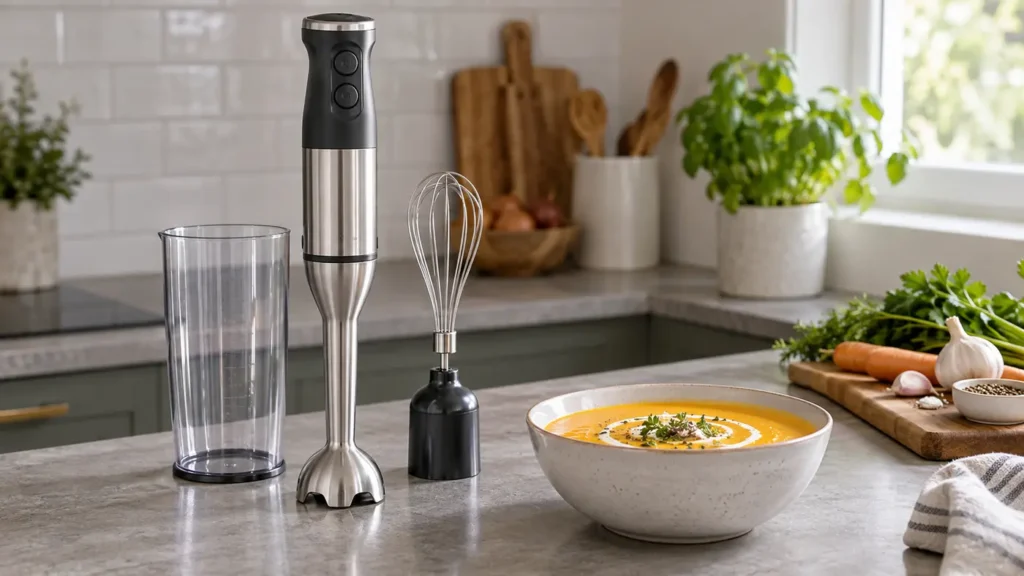
Immersion blender with blending cup and whisk attachment in a bright kitchen
Kitchen & Dining

Best Immersion Blender: Features That Actually Matter

Disclosure: This post contains affiliate links. If you buy through one of our links, we may earn a commission at no extra cost to you. Keep hands and utensils away from the blade, unplug before cleaning or changing attachments, and follow the manufacturer’s instructions.

An immersion blender can puree soup in the pot, make a quick smoothie in a cup and emulsify dressing without taking over the counter. It is one of the most space-efficient small appliances, but only when the motor body is comfortable to hold and the blending head is designed to control splashing.

The best model for most kitchens is not the one with the largest wattage claim or the biggest attachment bundle. Control, balance, shaft length, guard shape and cleaning are more important.

Quick verdict

Choose a variable-speed immersion blender with a stainless-steel removable shaft, a comfortable trigger or dial, and a blade guard that can move food without scratching cookware. A blending cup is useful; a whisk is worthwhile if you will actually use it. Buy a mini chopper attachment only when it replaces another appliance.

Immersion blender configurations

Setup Best for Advantages Tradeoffs
Basic blender Soups, sauces and dressings Lowest clutter and simplest cleaning Fewer extra jobs
Blender plus whisk Cream, eggs and light batters Useful second function with little storage Not a replacement for a heavy mixer
Multi-piece kit Small kitchens replacing several tools Can include cup, whisk, chopper and masher More parts, lids and storage
Cordless Fast jobs away from an outlet No cord around the pot Battery charging, weight and long-term replacement

Control matters more than maximum power

A powerful motor helps with fibrous vegetables and thicker mixtures, but a blender that jumps to full speed can throw hot soup up the sides of the pot. Progressive trigger control or several genuinely distinct speeds give you a gentler start.

Wattage is not a direct guarantee of blending performance. Blade geometry, guard openings, motor efficiency and how easily ingredients circulate all matter. Look for consistent results and manageable vibration rather than shopping by one number.

Choose the right shaft length

A longer shaft reaches into stockpots and tall pitchers, while a shorter shaft can feel easier to control in a small saucepan. Measure the containers you use most. The blade head needs to stay submerged, but the motor housing should remain well above the food.

A removable shaft is easier to wash and store. Stainless steel tolerates hot-food use better than some plastic shafts, but always confirm the model’s temperature limits. Never immerse the motor body.

Blade guard design and cookware

The bell around the blade controls circulation and helps protect the blade from the pot. Wide openings move thick food more freely; a very closed guard may trap chunks. Some guards have soft edges intended to reduce scratching, though safe technique is still important.

Keep the head slightly tilted and move slowly through the food rather than pressing hard against the bottom. If your cookware has a delicate nonstick coating, confirm the manufacturer’s recommendation before allowing a metal guard to touch it.

Corded or cordless?

A corded immersion blender is usually lighter, always ready and better suited to longer sessions. Check cord length and where the outlet sits in relation to your stove and prep area. Keep the cord away from heat, water and the pot rim.

Cordless models remove the cord from the workspace but add battery weight. Consider charging time, runtime, battery availability and whether the appliance can operate while charging. A cordless tool is only convenient if it is charged when you need it.

Attachments worth having

  • Blending cup: helps with small batches and gives the blade enough depth to work.
  • Whisk: useful for whipped cream, eggs and thin mixtures.
  • Mini chopper: valuable for herbs, nuts and onions when it truly replaces a separate chopper.
  • Potato masher: can produce an even texture without overworking starch when used correctly.

Attachment bundles often look like a bargain, but each part needs storage and cleaning. Start with the jobs you already do. A basic blender that lives within reach will be used more than a large kit buried in a cupboard.

Comfort and one-handed use

Weight is concentrated in the handle, so a small difference becomes noticeable during a long blend. Look for a grip you can hold securely with dry or slightly damp hands. Buttons should not require excessive pressure, and speed controls should be reachable without changing your grip.

If hand strength is limited, a lock-on design may feel easier than holding a stiff trigger, but it also requires careful control. Try the grip in person when possible and check the total assembled weight rather than motor weight alone.

Reducing splashes

  1. Use a container tall enough for the food volume.
  2. Submerge the blade guard before starting.
  3. Begin at low speed.
  4. Keep the head below the surface while the blade is moving.
  5. Stop the motor before lifting it out.
  6. Let very hot mixtures cool to the recommended temperature.

Do not fill a narrow cup so high that movement has nowhere to go. For hot soup, remove the pot from active heat and work in controlled pulses. Never blend in a container that can tip or shatter.

Cleaning and storage

Unplug the blender or disconnect the power unit before removing the shaft. Wash the detachable components as directed and take care around the sharp blade. If the shaft is dishwasher-safe, check whether the top rack is required. The motor body usually needs only a damp cloth.

Rinse soon after blending sticky foods so residue does not dry around the guard. Dry connections completely before reassembly. Store the shaft where its blade cannot be reached accidentally and where the coupling is not carrying the appliance’s weight.

Common buying mistakes

  • Buying the largest attachment kit without storage space
  • Choosing by wattage alone
  • Ignoring the assembled weight and button pressure
  • Using a metal guard carelessly on delicate cookware
  • Assuming every shaft is safe in very hot food
  • Expecting an immersion blender to crush large amounts of ice
  • Forgetting to check replacement attachment availability

Who may prefer a countertop blender?

A countertop blender is better for large smoothies, frequent ice crushing, very silky purees and jobs that need a closed jar. An immersion blender wins for soup in the pot, quick sauces, small batches and easy storage. Many homes need only one, so choose from the tasks you perform every week.

Frequently asked questions

Can an immersion blender blend hot soup?

Many are designed for soup, but the model’s temperature guidance must be followed. Remove the pot from active heat, keep the head submerged and start slowly to reduce splashing.

Can it replace a regular blender?

It can for soups, sauces, dressings and some smoothies. It is less suitable for large frozen drinks, heavy ice crushing or consistently ultra-smooth results.

Is a cordless model better?

It is more convenient around the pot, but usually heavier and dependent on a charged battery. A corded model is the better-value choice for many kitchens.

Do I need variable speed?

Yes, if you make hot soup or small batches. A gentle starting speed improves control and reduces splashing.

Will it scratch my pot?

It can if a hard metal guard is pressed or dragged against a delicate surface. Check both appliance and cookware instructions and use careful technique.

Shop immersion blenders

Compare grip comfort, variable-speed control, shaft length, guard material, attachment usefulness and cleaning instructions.

Shop Amazon USA
Shop Amazon Canada

Who should buy it—and who should skip it

Buy it if: you make soups, sauces, smoothies, or purées directly in a pot or tall container and value quick cleanup.

Skip it if: you mainly crush ice, make large frozen drinks, or need the broader capacity of a countertop blender.

Best value

A corded immersion blender with a removable stainless shaft and simple variable speed is the best value for most kitchens.

When the upgrade is worth it

Pay more for better low-speed control, a more comfortable grip, and useful whisk or chopper attachments when you will actually use them. Extreme wattage claims alone are not a reason to upgrade.

Final answer

For most kitchens, the best immersion blender is a balanced corded model with variable speed, a removable stainless-steel shaft and a useful blending cup. Add a whisk if it matches your routine, but avoid paying for attachments you will store rather than use. Control and cleanup matter more than an extreme power claim.

For other compact countertop choices, see our countertop ice maker guide and electric kettle guide.

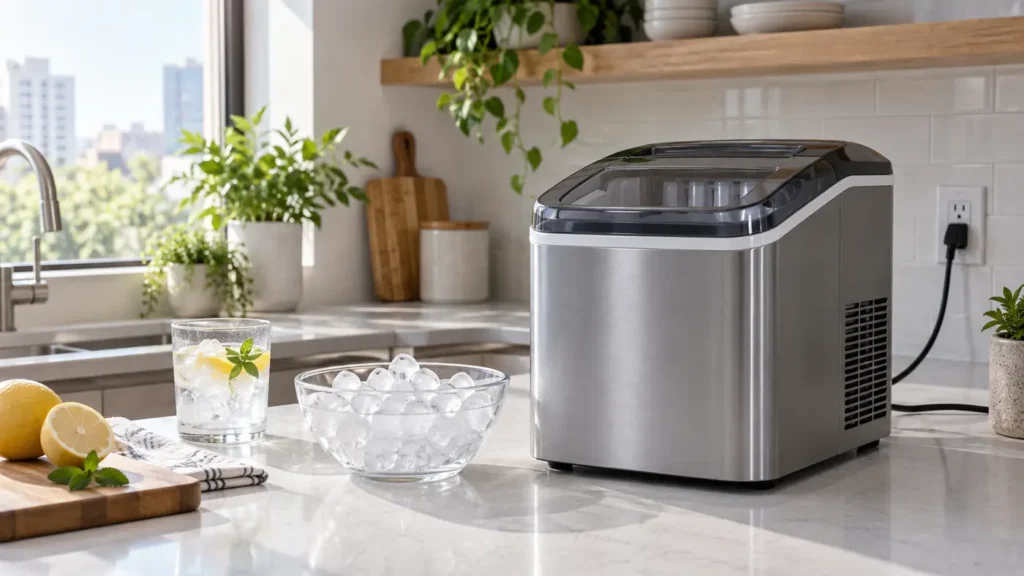
Compact countertop ice maker beside a bowl of ice in a bright kitchen
Kitchen & Dining

Best Countertop Ice Maker: What to Know Before You Buy

Disclosure: This post contains affiliate links. If you buy through one of our links, we may earn a commission at no extra cost to you. Countertop ice makers make ice; most do not keep it frozen. Follow the cleaning, water and electrical instructions for your exact model.

A countertop ice maker can be useful when a refrigerator cannot keep up, a freezer has no built-in ice maker, or guests arrive faster than trays can freeze. The best machine is not necessarily the one advertising the largest daily output. What matters is how quickly the first batch appears, how much ice the basket holds, how easy the water path is to clean and whether the appliance fits beneath your cabinets.

This guide explains the specifications that affect everyday use, including bullet versus nugget ice, reservoir size, noise, drainage and storage.

Quick verdict

For most homes, choose a compact self-cleaning bullet-ice machine with an accessible reservoir, removable basket, drain plug and clear low-water and full-basket indicators. If chewable ice texture is the priority, a nugget machine may be worth the higher price and extra maintenance. Measure the counter space and cabinet clearance before ordering.

Countertop ice maker types

Type Best for Advantages Tradeoffs
Bullet ice General drinks and occasional entertaining Fast batches, compact machines, usually lower cost Ice is often soft and melts faster than freezer-made cubes
Nugget ice People who prefer soft, chewable ice Distinct texture and easy drink blending Higher cost, more moving parts and more frequent cleaning
Clear cube ice Cocktails and slower dilution Denser, attractive cubes Longer cycle and typically larger or more expensive machine

Daily output is not basket capacity

A machine advertised to produce many pounds per day does not hold that amount at once. The daily figure assumes repeated cycles under specified room and water conditions, with the basket emptied whenever it fills. The actual basket may hold only a few pounds or less.

For daily convenience, compare three separate numbers: time to first batch, output per hour and basket capacity. A couple making iced drinks needs less holding capacity than a family filling coolers. If you want to bag ice for later, move finished ice to the freezer promptly and break apart pieces after they harden.

Counter space and ventilation

Measure width, depth and height with the lid fully open. Include clearance for ventilation around the side or rear vents and room to pull the drain plug. A machine that technically fits under a cabinet may be frustrating if the lid cannot open completely or the water reservoir is difficult to fill.

Place it on a stable, level, water-resistant surface near a properly grounded outlet. Do not block vents or crowd the unit against a warm appliance. Room temperature affects production speed and melting, so a sunny window or hot range is a poor location.

What “self-cleaning” really means

A self-clean cycle circulates water through part of the system; it does not eliminate manual cleaning. The basket, scoop, reservoir, lid and accessible surfaces still need regular washing. Mineral deposits can build up in the water path, particularly with hard water.

Look for a drain that lets the reservoir empty without lifting and tipping the whole machine. A removable water tank can also help, but check how many internal surfaces remain difficult to reach. Follow the manufacturer’s cleaning solution and descaling instructions rather than mixing unapproved chemicals.

Water quality and ice taste

Ice reflects the water used to make it. If tap water has a noticeable taste or odor, filtered water may improve results, provided the manual permits it. Do not use hot water, sparkling water or any liquid other than the type specified by the manufacturer.

Empty stale water, allow the reservoir to dry when the appliance will sit unused and clean the scoop separately. Keep the scoop in a clean holder instead of leaving its handle buried in the ice.

Noise to expect

Countertop ice makers cycle through water pumping, refrigeration and ice release. You may hear a fan, a compressor hum, water movement and a distinct clatter when ice drops into the basket. A quiet compressor matters in an open kitchen, but the falling ice may still be noticeable.

If the appliance will run near a bedroom or home office, look beyond a single decibel claim. Owner feedback about fan tone, vibration and alert beeps can be more useful. A level surface and proper clearance may reduce rattling.

Features worth paying for

  • Easy front or rear drain: makes cleaning and storage less awkward.
  • Removable basket and scoop: simplifies serving and washing.
  • Useful indicator lights: low water and full basket are more valuable than a complicated screen.
  • Automatic pause: prevents overfilling when the basket is full.
  • Simple self-clean cycle: helpful when paired with regular manual cleaning.
  • Accessible reservoir: reduces spills during refilling.
  • Documented replacement parts: useful for baskets, scoops or drain plugs.

Features you may not need

Wi-Fi, scheduling and app control sound impressive but add little if the basket must still be emptied and the ice transferred. Multiple ice-size settings on a bullet machine often change thickness more than overall shape. A window is convenient, but it should not replace a reliable full-basket sensor.

Common buying mistakes

  • Assuming the machine stores ice like a freezer
  • Comparing daily output while ignoring basket capacity
  • Forgetting lid-open height under wall cabinets
  • Choosing nugget ice without accepting the extra cleaning
  • Blocking the ventilation side against another appliance
  • Leaving meltwater and unused water in the reservoir for long periods
  • Expecting the first batch to be as cold and hard as freezer ice

How to use one efficiently

  1. Set the machine on a level counter with the required clearance.
  2. Clean it before first use according to the manual.
  3. Add approved water without exceeding the fill line.
  4. Let the first cycles run and check the manual on whether initial ice should be discarded.
  5. Transfer finished ice to a freezer bag if you are building a larger supply.
  6. Drain, clean and dry the unit after the recommended use interval.

Countertop ice can melt and be recirculated on many models. That saves water during a session, but it also means cleanliness matters. Do not treat the closed lid as long-term sanitary storage.

Frequently asked questions

Does a countertop ice maker keep ice frozen?

Most do not. They make ice and hold it temporarily in an insulated basket. As it melts, water may return to the reservoir for another cycle.

How fast is the first batch?

Many compact machines advertise a first batch within several minutes, but room temperature, water temperature and ice-size setting affect the result. Check the tested conditions and owner manual.

Is nugget ice worth the extra cost?

It can be if texture is the main reason you are buying the machine and you will use it frequently. For occasional drinks and parties, a simpler bullet-ice model is often better value.

Can I leave it running all the time?

Follow the manufacturer’s instructions. Most countertop units are intended for active ice-making sessions rather than permanent frozen storage, and they require regular cleaning and water changes.

Can I use it for a cooler?

Yes, but plan ahead. Basket capacity is limited, so you may need several cycles and freezer storage to build enough ice.

Shop countertop ice makers

Compare ice type, first-batch time, basket size, drain location, cleaning access, operating noise and exact countertop dimensions.

Shop Amazon USA
Shop Amazon Canada

Who should buy it—and who should skip it

Buy it if: you need frequent batches of fresh ice where a freezer ice maker is unavailable or too slow.

Skip it if: you only need occasional ice, have very limited counter space, or expect the machine to store ice frozen for long periods.

Best value

A compact bullet-ice machine with a drain plug and easy-clean reservoir is the best value for most homes.

When the upgrade is worth it

Pay more for quieter operation, a self-clean cycle, easier draining, and a larger water reservoir when the machine runs often. Higher advertised daily output matters only if you can use or freeze the ice quickly.

Final answer

A compact bullet-ice maker is the practical choice for most households: fast, relatively affordable and simple to operate. Choose nugget ice only when that texture is important enough to justify more cost and cleaning. Measure the full lid-open footprint, prioritize a convenient drain and remember that the basket is temporary holding space—not a freezer.

For more small-kitchen buying help, see our food storage container guide and air fryer size guide.

Three unbranded air fryers in compact, medium, and dual-basket sizes on a kitchen counter
Kitchen & Dining

What Size Air Fryer Do I Need?

Disclosure: This post contains affiliate links. If you buy through one of our links, we may earn a commission at no extra cost to you. Capacity labels are not standardized, so always compare basket dimensions and exterior measurements—not quarts alone.

The most common air-fryer mistake is buying by household size without considering what you actually cook. A compact basket may handle one person’s vegetables beautifully but require several batches for two chicken breasts. A large dual-basket model can cook a full dinner, yet take up more counter and storage space than a small kitchen can comfortably spare.

This air fryer size guide translates the usual capacity ranges into real kitchen decisions for one, two, or four people. The goal is not the biggest appliance you can afford. It is the smallest one that cooks your normal meal in a useful number of batches.

Quick answer

Household Useful starting range Best for
1 person 2–4 qt Snacks, vegetables, reheating, one main portion
2 people 4–6 qt Two portions, a few chicken pieces, shared sides
3–4 people 6–8 qt or dual basket Family portions, larger proteins, two foods at once
4+ or frequent entertaining 8+ qt, dual basket, or oven style Larger batches and multi-item meals

These ranges are starting points, not guarantees. A wide 5-quart basket may hold more food in a single layer than a tall 6-quart basket. Interior shape is often more important than the number printed on the box.

The rule that matters most: food needs surface area

Air fryers move hot air around food. For browning and crisping, pieces generally perform best with some room between them. A deep basket can advertise impressive volume while offering limited cooking surface. If your favorite foods are chicken cutlets, salmon fillets, or roasted vegetables, look for a wide, square basket.

Think in “single-layer servings” rather than quarts. Before buying, check the basket’s usable width and length and compare them with the food you cook most often. Product photos can be misleading, so look for published interior dimensions or review images with familiar foods.

Best air fryer size for one person

A 2- to 4-quart model is usually the practical range for one person. The smaller end works well for snacks, reheating leftovers, a portion of vegetables, or one small protein. Moving closer to 4 quarts gives you room to cook a main and side in one batch or prepare two portions for planned leftovers.

Choose 2–3 quarts if:

  • Counter and cabinet space are extremely limited
  • You mainly reheat pizza, fries, or small portions
  • You are comfortable cooking one component at a time
  • Low weight and easy storage matter most

Choose 3–4 quarts if:

  • You want a little breathing room around food
  • You meal-prep two servings at once
  • You regularly cook a protein plus vegetables
  • You would rather avoid replacing an undersized model later

Best air fryer size for two people

For two adults, 4 to 6 quarts is the most flexible range. A wide 5- or 6-quart basket can often accommodate two modest portions without stacking. This is also a useful size for a couple who cooks once and saves leftovers.

Do not assume a larger capacity always means a much larger footprint. Some models gain volume by becoming taller; others grow wider. For countertop use, measure the appliance width, depth, and height, then add the manufacturer’s required clearance for ventilation.

A single basket works best when:

  • Both people eat the same meal
  • Foods use similar temperatures and timing
  • You value one large cooking surface
  • You want simpler cleaning and storage

A dual basket works best when:

  • You often cook a main and side at different settings
  • Household members prefer different foods
  • You use sync-finish features regularly
  • You have enough counter depth and width

Best air fryer size for four people

Start around 6 to 8 quarts, then judge the basket layout. A family that cooks wings or vegetables may benefit from one wide basket. A family that wants chicken in one zone and potatoes in another may prefer a dual-basket model.

For four full portions, even a large basket may require batching—especially when crispness matters. An oven-style air fryer offers multiple racks and more visual capacity, but results can vary by rack position and the appliance is more involved to clean. Choose it for flexibility, not because it automatically cooks every food better.

Basket, dual-basket, or oven style?

Style Strengths Tradeoffs
Single basket Fast, simple, compact, easy to shake One temperature; may require batches
Dual basket Two foods, separate settings, synchronized finish Wider footprint; each zone may be narrow
Flexible divider One large zone or two smaller zones More parts; verify usable area in both modes
Oven style Multiple racks, toast and bake functions, larger flat foods More cleaning; rack position may affect browning

Measure your kitchen before buying

Write down four measurements:

  1. Counter footprint: the appliance’s width and depth.
  2. Operating clearance: the free space required around and above it.
  3. Drawer clearance: the extra depth needed to pull the basket out fully.
  4. Storage opening: cabinet or pantry height, including the handle and cord.

Do not operate an air fryer inside a closed cabinet or directly under a surface that conflicts with the manual’s clearance requirements. Hot exhaust needs a safe path away from walls, cabinets, curtains, paper, and other heat-sensitive materials.

Capacity labels can be confusing

Depending on the market and manufacturer, capacity may be listed in quarts, liters, pounds of food, or an example such as “fits a whole chicken.” These descriptions are not directly interchangeable. A claimed chicken size does not tell you how well vegetables spread out, and total volume does not reveal usable basket area.

When comparing two models, prioritize:

  • Usable basket width and length
  • Exterior footprint and open-drawer depth
  • Whether the insert is easy to lift and clean
  • Replacement basket, tray, and accessory availability
  • Warranty and return window

Features worth paying for

  • A useful temperature range: helpful for reheating, roasting, and lower-temperature cooking.
  • Simple controls: a clear time and temperature adjustment is more valuable than dozens of presets.
  • Dishwasher-safe removable parts: useful if the material and your dishwasher instructions allow it.
  • Easy-to-grip basket: especially important when hot and loaded.
  • Dual-zone sync: worthwhile only if you routinely cook two different foods.
  • Accessible replacement parts: extends the appliance’s useful life.

Features you may not need

  • Wi-Fi controls for a task that still requires hands-on food loading
  • Many one-touch presets that simply select time and temperature
  • A viewing window if it adds cleaning work you dislike
  • A very high capacity when you mostly cook one portion
  • A large accessory kit before you know which accessories you will use

Food-safety basics

An air fryer is a small convection oven, not a guarantee of doneness. Cooking time varies with food thickness, starting temperature, load size, and appliance design. Use a food thermometer in the thickest part of meat or poultry and follow current safe-temperature guidance from FoodSafety.gov.

Avoid overfilling the basket, keep raw foods separate from ready-to-eat foods during preparation, and clean removable parts after greasy or raw-meat cooking. Let the appliance cool before deep cleaning and follow the manual for any nonstick surface.

Common sizing mistakes

  • Buying for rare parties: a daily appliance should fit daily life; occasional extra batches may be easier than storing an oversized unit.
  • Ignoring basket shape: wide and square often beats narrow and tall.
  • Forgetting open-drawer depth: the appliance may fit the counter but block a walkway in use.
  • Assuming dual baskets double convenience: two narrow zones can limit larger foods.
  • Counting servings from marketing alone: appetites and recipes vary.

A simple decision method

  1. List the three foods you expect to cook most often.
  2. Estimate how many portions you want per batch.
  3. Decide whether those foods need one large surface or two separate zones.
  4. Measure the permanent counter or storage space.
  5. Choose the smallest model that fits the food in a useful arrangement.

If your counters already feel crowded, apply the layout ideas in The Small-Kitchen Habits That Keep Counters Looking Clean before committing to a large appliance.

Frequently asked questions

Is a 4-quart air fryer big enough for two people?

It can be, especially for smaller portions or foods that do not need much surface area. A wider 5- or 6-quart basket offers more flexibility and may reduce batching.

What size air fryer fits a whole chicken?

It depends on both the chicken and the basket’s internal dimensions. Check the manufacturer’s maximum food-size guidance and ensure the chicken does not touch the heating element. Verify doneness with a thermometer.

Does a larger air fryer take longer to cook?

Not necessarily. Food load, airflow, power, preheating, and basket shape all affect time. Follow the recipe as a starting point and check food early.

Is a dual-basket air fryer better for a family?

It is better when you regularly need different temperatures or times. One large basket may be better for a single large batch such as vegetables, wings, or cutlets.

Can I keep an air fryer in a cabinet?

You can store a cool, unplugged appliance in a cabinet if it fits safely. Operate it only in a location that meets the manual’s ventilation and clearance instructions.

Shop air fryers by size

Use the capacity range as a filter, then compare the actual basket dimensions, exterior measurements, clearance instructions, and included parts.

Shop Amazon USA
Shop Amazon Canada

Who should buy which size—and who should skip the upgrade

Choose a smaller basket if you cook for one or two and value fast preheating and easy storage. Choose a larger basket or dual-zone model if you routinely cook several portions or two foods at once.

Skip the larger size if it will crowd the counter or you rarely fill your current appliance.

Best value

The best value is the smallest air fryer that comfortably fits your normal meal, not the largest model you can afford.

When the upgrade is worth it

Pay more for useful capacity, a second cooking zone, better controls, or easier cleaning when those solve a recurring problem. Extra presets alone are not a meaningful upgrade.

Final answer

For one person, start at 2 to 4 quarts; for two people, 4 to 6 quarts; and for three or four people, 6 to 8 quarts or a dual-basket model. Then override that rule if your favorite foods need more flat cooking area. Basket dimensions, counter footprint, and the number of batches you will tolerate matter more than the capacity label alone.

For a calmer cooking space, continue with The No-Renovation Kitchen Upgrade.

Scroll to Top