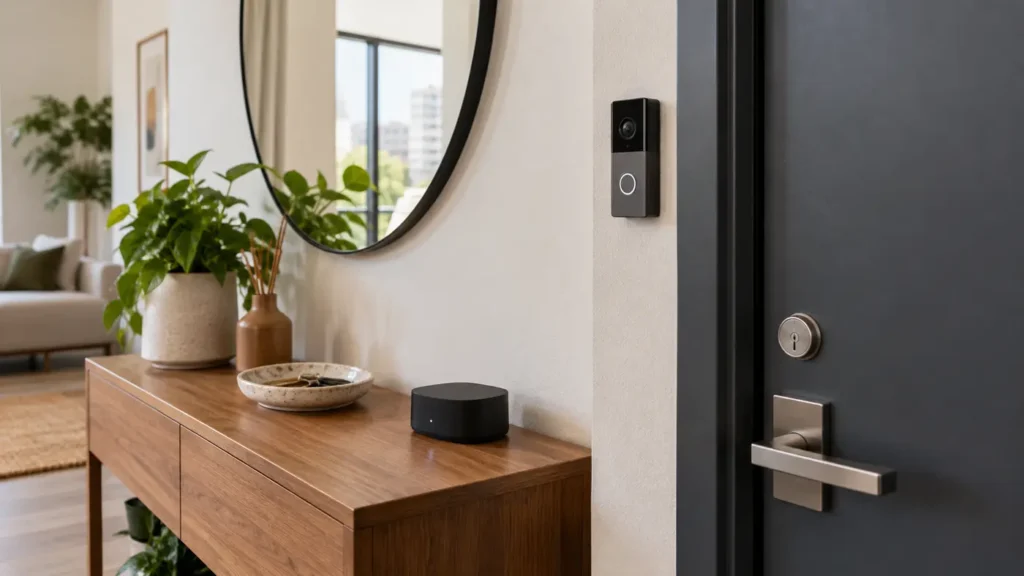
Video doorbell beside a modern front door with a local storage hub
Smart Home

Best Video Doorbell Without a Subscription

Disclosure: This post contains affiliate links. If you buy through one of our links, we may earn a commission at no extra cost to you. Respect local privacy and recording laws. Position the camera to monitor your entrance without unnecessarily capturing neighbours’ private areas.

A video doorbell without a required subscription can show visitors, record motion locally and send alerts without adding a monthly bill. Upfront cost may be higher when a local hub is included, but ongoing ownership can be easier to predict.

The biggest differences are storage location, installation, included detection and what happens when power or internet fails.

Quick verdict

Choose a doorbell with encrypted local storage, person detection included, a tall field of view, two-factor authentication and a clear firmware-support policy. Wired power is best when compatible wiring exists; battery power is easier for renters but needs regular charging.

Power and storage choices

Choice Best for Advantage Watch for
Wired plus local hub Permanent home installation Continuous power and central storage Compatibility and installation work
Battery plus in-device card Renters and simple setup No doorbell wiring required Charging and removable storage
Battery plus local hub Flexible multi-camera system Recordings stay inside home Higher upfront cost
Optional cloud plus local People wanting backup choice Flexible storage options Some features may still be paid

Check no-fee features

Confirm that live view, motion clips, playback, clip export and meaningful alerts all work without payment. A product page may advertise advanced recognition that belongs to a trial plan rather than the base camera.

Wired installation

Existing low-voltage doorbell wiring can provide continuous power, but transformer voltage and chime compatibility must match. If electrical details are uncertain, use a qualified installer. Some wired models still contain a small battery.

Battery installation

Battery doorbells are renter-friendly when mounting is permitted. Check realistic battery life in cold weather and high-traffic settings. Frequent live viewing and motion events shorten intervals between charges.

Field of view

A tall or head-to-toe view helps show packages near the threshold. A wide lens covers the approach but may include more neighbouring property than necessary. Adjustable privacy zones are useful.

Local storage security

A hub inside the home protects recordings if the doorbell is removed. In-device storage is simpler but travels with the unit. Check encryption, export and maximum supported capacity.

Alerts and response time

Person detection and activity zones reduce useless alerts. Notification speed depends on Wi-Fi, internet and phone settings. A strong signal at the door is essential; test the location before final mounting.

Weather and mounting

Use a model rated for the local temperature and exposure. Angle wedges can improve the view on a side wall. Mount securely without blocking unit doors, address numbers or shared walkways.

Common buying mistakes

  • Believing a free trial means the feature remains free
  • Ignoring transformer and chime compatibility
  • Mounting before checking Wi-Fi signal
  • Choosing a wide view that captures unnecessary private areas
  • Underestimating cold-weather battery drain
  • Failing to secure the account with two-factor authentication

Frequently asked questions

Will it work with my old chime?

Only if the doorbell and existing transformer/chime are compatible. Check the exact requirements.

Can renters install one?

A battery model with an approved non-destructive mount may work, but obtain required landlord permission.

Does local storage work without internet?

Some systems continue recording locally, but alerts and remote view usually stop. Confirm offline behaviour.

How much storage do I need?

It depends on resolution and motion traffic. Look for clear estimates and automatic overwrite controls.

Can a doorbell replace a security system?

No. It monitors one entrance and should be treated as one layer, not complete protection.

Shop video doorbells without subscriptions

Compare local storage, included alerts, wiring requirements, chime compatibility, field of view, weather rating and security support.

Shop Amazon USA Shop Amazon Canada

Who should buy it—and who should skip it

Buy it if: you want visitor alerts and local recording without a required monthly plan, and you can install the camera without violating lease or privacy rules.

Skip it if: your Wi-Fi at the door is unreliable, you cannot mount or power the unit safely, or you need professional monitored security rather than a doorbell camera.

Best value

A model with useful person alerts and local storage included in the purchase price is the best value. Wired power is usually the strongest long-term choice where compatible wiring already exists.

When the upgrade is worth it

Pay more for a local hub, better field of view, stronger detection, and longer software support when those features remain usable without a subscription. Extra cloud features are not an upgrade if avoiding fees is the goal.

Final answer

A local-storage video doorbell is the strongest value when person alerts, playback and export remain free. Choose wired power for dependable permanent use or battery power for flexible installation, then prioritize field of view, Wi-Fi strength, privacy zones and security updates.

For inside the home, compare our indoor camera guide.

Compact indoor security camera on a living room shelf
Smart Home

Best Indoor Security Camera Without a Subscription

Disclosure: This post contains affiliate links. If you buy through one of our links, we may earn a commission at no extra cost to you. Camera use is subject to privacy and recording laws. Inform household members and visitors as required, and never place cameras in private areas.

An indoor security camera without a required subscription can provide live viewing, motion alerts and local recordings without another monthly bill. The important phrase is required subscription: some cameras work locally but reserve advanced detection, longer history or cloud backup for paid plans.

A good no-fee camera makes local storage clear, gives you physical or visible privacy controls and continues basic recording when the internet is unavailable.

Quick verdict

Choose a camera with encrypted local storage, clear person or motion alerts included, a physical privacy shutter or hardware off switch, two-factor account security and a documented update policy. Decide whether you prefer a microSD card in the camera or a separate local hub.

Local storage options

Choice Best for Advantage Watch for
microSD in camera Simple single-camera setup Low cost and easy expansion Card can be taken with camera
Local hub Several cameras Recordings remain elsewhere in home Higher upfront cost
Network recorder Advanced multi-camera systems Large capacity and continuous recording More setup and networking
Cloud optional Remote backup choice Off-site copy if desired Fees and privacy tradeoffs

What works without payment

Read the feature list carefully. Confirm live view, motion recording, alert delivery, playback and clip export all work without a plan. Facial recognition, package detection or extended cloud history may still require payment.

Privacy controls

A physical shutter provides visible reassurance, while a hardware power switch makes status easier to understand. Software privacy modes are useful but depend on the app and account. Place the camera only where everyone reasonably expects monitoring.

Local storage capacity

Recording length depends on resolution, motion frequency and card size. Use the supported card type and endurance rating. Enable automatic overwrite only if you understand that older clips will be replaced.

Image quality and field of view

Resolution matters less than useful detail in the actual room. A very wide lens sees more but can make faces smaller. Pan-and-tilt cameras cover a broad space but need sensible home positions and may miss movement while pointed elsewhere.

Alerts and detection

Good alerts identify useful events without reporting every light change. Adjustable zones and sensitivity reduce nuisance notifications. Person detection processed locally is valuable when included without a plan.

Network and account security

Use a unique password, two-factor authentication and automatic firmware updates. Put smart-home devices on a separate guest or IoT network when your router supports it. Review shared-user access and remove accounts that no longer need viewing rights.

Power and outage behaviour

Plug-in cameras offer dependable operation but stop during a power failure unless backed up. Battery cameras are easier to place but require charging and may record only event clips. Check what happens when internet service drops.

Common buying mistakes

  • Assuming local storage includes every advertised feature
  • Placing a camera in a bedroom, bathroom or other private area
  • Using a weak reused password
  • Ignoring who can access shared accounts
  • Choosing extreme resolution without checking night performance
  • Forgetting that an in-camera card can be removed

Frequently asked questions

Can a local camera work without internet?

Some can record locally during an outage, but remote viewing and alerts usually need internet. Confirm the model’s offline behaviour.

Is microSD storage secure?

It can be convenient, but encryption, card location and export controls vary. A stolen camera may take the card with it.

Do I need 4K?

Not necessarily. Lighting, lens quality, compression and subject distance often matter more.

Can I point it out a window?

Reflections and infrared lights can ruin night images, and privacy rules still apply. Outdoor-rated placement is usually better.

How often should I update it?

Enable automatic updates when available and replace products that no longer receive security support.

Shop indoor security cameras

Compare local storage method, privacy controls, alert types, field of view, night vision, power and software-support policy.

Shop Amazon USA Shop Amazon Canada

Who should buy it—and who should skip it

Buy it if: you want local indoor monitoring without a required monthly fee and are comfortable managing storage, account security, and privacy settings.

Skip it if: household privacy concerns outweigh the benefit, you need professional monitoring, or you do not want to maintain local storage.

Best value

A single camera with microSD storage, useful free alerts, and strong privacy controls is the best value for one room. A hub becomes better value when several cameras share the same local storage system.

When the upgrade is worth it

Pay more for a local hub, better night imaging, hardware privacy controls, and a longer update policy when you will use several cameras or keep the system for years. Resolution alone is not a reason to spend more.

Final answer

The best no-subscription indoor camera combines included local recording, useful free alerts and strong privacy controls. A microSD model suits one room; a local hub is better for several cameras. Security updates and account protection matter as much as image resolution.

Build the rest of the setup with our smart plug guide and charging station guide.

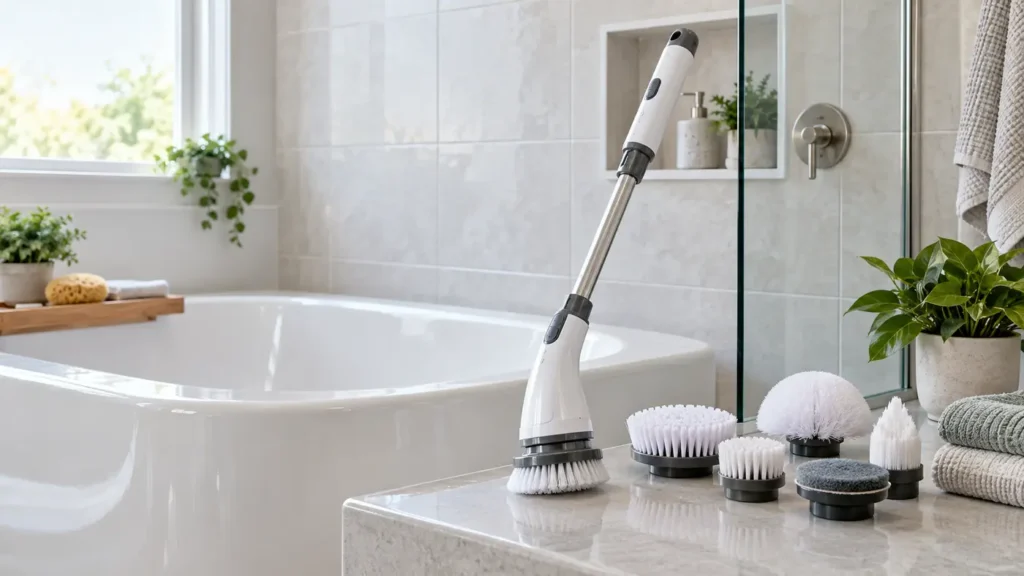
Cordless electric spin scrubber with brush heads beside a clean bathtub
Laundry & Cleaning

Best Electric Spin Scrubber for Bathrooms: Buying Guide

Disclosure: This post contains affiliate links. If you buy through one of our links, we may earn a commission at no extra cost to you. Use only on surfaces and with cleaners approved by the scrubber and surface manufacturers. Keep charging equipment dry.

An electric spin scrubber can reduce repetitive hand motion when cleaning tubs, tile, grout and shower walls. It does not replace the correct cleaner or safe technique, and a powerful brush can damage delicate finishes if used carelessly.

The most useful models combine comfortable reach, controlled speed, several genuinely different brush shapes and replacement heads you can buy later.

Quick verdict

Choose a cordless scrubber with an adjustable handle, two practical speeds, a flat brush for broad surfaces, a corner brush for edges and a rounded brush for tubs. Prioritize grip, balance and replaceable heads over a huge accessory count.

Useful brush-head shapes

Choice Best for Advantage Watch for
Flat brush Tile, shower walls and floors Covers broad areas quickly Can skip deep corners
Corner brush Grout lines and tight edges Concentrates contact Too aggressive for some sealants
Dome brush Tubs, sinks and curved surfaces Follows rounded shapes Less efficient on flat walls
Soft pad Delicate approved surfaces Gentler contact May have limited scrubbing power

Handle length and balance

A telescoping handle can reduce bending, but full extension increases leverage and can feel top-heavy. Check whether the head angle locks securely and whether the controls remain reachable.

For close work around faucets, a removable short-handle mode is valuable.

Speed and torque

Two useful speeds are enough for most bathrooms. A high speed can fling cleaner or overload the brush against a resistant surface. Good torque maintains motion with light pressure; pressing harder is not always safer or more effective.

Battery and charging

Compare realistic runtime, full charging time and whether the battery is replaceable. A common USB charging connection is convenient only when the port cover seals properly. Never charge the tool in a wet area.

Water resistance

Water resistance does not mean the entire tool can be submerged. Read the exact splash or immersion rating and keep the charging port closed. Rinse removable heads separately when instructed.

Surface compatibility

Test an inconspicuous spot first. Abrasive brushes or cleaners can haze acrylic, scratch soft stone, wear grout sealer or damage coatings. Let chemistry do part of the work instead of forcing the brush.

Cleaning method

  1. Ventilate the bathroom.
  2. Apply an approved cleaner and allow proper dwell time.
  3. Start at low speed with light pressure.
  4. Work from cleaner upper areas downward.
  5. Rinse the surface and brush head.
  6. Dry the tool before storage and charging.

Replacement heads

Brush heads are wear items. Confirm their cost and availability before buying the tool. Proprietary heads can make an inexpensive scrubber costly to keep using.

Common buying mistakes

  • Assuming waterproof means submersible
  • Using a stiff brush on delicate acrylic or stone
  • Pressing so hard the motor stalls
  • Buying many duplicate heads instead of useful shapes
  • Charging near a wet tub or sink
  • Ignoring replacement-brush availability

Frequently asked questions

Can it clean grout?

A corner brush can help, but choose the cleaner and bristle stiffness carefully so grout and sealant are not damaged.

Will it remove mold?

It may remove surface residue, but recurring mold needs moisture control and appropriate remediation.

Can I use it on glass?

Only with a head and cleaner approved for that glass. Abrasive pads can scratch.

How long should the battery last?

Runtime varies with speed and pressure. Compare tested runtime and charging time rather than a best-case claim.

Do I still need cleaner?

Usually, yes. The scrubber supplies motion; the correct product loosens the soil.

Shop electric spin scrubbers

Compare handle length, brush-head shapes, battery runtime, charging method, splash rating and replacement brushes.

Shop Amazon USA Shop Amazon Canada

Who should buy it—and who should skip it

Buy it if: you want to reduce scrubbing effort on tubs, tile, grout, and shower walls and can safely control a powered brush on wet surfaces.

Skip it if: your surfaces are delicate, the brush would be awkward to control, or ordinary hand tools already handle the job.

Best value

A cordless scrubber with replaceable medium-stiffness heads, a comfortable handle, and straightforward charging is the best value for most bathrooms.

When the upgrade is worth it

Pay more for better balance, longer reach, useful head shapes, and readily available replacement brushes. Extra speed modes matter less than control and head availability.

Final answer

A well-balanced cordless spin scrubber with an adjustable handle and four useful head shapes is the best choice for most bathrooms. Use light pressure, respect surface limits and buy only when replacement brushes are readily available.

For broader cleaning tools, see our cordless vacuum guide and 10-minute evening reset.

Compact clothes steamer beside freshly steamed shirts in a bright bedroom
Laundry & Cleaning

Best Clothes Steamer for Home: What to Look For

Disclosure: This post contains affiliate links. If you buy through one of our links, we may earn a commission at no extra cost to you. Test delicate fabric in an inconspicuous area, keep steam away from skin and never steam clothing while it is being worn.

A clothes steamer is useful for relaxing wrinkles in hanging shirts, dresses, curtains and travel clothing without setting up an ironing board. The best model is the one you can hold comfortably when the water tank is full and use without drips, awkward refilling or a stiff trigger.

Handheld and upright steamers suit different routines. Heat-up claims matter less than steady output, safe fabric guidance and how easily the unit empties and dries.

Quick verdict

Choose a balanced handheld steamer with continuous-steam lock, a visible removable tank, a long cord and a stable heat-resistant base. Pick an upright model only when you steam several garments at once and have room to store the hose, pole and reservoir.

Handheld vs upright steamers

Choice Best for Advantage Watch for
Handheld Travel and a few garments Compact and quick to store Smaller tank and more hand weight
Upright Frequent multi-garment sessions Larger tank and hanging pole More floor space and setup
Travel steamer Suitcase use Very small footprint Lower output and voltage limitations
Iron-steamer hybrid Crisp collars plus general steaming Two tools in one Heavier and more complicated

Steam output and heat-up time

A fast heat-up is convenient, but steady steam matters more. Look for clear ready indicators and at least two steam levels if you handle both delicate and sturdy fabrics. A machine that spits water can mark clothing and slow the job.

Use distilled or tap water only as the manual directs. Water requirements vary, and the wrong choice can increase mineral buildup.

Tank design

A removable transparent tank is easier to fill and lets you see when water is low. Check usable capacity rather than the size of the entire steamer. A large tank extends runtime but makes a handheld model heavier.

Look for a cap that seals securely and an opening large enough to drain completely after use.

Comfort and control

Grip shape, full weight and button pressure determine whether a steamer is pleasant to use. A continuous-steam lock reduces hand fatigue, while a trigger gives precise control. A stable base prevents the hot head from tipping between garments.

Fabric attachments

A fabric brush can help steam reach heavier material; a crease tool may sharpen trouser lines; a lint pad is convenient but not essential. Follow garment labels and keep the head moving. Velvet, structured tailoring and delicate trims may require professional care.

Cord, hose and storage

A longer cord lets you reach a hanging garment without an extension cord. For upright units, check hose flexibility, pole height and how the parts collapse. Store only after the appliance is cool, empty and dry.

Safe steaming routine

  1. Hang the garment securely with space behind it.
  2. Fill and heat the steamer as directed.
  3. Test delicate material in a hidden area.
  4. Pull fabric gently from the edge, keeping hands away from steam.
  5. Work top to bottom and allow the garment to dry before wearing.

Care and descaling

Empty unused water, wipe the head after cooling and descale on the manufacturer’s schedule. Do not add fragrance, starch or cleaning chemicals unless explicitly approved. Mineral deposits can reduce output and cause spitting.

Common buying mistakes

  • Buying a large tank without considering full weight
  • Steaming a garment while someone is wearing it
  • Ignoring the garment care label
  • Using unapproved scented water or additives
  • Packing the steamer before it is cool and dry
  • Choosing a short cord for the available outlet

Frequently asked questions

Can a steamer replace an iron?

It can handle everyday wrinkles, but an iron is better for crisp collars, cuffs and sharp creases.

Can I steam curtains while hanging?

Often, yes, if the fabric permits it and the area is safe. Protect nearby walls, windows and electrical items from moisture.

Why does a steamer spit water?

The unit may not be fully heated, mineral buildup may be present, or it may be tilted beyond the allowed angle.

Is a travel steamer dual voltage?

Not automatically. Check the exact electrical rating and use only approved travel arrangements.

How should I store it?

Let it cool, empty and dry the tank, then store upright or as directed.

Shop clothes steamers

Compare weight, usable tank capacity, steam control, cord length, included attachments and fabric instructions.

Shop Amazon USA Shop Amazon Canada

Who should buy it—and who should skip it

Buy it if: you regularly refresh shirts, dresses, curtains, or travel clothes and want faster setup than an ironing board.

Skip it if: you mainly press sharp creases, handle fabrics that should not be steamed, or rarely need wrinkle removal.

Best value

A compact steamer with steady output, a comfortable grip, and a tank large enough for a few garments is the best value for most homes.

When the upgrade is worth it

Pay more for faster heat-up, steadier steam, a larger removable tank, and better anti-drip design when you steam several garments at a time. More attachments alone are not a strong upgrade.

Final answer

For most homes, a comfortable handheld steamer with a removable tank, continuous-steam option and stable base offers the best balance of performance and storage. Choose an upright steamer only for frequent larger sessions.

For a better laundry setup, see our small-space hamper guide and laundry room ideas.

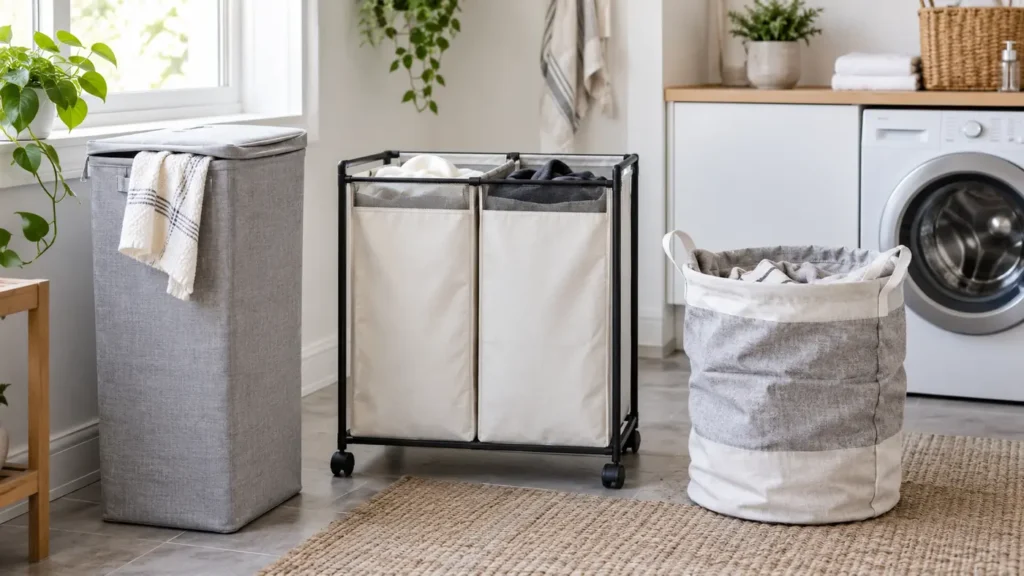
Laundry hampers in a bright laundry room
Laundry & Cleaning

Best Laundry Hamper for a Small Space: Buying Guide

Disclosure: This post contains affiliate links. If you buy through one of our links, we may earn a commission at no extra cost to you. Check weight limits, ventilation and care instructions before use.

A laundry hamper earns its space only when it is easy to fill, carry and empty. In a small home, the wrong shape can block a walkway or become a permanent pile beside the washer. The best hamper matches the route from bedroom to laundry area as well as the amount of laundry it holds.

Quick verdict

Choose a tall, slim hamper for a narrow bedroom corner; a divided hamper when sorting at the source saves time; or a flexible basket when it must fold away. Look for ventilation, a washable liner, reinforced handles and a capacity you can still lift when full.

Laundry hamper types

Type Best for Advantages Tradeoffs
Tall slim hamper Narrow bedroom or bathroom spaces Small footprint and tidy appearance Can become top-heavy or difficult to reach into
Divided sorter Families and regular sorting Separates loads before wash day Wider and more difficult to carry
Soft basket Carrying laundry between rooms Lightweight and easy to grip Less structured and may collapse
Rolling hamper Same-floor laundry routes Reduces lifting Needs smooth floors and storage room
Hanging hamper Very limited floor space Uses a door or wall Can stress hardware and hold less

Choose capacity by what you can carry

A very large hamper reduces the number of trips but becomes heavy and encourages laundry to accumulate. Choose a capacity close to one or two normal machine loads, depending on your routine. If stairs are involved, two smaller baskets may be safer and easier than one oversized bin.

Capacity labels in litres do not reveal how well bulky towels or bedding fit. Compare interior dimensions and opening size. A narrow mouth can make a tall hamper frustrating even when the listed volume looks generous.

Measure the floor footprint

Measure the exact spot, including baseboards, door swing and any nearby drawer. Tall tapered designs may be narrower at the floor than at the rim. Allow room for fingers around the handles and for removing an inner bag.

If the hamper will sit in a closet, check shelf height and ventilation. In a bathroom, keep it away from splash zones and do not put damp towels into a closed, unventilated container for long periods.

Ventilation and damp laundry

Air holes, mesh panels or a breathable liner help moisture escape. Ventilation does not make it safe to leave wet fabric bunched for days, but it reduces the sealed environment that encourages odors.

A lid hides laundry and can make a room look calmer. Choose one that opens easily with one hand and still allows airflow. A heavy lid or stiff hinge may be annoying when carrying clothes.

Handles that survive a full load

Handles are a common failure point. Moulded openings in a rigid basket spread the load, while stitched fabric handles need reinforcement. Rope handles are comfortable but can pull through weak sidewalls.

Lift the empty hamper as you would when full. Handles near the top suit a short carry; side handles may be easier on stairs. A removable liner can become the carrying bag, but only if it has its own strong handles.

Divided hampers: useful or bulky?

A two- or three-section sorter saves time when household members reliably use it. Look for labels or different liner colours, equal sections that match actual wash loads and bags that lift out independently.

Skip the divider if you sort differently for each wash or if the frame consumes too much floor space. A single hamper and two lightweight baskets near the machine can be more flexible.

Cleaning the hamper

Washable liners are the easiest option. Rigid plastic can be wiped and dried quickly. Woven fibres and decorative fabric look warmer in a bedroom but may absorb moisture or collect dust.

Inspect seams, corners and the bottom. Let every part dry fully after cleaning. If odors return immediately, check whether damp clothing is being left inside or whether the room itself has a humidity problem.

Common buying mistakes

  • Buying the largest capacity without considering lifting
  • Measuring width but not lid or handle clearance
  • Choosing a narrow opening for bulky towels
  • Leaving damp laundry in a closed hamper
  • Selecting a divided sorter wider than the available wall
  • Ignoring how the hamper travels around corners or stairs
  • Buying a liner that cannot be removed or washed

Best setup by space

Small bedroom

Use a tall slim hamper with a lid, washable liner and broad stable base. Put it near the closet rather than in the main walkway.

Bathroom

Choose ventilation and moisture-tolerant materials. Keep it outside the direct shower or tub splash area.

Apartment laundry room

A compact divided sorter works when loads are frequent. If floor space is limited, use nested carrying baskets.

Stairs between bedroom and washer

Choose a light basket with two secure handles and a size that does not block your view of the steps.

Frequently asked questions

Is a lid worth having?

Yes for visual calm and containing ordinary laundry, provided the hamper remains ventilated and damp items are not left sealed inside.

Should I buy a divided hamper?

Only if the categories match your wash routine. It saves time when each section becomes a practical load.

Are fabric hampers washable?

Some liners are machine-washable, while the outer frame may be spot-clean only. Check the exact instructions.

What size is best for one person?

A moderate hamper holding roughly one or two normal loads is easier to manage than an oversized family sorter. Interior shape matters as much as listed litres.

Do rolling hampers work on carpet?

Performance varies with wheel size and carpet pile. Small casters often struggle on thick carpet, so check the route before buying.

Shop laundry hampers

Compare floor footprint, opening size, ventilation, removable liners, reinforced handles, section size and full-load portability.

Shop Amazon USA
Shop Amazon Canada

Who should buy it—and who should skip it

Buy it if: floor space is tight and you need a hamper that fits a specific route between bedroom, bathroom, and laundry area.

Skip it if: you have room for a standard basket or prefer carrying separate loads without a fixed sorter.

Best value

A narrow two-section hamper with removable washable bags is the best value for most small spaces because it sorts laundry without adding much footprint.

When the upgrade is worth it

Pay more for a sturdy frame, better wheels, ventilated washable liners, or a lid when those features solve a real daily problem. Extra compartments are only useful if you actually sort that many loads.

Final answer

The best small-space hamper is large enough for your normal laundry rhythm but light enough to carry when full. Choose a tall slim design for tight corners, a divided sorter for reliable pre-sorting or a flexible basket for frequent carrying. Ventilation, washable liners and reinforced handles matter more than decorative extras.

Make the whole room work better with our guide to creating a more pleasant laundry room and the 10-minute evening reset.

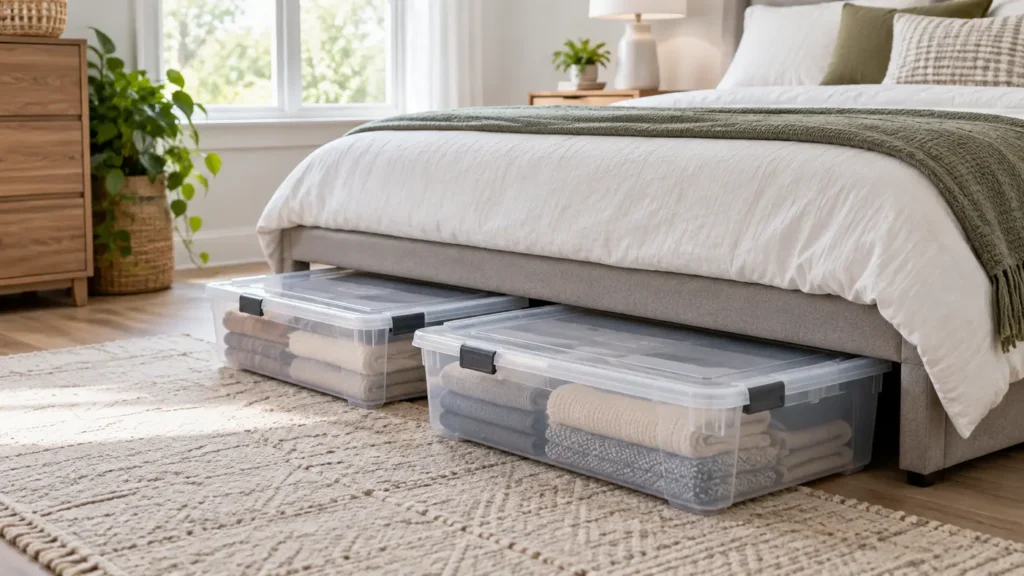
Clear lidded storage containers under a neatly made bed
Home Organization

Best Under-Bed Storage Containers: A Practical Buying Guide

Disclosure: This post contains affiliate links. If you buy through one of our links, we may earn a commission at no extra cost to you. Measure the actual clearance under your bed before ordering and do not overload containers beyond their rated capacity.

Under-bed storage can hold off-season clothing, spare bedding and rarely used items without adding another cabinet to the room. The wrong container, however, can waste half the space, collect dust, snag on carpet or become too heavy to pull out.

The best choice starts with accurate clearance, then balances structure, access, dust protection and the weight of what you plan to store.

Quick verdict

Choose a low-profile, lidded container with a rigid frame, smooth base or sturdy wheels, handles on at least two sides and enough transparency to identify contents. Fabric bags work for light bedding; rigid boxes protect structured items; rolling drawers are best for frequent access.

Under-bed storage types

Type Best for Advantages Tradeoffs
Rigid plastic box Clothing, shoes and dust protection Stackable, visible and easy to wipe Needs exact clearance and can crack
Fabric zip bag Blankets and soft seasonal items Light, flexible and inexpensive Can sag, snag or collapse when partly empty
Rolling drawer Items used weekly Fast access and easy movement Wheels add height and require clear flooring
Vacuum storage bag Bulky textiles for longer storage Reduces volume dramatically Awkward access and not ideal for every material

Measure clearance in several places

Do not rely on the height of one bed leg. Measure from the floor to the lowest point of the frame, centre support and any slats or hardware. Rugs, uneven floors and a sagging box spring can reduce clearance.

Leave a little extra space so the container does not scrape. If a box is listed at exactly the measured height, the lid, handles or wheels may still catch. Measure the usable depth from the side of the bed to any centre legs.

Plan what goes inside first

Light bedding can fill a large fabric bag without becoming difficult to move. Books, tools or dense shoes need a smaller rigid box. A giant container feels efficient until it weighs too much to pull out safely.

Group items by how often you use them. Weekly items belong near the easiest side of the bed. Seasonal items can go deeper. Keep emergency supplies or anything needed quickly somewhere more accessible.

Lids, zippers and dust control

A rigid snap lid offers good everyday dust protection, while a zipper bag fits soft items and can compress slightly. Look for a zipper that travels around at least two sides so you can open the bag without removing everything from beneath the bed.

Dust-resistant is not the same as airtight or waterproof. Under-bed containers should not be used to hide damp textiles, and they will not protect belongings from an active leak. Clean and fully dry every item before storage.

Wheels vs smooth bases

Wheels help on hard floors, particularly with frequent access, but they add height and can roll poorly across thick rugs. Small hard casters may mark delicate flooring or catch debris.

A smooth rigid base slides easily on many surfaces and uses less vertical space. On carpet, broad low-friction runners can work better than tiny wheels. Protect the floor according to its care instructions.

Handles and access

A front handle is essential. Side handles help when carrying the container to another room. Handles should be stitched through a reinforced area or moulded into the rigid body rather than attached to a thin panel.

Clear sides or a label window save time. If containers are opaque, label both the front and top because you may approach them from different sides of the bed.

What not to store under a bed

  • Damp clothing or textiles
  • Food or scented products that attract pests
  • Important documents without suitable environmental protection
  • Heavy objects in a flexible bag
  • Items needed during an emergency
  • Anything that blocks a floor vent, heater or required clearance

Vacuum bags: useful but not universal

Vacuum bags reduce the volume of comforters and seasonal clothing, but the compressed shape can become lumpy and difficult to stack. Some fillings and delicate materials may not respond well to long compression. Follow the textile care guidance.

Use a bag with a dependable valve and place it inside a protective outer container if abrasion is likely. Recheck it after a few days because slow leaks can make the bag expand and jam beneath the frame.

Common buying mistakes

  • Measuring only at the bed corner
  • Buying the tallest container that might fit
  • Choosing one huge box for dense items
  • Expecting a fabric bag to hold its shape when partly full
  • Ignoring centre legs and crossbars
  • Blocking floor vents or electrical cords
  • Storing items before they are fully clean and dry

Simple organization system

  1. Empty and clean the area beneath the bed.
  2. Measure height, depth and obstructions.
  3. Sort by season and frequency of use.
  4. Choose smaller containers for heavy items.
  5. Label the front and top.
  6. Make a short inventory note on your phone.
  7. Review the contents when seasons change.

This is especially effective when combined with our guide to organizing a bedroom without buying more furniture.

Frequently asked questions

Are fabric or plastic containers better?

Plastic provides more structure and easier cleaning. Fabric is lighter and suits soft items. Choose according to contents and access frequency.

Should under-bed boxes have wheels?

Wheels help on hard floors and with frequent use, but they reduce clearance. A smooth base may be better for shallow spaces.

Can I store clothes in vacuum bags?

Many everyday textiles can be compressed, but check garment and filling care guidance. Avoid long compression for items that may be damaged.

How do I prevent musty smells?

Store only clean, fully dry items and keep the room’s humidity under control. A sealed container cannot correct damp contents or an existing moisture problem.

How much clearance should I leave?

Leave enough margin to account for lids, handles, rugs and small variations in the frame. A little spare height makes daily use much easier.

Shop under-bed storage

Compare exterior height, usable interior size, frame rigidity, wheel height, lid security, handle strength and empty weight.

Shop Amazon USA
Shop Amazon Canada

Who should buy it—and who should skip it

Buy it if: you have unused clearance under the bed and need seasonal clothing, linens, or low-use items out of the main living space.

Skip it if: the bed clearance is too low, dust control is poor, or you need the stored items every day.

Best value

Low-profile zippered containers with a clear top and handles are the best value for soft goods. Rigid bins make more sense when stacking strength or crush protection matters.

When the upgrade is worth it

Pay more for stronger zippers, reinforced handles, wheels on heavier bins, and better dust sealing when the containers will be moved often. Decorative materials are rarely worth extra under a bed.

Final answer

The best under-bed storage is slightly shorter than your measured clearance, rigid enough for its contents and easy to pull from the side you use. Choose transparent lidded boxes for protection, fabric bags for light bedding and rolling drawers for frequent access. Several manageable containers usually work better than one oversized bin.

For more practical storage ideas, see the most overlooked storage space in your home and how to reduce visual clutter.

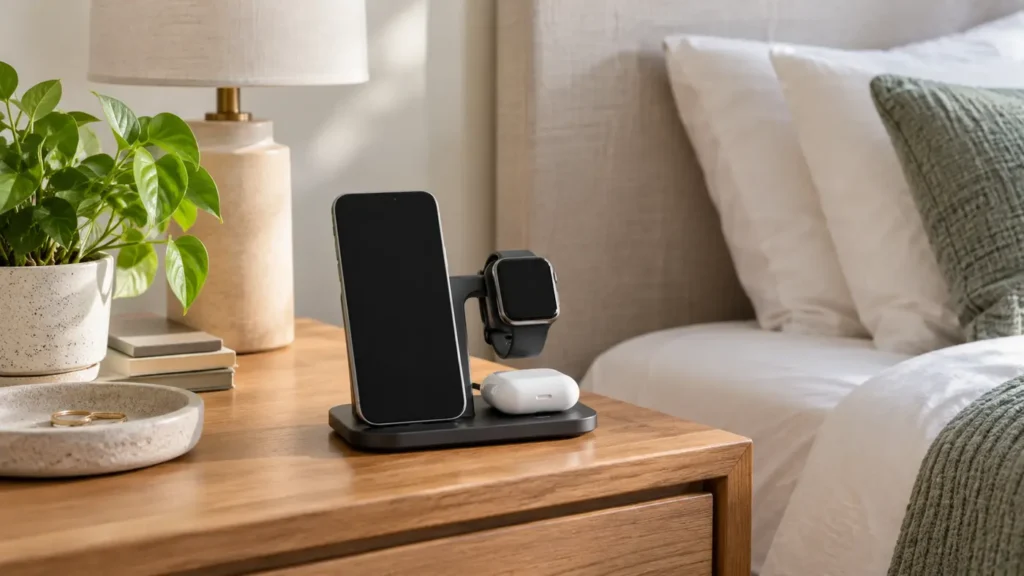
Bedside charging station holding a phone, smartwatch and wireless earbuds
Smart Home

Best Bedside Charging Station: What to Look For

Disclosure: This post contains affiliate links. If you buy through one of our links, we may earn a commission at no extra cost to you. Use certified chargers and cables that match your devices, and follow the manufacturer’s electrical and heat-safety instructions.

A bedside charging station can replace a tangle of cables with one predictable place for a phone, watch and earbuds. The useful ones do more than look tidy: they align devices reliably, supply the correct power and let you pick up a phone without dragging the entire stand across the nightstand.

This guide covers wireless stands, three-in-one docks, cable organizers and the compatibility details that matter before you buy.

Quick verdict

Choose a weighted charging stand with clearly stated phone, watch and earbud compatibility, a certified power adapter included, non-slip feet and easy alignment in the dark. If you change devices often, a cable organizer or modular stand may last longer than a tightly integrated three-in-one dock.

Charging station types

Type Best for Advantages Tradeoffs
Three-in-one wireless dock Matching phone, watch and earbud ecosystem Cleanest setup and one power cord Compatibility can be narrow
Magnetic phone stand Phone-first charging and bedside viewing Easy alignment and upright screen Requires compatible phone or case
Multi-port wired charger Mixed device households Flexible cables and faster charging options More visible wires
Cable-management tray Renters and frequently changing devices Uses existing chargers and is easy to update Less polished than an integrated dock

Compatibility comes first

A station can physically hold a device and still charge it slowly or not at all. Check the exact phone model, watch generation, earbud case and protective case thickness. Watch chargers are especially ecosystem-specific, and some docks require you to install your original watch charging puck.

Magnetic alignment depends on both the phone and case. A thick wallet case, metal plate or misaligned magnetic ring can weaken the connection and increase heat. If you plan to upgrade soon, choose a modular design with replaceable cables or charging modules.

Included power adapter and real output

Some docks include only the stand and cable. Without a suitable wall adapter, the station may divide limited power among devices and charge more slowly than expected. Read what input the dock requires and whether the recommended adapter is included.

Large total-wattage numbers can be misleading because power is shared across ports. Check the maximum for each charging position when all devices are connected. Overnight charging does not require the absolute fastest speed, but it should be stable and compatible.

Wireless or wired at the bedside?

Wireless charging makes placement easy and reduces connector wear. An upright stand also keeps a clock or alarm visible. Wired charging is more efficient, can be faster and works with a wider range of devices.

If heat, energy use or maximum charging speed matters most, a well-managed wired setup may be the better choice. If convenience and reducing nightly cable fumbling matter most, wireless alignment wins.

Nightstand-friendly design

  • Weighted base: stays down when you lift the phone.
  • Non-slip feet: protects furniture and prevents sliding.
  • No bright status light: or a light that turns off automatically.
  • Small footprint: leaves room for a lamp, glasses and water.
  • Case-friendly spacing: prevents the camera bump or watch band from interfering.
  • Accessible controls: does not block phone buttons or alarm gestures.

Heat and safe placement

Charging creates heat, and wireless charging can feel warmer than a cable. Keep the dock on a hard, open surface instead of under bedding, papers or clothing. Remove anything that the phone or charger maker says can interfere, and stop using equipment that is damaged, discoloured, unusually hot or making noise.

Do not balance a dock on a narrow shelf where a phone can fall. Route the power cord along the back of the nightstand and leave enough slack that moving the table does not pull the plug.

Case and camera-bump problems

Modern phones can have thick camera sections that prevent the back from sitting flat. Look for a raised charging pad or adjustable support. Folded stands are convenient for travel, but the hinge must stay firm under the phone’s weight.

Cases with cards, magnets not intended for charging or metal kickstands may need to be removed. Confirm compatibility instead of assuming “case-friendly” covers every case.

When a simple cable organizer is better

A cable organizer costs less, works with mixed devices and lets you replace one charger at a time. It is often the best choice for couples using different phone brands or for anyone expecting to upgrade watches.

Use short, high-quality cables and label them if several connectors look similar. A small weighted cable holder keeps ends from falling behind the table without locking you into one dock.

Common buying mistakes

  • Assuming every watch uses the same wireless standard
  • Buying a dock without checking whether the adapter is included
  • Ignoring charging speed when all positions are occupied
  • Using a thick or metal-backed case that prevents alignment
  • Accepting a bright status light beside the bed
  • Choosing a lightweight stand that lifts with the phone
  • Covering the charger with bedding or clothing

Frequently asked questions

Is overnight wireless charging safe?

Use compatible, undamaged equipment from reputable sources and follow device instructions. Modern devices manage charging, but placement, heat and charger quality still matter.

Will a three-in-one charger work with any phone and watch?

No. Phone standards overlap more often than watch standards. Check exact model compatibility for every position.

Do I need a magnetic case?

For a magnetic stand, a compatible case usually gives the most reliable hold and alignment. Ordinary thick cases may weaken the connection.

Why is my phone charging slowly?

The wall adapter may be undersized, power may be shared, the device may be misaligned, or heat may be limiting speed. Check the approved setup.

Is wired charging better?

It is generally more efficient and flexible. Wireless charging is mainly about placement convenience and reducing cable handling.

Shop bedside charging stations

Compare exact compatibility, per-device output, included adapter, case fit, light behaviour, base weight and cord routing.

Shop Amazon USA
Shop Amazon Canada

Who should buy it—and who should skip it

Buy it if: several devices charge beside the bed and you want fewer loose adapters and cables on the nightstand.

Skip it if: one charger already covers your needs or the station would crowd a small bedside surface.

Best value

A compact certified charging station with enough ports for the devices you actually use is the best value. Fewer good ports beat a crowded unit full of connectors you do not need.

When the upgrade is worth it

Pay more for higher-power USB-C charging, a well-designed wireless pad, and replaceable cables when your devices can use those features. Do not pay extra for excessive port count alone.

Final answer

A weighted, dark, case-compatible charging stand is the best bedside choice for people with matching devices. Mixed-device homes are often better served by a quality multi-port charger and tidy cable holder. Buy for exact compatibility and included power—not for the number of charging symbols printed on the box.

For broader cable control, see why every home needs a charging station. For a calmer setup, pair it with our white noise machine guide.

Compact white noise machine on a calm bedroom nightstand
Bedroom & Comfort

Best White Noise Machine for a Bedroom: Buying Guide

Disclosure: This post contains affiliate links. If you buy through one of our links, we may earn a commission at no extra cost to you. Keep listening levels comfortable and follow the product instructions, especially when using sound near infants or children.

A white noise machine can soften the contrast between a quiet bedroom and sudden sounds such as traffic, hallway doors or a partner’s schedule. It does not remove noise; it creates a steady background that makes changes less noticeable. The right machine depends on sound character, volume control, speaker quality and whether you want fan-based noise or digital recordings.

Quick verdict

For most adults, choose a compact machine with precise volume steps, continuous non-looping sound, a physical power button, memory for the last setting and a fully dark display. Pick fan-based sound if you like natural airflow noise; choose digital sound if you want brown, pink, rain or other options.

Fan-based vs digital sound

Type Best for Advantages Tradeoffs
Mechanical fan sound People who dislike recordings Natural variation and no audible loop Fewer sound choices and moving parts
Digital noise Flexible bedrooms and travel White, pink, brown and nature options Poor models may reveal loops or harsh speakers
Smart speaker or app Occasional use Uses equipment you may already own Depends on connection, app and notification settings

White, pink and brown noise

These names describe how energy is distributed across frequencies. White noise sounds brighter and hissier. Pink noise reduces the emphasis on high frequencies and often feels more balanced. Brown noise puts more energy into lower frequencies and has a deeper rumble.

No colour is universally best. A deeper sound may mask low traffic rumble, while a brighter sound can cover higher-frequency household noise. Choose the one that feels neutral enough to ignore at a modest volume.

Volume control is the most important feature

A useful machine offers small, predictable volume steps. If the jump from quiet to loud is too large, finding a comfortable level becomes difficult. The lowest setting should be genuinely quiet for a calm bedroom, while the upper range should not be used as a substitute for hearing protection or soundproofing.

Place the machine between you and the main noise source when practical, rather than directly beside your head. Start low and increase only until interruptions become less noticeable. Louder is not automatically more effective.

Listen for loops and speaker quality

Short digital recordings can repeat with an obvious click, bird call or wave pattern. Once noticed, the loop can become more distracting than the original noise. Look for products described as non-looping or with long, smoothly blended recordings, then check owner feedback for repetition.

A small speaker can sound sharp or distorted at higher volumes. If you prefer brown noise, speaker quality matters because deeper frequencies need more capable hardware. A clean, even sound is more useful than a list of 40 similar tracks.

Bedroom-friendly controls

  • Physical buttons: easier to use without opening an app.
  • Setting memory: restores the preferred sound and volume.
  • Display-off mode: prevents unwanted light.
  • Timer plus continuous mode: supports both naps and overnight use.
  • Headphone-free operation: keeps ears clear and avoids wearing devices in bed.
  • USB-C or a common power connection: simplifies travel, when properly implemented.

Continuous play or timer?

A timer works when you mainly need help settling down. Continuous play is better when traffic or building noise may occur throughout the night. Some people notice when sound stops suddenly, so a gentle fade-out is preferable to an abrupt cutoff.

Check whether the timer is optional. A machine that always shuts off may not suit shift workers or light sleepers.

Travel and power

A travel machine should be compact but still stable on a nightstand. Battery operation helps during trips or outages, though batteries add charging responsibility. Confirm whether the machine can play while charging and how long it runs at a realistic volume.

For home use, a plug-in model avoids battery wear. Keep cords away from walking paths and do not place the machine where bedding blocks ventilation or controls.

Features you can skip

Colour-changing lights, dozens of lullabies and app accounts can add clutter without improving masking. A night-light is useful only if you want one; otherwise it is another source of glow. Bluetooth playback is convenient for music but not necessary for dependable noise.

Common buying mistakes

  • Choosing by the number of sounds instead of their quality
  • Ignoring the size of volume steps
  • Buying a display that cannot go completely dark
  • Placing the machine directly beside the pillow and turning it too loud
  • Relying on a cloud service or app for a basic overnight function
  • Assuming “white noise” is the only useful sound colour

How to set it up

  1. Identify the main source of disruptive sound.
  2. Place the machine between that source and the bed when practical.
  3. Select a steady sound with no distracting detail.
  4. Start at the lowest useful volume.
  5. Dim or disable every light.
  6. Test a timer and continuous mode on separate nights.

Frequently asked questions

Will a white noise machine block loud noise?

No. It masks changes and reduces contrast; it does not physically block sound. Sealing gaps, using curtains and addressing the source can help more.

Is brown noise better for sleep?

Some people prefer its deeper character, but comfort is personal. Choose the least noticeable sound that masks the disturbance at a modest level.

Can I use a phone app instead?

Yes, but notifications, battery management and speaker quality can make a dedicated machine more dependable.

Where should the machine go?

Usually between the bed and the noise source, with enough distance to avoid blasting sound at your ear. Follow the maker’s placement guidance.

Do I need nature sounds?

Only if you find them relaxing. Detailed rain, birds or waves may be distracting if the recording loop becomes obvious.

Shop white noise machines

Compare sound quality, volume steps, continuous play, timer behaviour, dark mode, memory and power options.

Shop Amazon USA
Shop Amazon Canada

Who should buy it—and who should skip it

Buy it if: steady background sound helps mask traffic, neighbours, or household noise at bedtime.

Skip it if: you sleep well in a quiet room, dislike continuous sound, or need to address a specific noise source directly.

Best value

A simple machine with non-looping sound, precise volume control, and a warm dim display is the best value for most bedrooms.

When the upgrade is worth it

Pay more for better speaker quality, more precise volume steps, timer memory, or reliable app-free controls. Extra sound libraries are not worth much if you use only one or two settings.

Final answer

The best white noise machine is the one you stop noticing. Prioritize smooth sound, fine volume control, a dark display, setting memory and reliable continuous play. A simple digital model suits most bedrooms; a mechanical fan machine is ideal if natural sound matters more than variety.

For a calmer bedroom, pair it with our blackout curtain guide and bedroom humidifier guide.

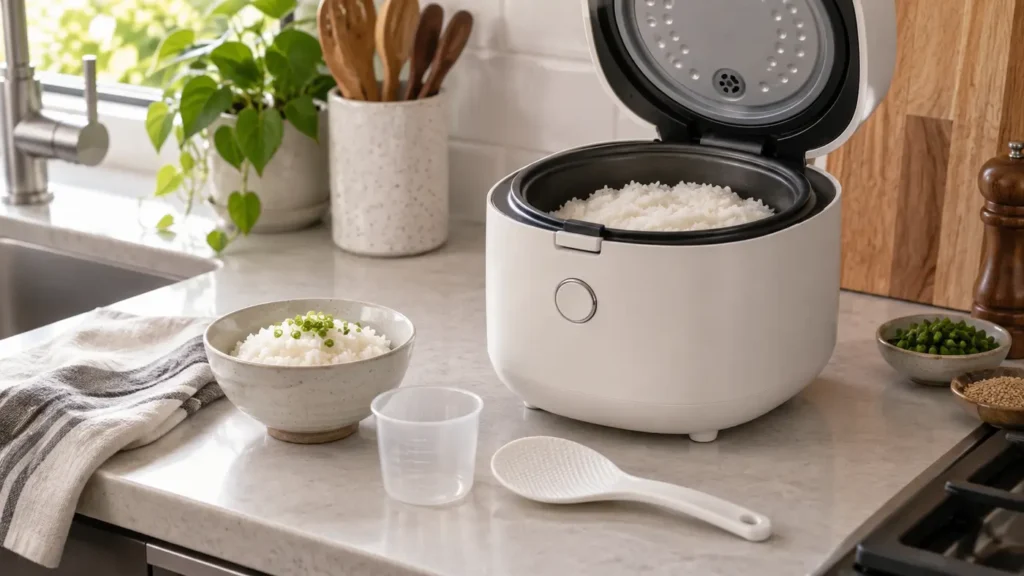
Compact rice cooker open with cooked rice on a modern kitchen counter
Kitchen & Dining

Best Rice Cooker for a Small Kitchen: Size and Features Guide

Disclosure: This post contains affiliate links. If you buy through one of our links, we may earn a commission at no extra cost to you. Follow the appliance instructions for measuring, steam release, food holding, cleaning and electrical safety.

A rice cooker can turn a basic side dish into a dependable part of meal preparation. Add measured rice and water, start the cycle and let the appliance switch to warm when cooking is complete. The challenge is choosing a cooker that matches your household without occupying more counter space than it earns.

Capacity labels can be confusing, fuzzy logic is not essential for everyone, and a long menu of programs can hide awkward cleaning. This guide focuses on practical size, bowl quality, controls and keep-warm performance.

Quick verdict

For one or two people, a compact three-cup cooker is usually enough; larger households and batch cooks often suit a five- or six-cup model. Choose a removable inner lid or easy-to-clean lid area, a clearly marked bowl and controls you will use. A simple one-touch cooker is excellent value for white rice, while fuzzy-logic models better suit several rice types and people who want more automatic adjustment.

Rice cooker types

Type Best for Advantages Tradeoffs
Basic switch cooker White rice and simple meals Affordable, quick to learn, few controls Less adjustment for different grains
Fuzzy-logic cooker Several rice varieties Adjusts time and temperature during the cycle Higher cost and longer programs
Pressure or induction cooker Enthusiasts seeking texture control Advanced heating and specialized programs Expensive, heavier and more complex
Multi-cooker Homes replacing several appliances Rice plus pressure, slow-cook or steam functions Larger footprint and more complicated interface

Understand the cup measurement

Many rice cookers include a small measuring cup that is not the same as a standard North American cup. Capacity is commonly stated in uncooked rice using the supplied cup. The cooked amount becomes much larger.

Use the included cup and the bowl’s matching water lines unless the recipe or manual says otherwise. Replacing it with a standard kitchen cup while following the same markings can produce poor results. Keep the supplied cup with the cooker or note its volume before it disappears into a drawer.

Choose capacity from real meals

A small cooker is easier to store and may handle small portions better. An oversized cooker can perform poorly below its minimum quantity and wastes counter space. Think about the largest normal batch, not a once-a-year gathering.

  • One or two people: a compact three-cup uncooked capacity is a practical starting point.
  • Three or four people: five to six cups offers room for leftovers.
  • Batch cooking: choose enough capacity for several meals, but confirm storage and minimum batch size.

Marketing varies, so compare the stated uncooked and cooked capacities as well as the physical dimensions.

Inner bowl materials and coatings

Most household rice cookers use an aluminum-based bowl with a nonstick coating. These release rice easily but should be used with the supplied plastic or silicone paddle. Replace a bowl when its coating is deeply scratched, peeling or damaged.

Stainless-steel bowls avoid a nonstick coating but can require more careful water ratios and cleanup. Ceramic-coated bowls may feel substantial, though they can still chip or wear. Check whether replacement bowls are sold before choosing an expensive model.

Keep-warm quality matters

Automatic keep-warm is convenient, but it is not a license to leave rice indefinitely. Good models hold an even temperature without drying the top or browning the bottom too quickly. The safe and recommended holding time depends on the appliance and food-safety guidance.

If you usually serve rice immediately, a basic warmer is enough. If family members eat at different times, look for an elapsed-time display, an easy reheat function and owner feedback about texture after several hours.

Programs you may actually use

  • White rice: the everyday standard.
  • Brown rice: uses a longer hydration and cooking cycle.
  • Quick cook: useful when texture can be slightly less refined.
  • Porridge: designed for higher water ratios and longer cooking.
  • Steam: can cook vegetables or proteins in a basket, subject to the manual.
  • Reheat: restores warm rice more gently than starting a full cycle.

Cake, yogurt and specialty programs add value only when you plan to use them. A clear interface with four useful modes beats a confusing panel with fifteen.

Lid design and cleaning

Steam carries starch into the lid and vent. A removable inner lid and detachable steam cap make thorough cleaning easier. Fixed lids can still work well if the accessible surfaces are smooth and the condensation collector is simple to empty.

Wash the bowl and accessories as directed, wipe the heating plate after it cools and keep the temperature sensor free of rice grains. The outside of the bowl should be dry before it returns to the cooker. Never immerse the main body.

Counter space and cord storage

Measure the cooker with the lid fully open. Steam needs clearance from upper cabinets, and the lid should not hit a shelf. A retractable or detachable cord can make storage easier, while a carrying handle is useful if the cooker moves between a cupboard and counter.

Place the cooker on a stable, heat-resistant surface away from a wall that could be damaged by repeated steam. Do not operate it beneath a closed shelf without the clearance required by the manual.

Common buying mistakes

  • Confusing the supplied rice cup with a standard measuring cup
  • Buying capacity for rare events instead of normal meals
  • Ignoring the minimum batch size
  • Choosing many programs with a difficult interface
  • Using metal utensils in a coated bowl
  • Forgetting to clean the inner lid, vent and condensation collector
  • Assuming keep-warm means unlimited safe storage

Getting better rice

  1. Measure with the supplied cup.
  2. Rinse only as appropriate for the rice type and package directions.
  3. Use the matching bowl line or recommended water ratio.
  4. Level the rice before cooking.
  5. Keep the outside of the bowl clean and dry.
  6. After the cycle, rest the rice as directed, then fluff with the proper paddle.

Freshness, rice variety, altitude and water hardness can change the ideal ratio. Make small adjustments and record what works instead of changing several variables at once.

Frequently asked questions

Is a three-cup rice cooker enough for two people?

Usually, yes. Confirm whether the rating refers to uncooked rice and compare it with your normal serving size and desire for leftovers.

Is fuzzy logic worth it?

It is useful when you cook several rice types or want the cooker to compensate for small measuring differences. For basic white rice, a simple model can be excellent.

Can I cook quinoa or oatmeal?

Many cookers can handle other grains, but ratios and foaming behavior vary. Use a program and recipe approved for the model.

Can I leave rice on warm overnight?

Do not assume so. Follow the manufacturer’s holding-time guidance and food-safety recommendations. When in doubt, cool leftovers promptly and refrigerate them.

Why does rice stick to the bottom?

Possible causes include an unsuitable ratio, damaged coating, incorrect program, very long warming or starch buildup. Check the bowl and repeat the manual’s standard method.

Shop rice cookers

Compare true uncooked capacity, minimum batch, bowl replacement, removable lid parts, keep-warm controls and lid-open dimensions.

Shop Amazon USA
Shop Amazon Canada

Who should buy it—and who should skip it

Buy it if: you cook rice regularly and want repeatable results with less stove attention.

Skip it if: you rarely make rice, already get consistent stovetop results, or do not have storage room for another appliance.

Best value

A compact three-cup class cooker with dependable keep-warm performance is the best value for one or two people.

When the upgrade is worth it

Pay more for better fuzzy-logic control, useful grain settings, a removable lid, and easier cleaning when rice is a frequent staple. Large capacity is not an upgrade for a small household.

Final answer

Pick the smallest rice cooker that comfortably handles your normal largest batch. A simple three-cup model is strong value for one or two people, while a five- or six-cup fuzzy-logic cooker suits families and multiple rice types. Prioritize easy lid cleaning, a replaceable bowl and useful keep-warm controls over a long program list.

Organize the results with our food storage container guide, and compare another compact appliance in our immersion blender guide.

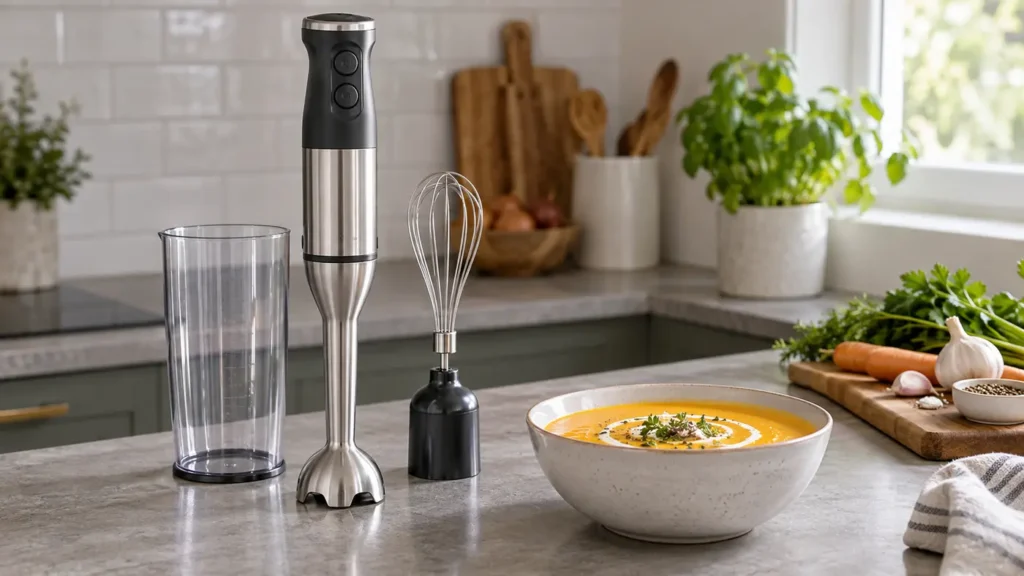
Immersion blender with blending cup and whisk attachment in a bright kitchen
Kitchen & Dining

Best Immersion Blender: Features That Actually Matter

Disclosure: This post contains affiliate links. If you buy through one of our links, we may earn a commission at no extra cost to you. Keep hands and utensils away from the blade, unplug before cleaning or changing attachments, and follow the manufacturer’s instructions.

An immersion blender can puree soup in the pot, make a quick smoothie in a cup and emulsify dressing without taking over the counter. It is one of the most space-efficient small appliances, but only when the motor body is comfortable to hold and the blending head is designed to control splashing.

The best model for most kitchens is not the one with the largest wattage claim or the biggest attachment bundle. Control, balance, shaft length, guard shape and cleaning are more important.

Quick verdict

Choose a variable-speed immersion blender with a stainless-steel removable shaft, a comfortable trigger or dial, and a blade guard that can move food without scratching cookware. A blending cup is useful; a whisk is worthwhile if you will actually use it. Buy a mini chopper attachment only when it replaces another appliance.

Immersion blender configurations

Setup Best for Advantages Tradeoffs
Basic blender Soups, sauces and dressings Lowest clutter and simplest cleaning Fewer extra jobs
Blender plus whisk Cream, eggs and light batters Useful second function with little storage Not a replacement for a heavy mixer
Multi-piece kit Small kitchens replacing several tools Can include cup, whisk, chopper and masher More parts, lids and storage
Cordless Fast jobs away from an outlet No cord around the pot Battery charging, weight and long-term replacement

Control matters more than maximum power

A powerful motor helps with fibrous vegetables and thicker mixtures, but a blender that jumps to full speed can throw hot soup up the sides of the pot. Progressive trigger control or several genuinely distinct speeds give you a gentler start.

Wattage is not a direct guarantee of blending performance. Blade geometry, guard openings, motor efficiency and how easily ingredients circulate all matter. Look for consistent results and manageable vibration rather than shopping by one number.

Choose the right shaft length

A longer shaft reaches into stockpots and tall pitchers, while a shorter shaft can feel easier to control in a small saucepan. Measure the containers you use most. The blade head needs to stay submerged, but the motor housing should remain well above the food.

A removable shaft is easier to wash and store. Stainless steel tolerates hot-food use better than some plastic shafts, but always confirm the model’s temperature limits. Never immerse the motor body.

Blade guard design and cookware

The bell around the blade controls circulation and helps protect the blade from the pot. Wide openings move thick food more freely; a very closed guard may trap chunks. Some guards have soft edges intended to reduce scratching, though safe technique is still important.

Keep the head slightly tilted and move slowly through the food rather than pressing hard against the bottom. If your cookware has a delicate nonstick coating, confirm the manufacturer’s recommendation before allowing a metal guard to touch it.

Corded or cordless?

A corded immersion blender is usually lighter, always ready and better suited to longer sessions. Check cord length and where the outlet sits in relation to your stove and prep area. Keep the cord away from heat, water and the pot rim.

Cordless models remove the cord from the workspace but add battery weight. Consider charging time, runtime, battery availability and whether the appliance can operate while charging. A cordless tool is only convenient if it is charged when you need it.

Attachments worth having

  • Blending cup: helps with small batches and gives the blade enough depth to work.
  • Whisk: useful for whipped cream, eggs and thin mixtures.
  • Mini chopper: valuable for herbs, nuts and onions when it truly replaces a separate chopper.
  • Potato masher: can produce an even texture without overworking starch when used correctly.

Attachment bundles often look like a bargain, but each part needs storage and cleaning. Start with the jobs you already do. A basic blender that lives within reach will be used more than a large kit buried in a cupboard.

Comfort and one-handed use

Weight is concentrated in the handle, so a small difference becomes noticeable during a long blend. Look for a grip you can hold securely with dry or slightly damp hands. Buttons should not require excessive pressure, and speed controls should be reachable without changing your grip.

If hand strength is limited, a lock-on design may feel easier than holding a stiff trigger, but it also requires careful control. Try the grip in person when possible and check the total assembled weight rather than motor weight alone.

Reducing splashes

  1. Use a container tall enough for the food volume.
  2. Submerge the blade guard before starting.
  3. Begin at low speed.
  4. Keep the head below the surface while the blade is moving.
  5. Stop the motor before lifting it out.
  6. Let very hot mixtures cool to the recommended temperature.

Do not fill a narrow cup so high that movement has nowhere to go. For hot soup, remove the pot from active heat and work in controlled pulses. Never blend in a container that can tip or shatter.

Cleaning and storage

Unplug the blender or disconnect the power unit before removing the shaft. Wash the detachable components as directed and take care around the sharp blade. If the shaft is dishwasher-safe, check whether the top rack is required. The motor body usually needs only a damp cloth.

Rinse soon after blending sticky foods so residue does not dry around the guard. Dry connections completely before reassembly. Store the shaft where its blade cannot be reached accidentally and where the coupling is not carrying the appliance’s weight.

Common buying mistakes

  • Buying the largest attachment kit without storage space
  • Choosing by wattage alone
  • Ignoring the assembled weight and button pressure
  • Using a metal guard carelessly on delicate cookware
  • Assuming every shaft is safe in very hot food
  • Expecting an immersion blender to crush large amounts of ice
  • Forgetting to check replacement attachment availability

Who may prefer a countertop blender?

A countertop blender is better for large smoothies, frequent ice crushing, very silky purees and jobs that need a closed jar. An immersion blender wins for soup in the pot, quick sauces, small batches and easy storage. Many homes need only one, so choose from the tasks you perform every week.

Frequently asked questions

Can an immersion blender blend hot soup?

Many are designed for soup, but the model’s temperature guidance must be followed. Remove the pot from active heat, keep the head submerged and start slowly to reduce splashing.

Can it replace a regular blender?

It can for soups, sauces, dressings and some smoothies. It is less suitable for large frozen drinks, heavy ice crushing or consistently ultra-smooth results.

Is a cordless model better?

It is more convenient around the pot, but usually heavier and dependent on a charged battery. A corded model is the better-value choice for many kitchens.

Do I need variable speed?

Yes, if you make hot soup or small batches. A gentle starting speed improves control and reduces splashing.

Will it scratch my pot?

It can if a hard metal guard is pressed or dragged against a delicate surface. Check both appliance and cookware instructions and use careful technique.

Shop immersion blenders

Compare grip comfort, variable-speed control, shaft length, guard material, attachment usefulness and cleaning instructions.

Shop Amazon USA
Shop Amazon Canada

Who should buy it—and who should skip it

Buy it if: you make soups, sauces, smoothies, or purées directly in a pot or tall container and value quick cleanup.

Skip it if: you mainly crush ice, make large frozen drinks, or need the broader capacity of a countertop blender.

Best value

A corded immersion blender with a removable stainless shaft and simple variable speed is the best value for most kitchens.

When the upgrade is worth it

Pay more for better low-speed control, a more comfortable grip, and useful whisk or chopper attachments when you will actually use them. Extreme wattage claims alone are not a reason to upgrade.

Final answer

For most kitchens, the best immersion blender is a balanced corded model with variable speed, a removable stainless-steel shaft and a useful blending cup. Add a whisk if it matches your routine, but avoid paying for attachments you will store rather than use. Control and cleanup matter more than an extreme power claim.

For other compact countertop choices, see our countertop ice maker guide and electric kettle guide.

Scroll to Top