Kitchen & Dining

Practical ideas and products for cooking, dining and everyday kitchen life.

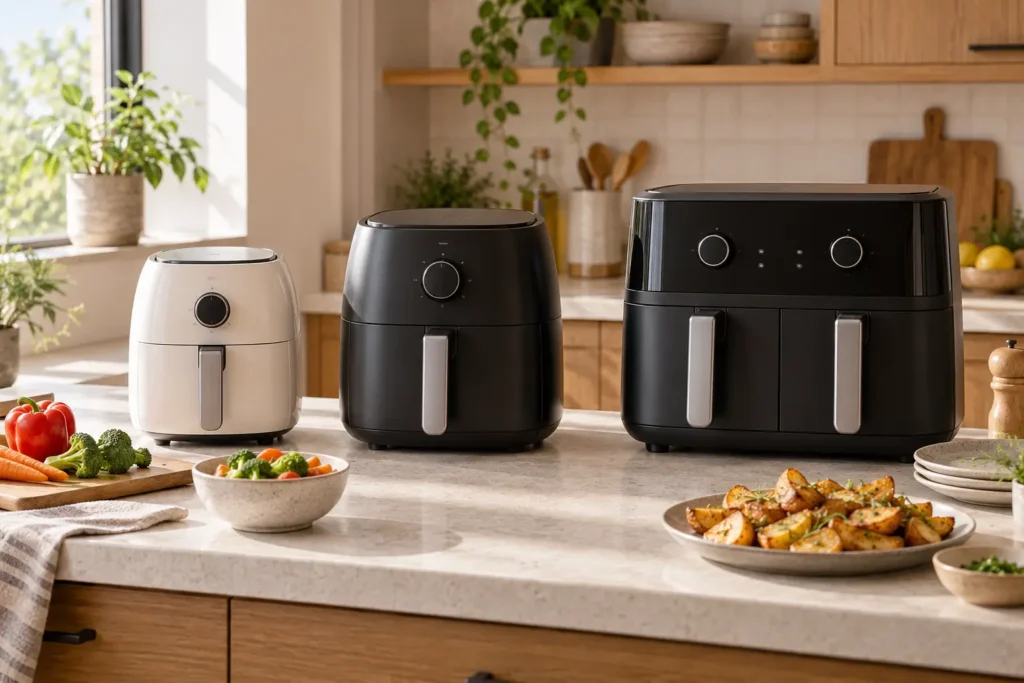
Three unbranded air fryers in compact, medium, and dual-basket sizes on a kitchen counter
Kitchen & Dining

Air Fryer Oven vs Basket Air Fryer

Disclosure: As an Amazon Associate, My Indoor Space may earn from qualifying purchases made through links in this guide, at no extra cost to you.

An air fryer toaster oven handles toast, baking, reheating, and larger flat foods. A basket air fryer is usually faster, easier to shake, and better at concentrating hot airflow around smaller portions. The better choice depends less on the word “air fryer” and more on what you cook most often.

Quick verdict

Choose a basket air fryer for the best combination of speed, compact cooking volume, simple cleanup, and reliable crisping. Choose an air fryer toaster oven when you need toast, open-face foods, wider pans, and one appliance to replace several countertop functions.

Who each style is for

A basket model is ideal for one to four people cooking fries, vegetables, wings, reheated pizza slices, and smaller proteins. It is also the better fit when you want fast preheating and parts that go to the sink easily.

An oven-style model suits someone who makes toast daily, wants to cook on a wider tray, or hopes to replace an older toaster oven. It needs more permanent counter space and more interior wiping.

Side-by-side comparison

Factor Basket air fryer Air fryer oven
Speed Usually faster for small portions Larger cavity can take longer
Crisping Strong concentrated airflow Depends on tray position and load
Food shape Deep basket Wide, flat trays
Toast Not practical Built for it
Cleanup Removable basket and plate More walls, racks, and crumb areas
Counter use Smaller footprint, often taller Wider and deeper

Best value: single-basket air fryer

A well-sized single basket is the value winner for most people. The removable cooking plate and compact chamber make it easier to load, shake, and clean. Straightforward temperature and time controls matter more than dozens of presets.

Choose capacity by usable cooking area, not only litres or quarts. A wider basket can cook food in one layer more effectively than a deeper basket with the same advertised volume.

Upgrade worth it: quality oven with easy-clean interior

An air fryer oven is worth the upgrade when it replaces both an air fryer and toaster oven. Look for a removable crumb tray, accessible interior, clear rack-position guidance, and enough height for the foods you actually make.

Extra rotisserie cages and specialty racks sound impressive but add storage and washing. Pay for even temperature control, useful tray size, and cleanability first.

Cooking performance

Basket air fryers surround a smaller load with fast-moving air. Shaking or turning exposes more surfaces and helps browning. Overfilling blocks circulation and produces softer results.

Oven models spread food across trays. They are useful for flat items but may require tray rotation when cooking on multiple levels. Read the manual’s recommended rack positions rather than treating every shelf as equal.

Real capacity

“Family size” is not a precise measurement. Lay out the chicken pieces, vegetables, or frozen food you normally cook and estimate the single-layer area required. Stacking saves space but can reduce crisping.

For oven styles, measure the baking dish, pizza, or number of toast slices you expect to fit. External dimensions also need room for the door, heat clearance, and ventilation.

Cleanup and coatings

Basket and crisper plates collect rendered fat and crumbs, but they can usually be removed. Check whether parts are dishwasher safe and whether the coating requires non-metal tools.

Oven interiors have more surfaces, heating elements, racks, and corners. A removable crumb tray helps, but grease splatter still needs prompt wiping after the appliance cools.

Controls and daily use

Separate time and temperature controls are faster than scrolling through many menus. A pause function that remembers the cycle when the basket opens is convenient. On an oven, independent toast shade and cooking controls prevent guesswork.

Smartphone control is not essential for an appliance that still requires safe loading, food checks, and hands-on cleanup.

Common buying mistakes

  • Comparing volume without checking usable cooking area.
  • Buying an oven too deep for the counter and wall clearance.
  • Expecting identical crisping from overloaded trays.
  • Ignoring the difficulty of cleaning the oven ceiling and elements.
  • Paying for accessories that will remain in storage.

Frequently asked questions

Which air fryer is easier to clean?

A basket model generally wins because the food-contact parts lift out and the cooking chamber is smaller.

Which is better for toast?

An air fryer toaster oven. Basket models are awkward for toast and do not provide the same broad heating layout.

Does an oven-style air fryer cook more food?

It can hold wider items or multiple trays, but crowded levels may require more time and rotation. Usable capacity matters more than exterior size.

Which is better for a small kitchen?

A basket model uses less counter area if you already own a toaster. An oven model can save space only when it genuinely replaces another appliance.

Final winner

The basket air fryer is the overall winner for speed, crisping, value, and cleanup. The air fryer toaster oven wins for households that make toast, cook wide flat foods, and will remove another countertop appliance rather than adding one more.

Choose the right capacity with our air fryer size guide, then compare other compact appliances in our small-kitchen rice cooker guide.

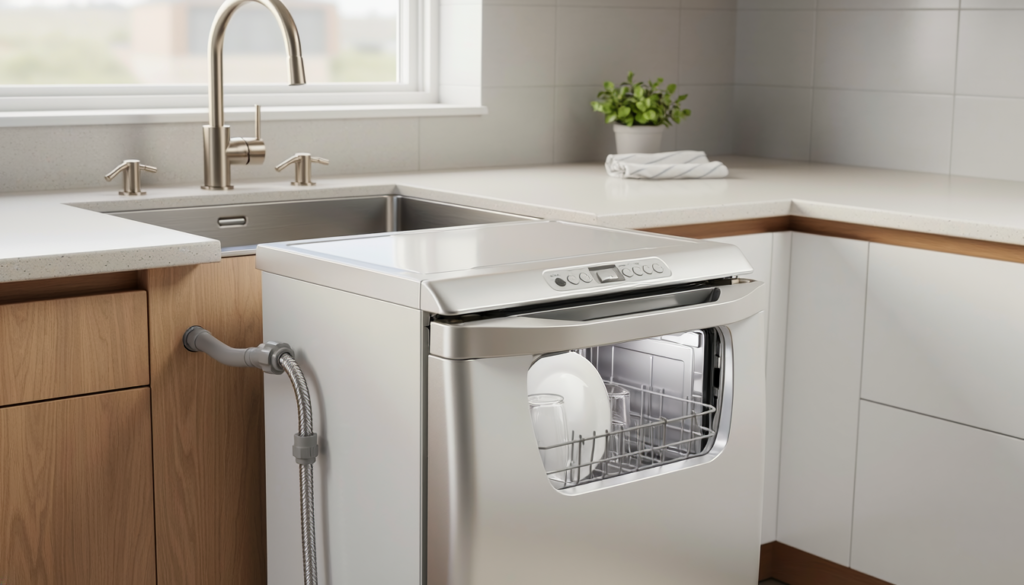
Compact countertop dishwasher in a small apartment kitchen
Kitchen & Dining

Best Compact Dishwasher for an Apartment

Disclosure: As an Amazon Associate, My Indoor Space may earn from qualifying purchases made through links in this guide, at no extra cost to you.

A compact dishwasher can save time in a small kitchen, but only if it fits the counter, accepts your dishes, and connects to the sink without disrupting daily use. Countertop, built-in slimline, and rolling portable models solve different space problems.

Quick verdict

For most renters, the best compact dishwasher is a countertop model with a faucet hookup, stainless interior, removable filter, simple normal and quick cycles, and enough vertical clearance for everyday plates. Choose a built-in 18-inch model only when cabinetry, plumbing, permission, and budget support permanent installation.

Who it is for—and who should skip it

A compact dishwasher suits one- or two-person homes, rental kitchens without a built-in unit, basement suites, and anyone who wants to reduce sink clutter. It works best when small loads are run regularly.

Skip it if the faucet is incompatible, counter space is already scarce, drainage would be unsafe, or your plates and cookware exceed the rack dimensions. Lease and building rules may also limit temporary appliance connections.

Compare the three main types

Type Best for Main trade-off
Countertop faucet-connect Most renters Uses counter and sink access
Countertop tank-fill Incompatible faucets Manual filling and drainage
Rolling portable Larger loads and more storage Needs floor space and movement
18-inch built-in Permanent small kitchens Installation and cabinet work

Best value: faucet-connect countertop model

A standard countertop unit offers the best value when the faucet accepts its quick-connect adapter. It draws and drains automatically during the cycle, avoiding repeated manual filling.

Check the faucet aerator threads before buying. Pull-down, touchless, designer, and non-standard faucets may not accept the supplied adapter. Do not force a connection or use an improvised pressurized fitting.

Upgrade worth it: stainless interior and better rack

A stainless-steel interior is a useful upgrade for durability, stain resistance, and heat retention. Rack design matters just as much: folding tines, a removable cutlery basket, and a sensible spray-arm path can make a compact tub far more usable.

A built-in water tank is worthwhile when faucet connection is impossible. Confirm how many fill pitchers are needed, whether a level indicator is visible, and where the drain hose will empty.

Measure the full operating space

Measure width, depth, height, door-open clearance, and the path for hoses and power. Include upper cabinets and the space needed to load from the front. A machine may fit on the counter but still be impossible to open fully.

Check the unit’s maximum plate diameter and usable rack height. Place settings are standardized estimates and do not guarantee that your dinner plates, mugs, or saucepan will fit together.

Water supply and drainage

A faucet-connected model temporarily takes over the faucet during operation. The adapter, hose, and sink must remain secure and unobstructed. A tank-fill model still needs a stable drain hose positioned exactly as instructed.

Never leave a new setup unattended until you have observed complete fill, wash, drain, and dry cycles without leaks. Keep connections accessible and inspect them regularly.

Noise in a small apartment

In an open-concept apartment, a few decibels can affect conversation and television listening. Compare published noise ratings, but also consider pump tone, drain noise, and end-of-cycle beeps.

Rubber feet and a level, solid counter reduce vibration. Do not place the dishwasher on a weak cart or uneven surface.

Cycles and drying

Normal, quick, and intensive cycles cover most needs. Specialty fruit or baby-item modes are not substitutes for following food-safety or sanitation guidance. A long feature list is less valuable than dependable cleaning and an accessible filter.

Compact machines often use residual heat or airflow rather than a powerful heated dry. Opening the door after the cycle when the manual allows it can help moisture escape.

Running cost and maintenance

Use only dishwasher detergent in the amount recommended for the water and load. Hand dish soap can create excessive foam and leaks. Clean the filter, spray arm, door seal, and interior as directed.

Scrape solid food but do not assume every item is dishwasher safe. Wood, cast iron, sharp knives, insulated drinkware, and delicate finishes may need hand washing.

Common buying mistakes

  • Ordering before checking faucet-thread compatibility.
  • Measuring the closed machine but not the open door.
  • Trusting place-setting capacity instead of rack dimensions.
  • Using hand dish soap.
  • Letting a drain hose move out of the sink.
  • Assuming countertop means lightweight or easy to relocate.

Frequently asked questions

Do countertop dishwashers need plumbing?

Many connect temporarily to a faucet and drain into the sink. Tank-fill models avoid the pressurized faucet connection but still require drainage.

Can I use one with a pull-down faucet?

Often not with the standard adapter. Check the exact faucet and dishwasher compatibility rather than buying an unapproved adapter.

Will full-size plates fit?

Some do and some do not. Compare the stated maximum plate diameter with your own dishes and allow for spray-arm clearance.

Can renters install one?

A temporary countertop model may be acceptable, but the lease, insurer, building rules, and landlord determine what is permitted.

Final winner

The best compact dishwasher for most apartments is a faucet-connect countertop model with verified faucet compatibility, a stainless interior, removable filter, flexible rack, and clear leak-free hose routing. When the faucet will not cooperate, choose a tank-fill model rather than forcing an unsafe connection.

Make the most of a tight kitchen with our small-kitchen pantry organizer guide and food storage container comparison.

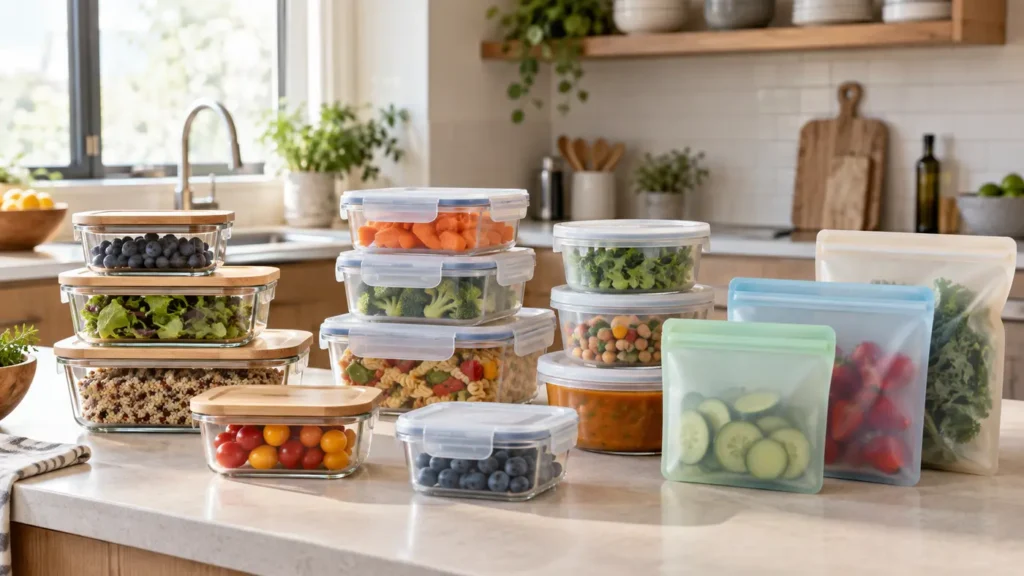
Glass, plastic and silicone food storage containers arranged in a bright kitchen
Kitchen & Dining

Best Vacuum Sealer for Home Food Storage

Disclosure: As an Amazon Associate, My Indoor Space may earn from qualifying purchases made through links in this guide, at no extra cost to you.

A vacuum sealer can reduce freezer bulk, help protect food quality, and simplify portioning, but the machine is only half the purchase. Bag cost, sealing consistency, moisture handling, and counter space determine whether it becomes useful or stays in a cupboard.

Quick verdict

For most homes, choose a compact external suction sealer with pulse control, separate vacuum-and-seal functions, a removable drip tray, and widely available textured bags. Built-in roll storage is convenient but not worth a much larger footprint in a small kitchen.

Who it is for—and who should skip it

A vacuum sealer suits people who buy meat in larger packs, freeze garden produce, batch-cook, fish, or portion ingredients. It can also organize non-food items approved by the manufacturer.

Skip it if you rarely freeze food, dislike buying specialty bags, or expect vacuum sealing to make unsafe food safe. It does not replace refrigeration, freezing, proper cooking, or food-safety guidance.

Compare sealer types

Type Best for Main trade-off
External suction Most home users Needs textured channel bags
Handheld Reusable zipper bags and containers Less versatile for long freezer storage
Chamber sealer Frequent sealing and liquids Large, heavy, and expensive
Compact bar sealer Small kitchens May omit cutter and roll storage

Best value: compact external sealer

A compact external model covers the needs of most households. Look for a full-width sealing strip, clear bag-position markings, and positive latches that do not require excessive hand pressure.

Pulse mode is valuable for bread, berries, and softer foods because you can stop before crushing. A manual seal button lets you make bags from rolls and stop suction when moisture approaches the sealing area.

Upgrade worth it: double seal and accessory port

A double-seal option adds reassurance for long freezer storage or foods with small amounts of moisture. An accessory port is useful if you will vacuum compatible containers or jar attachments.

A chamber machine is a genuine performance upgrade for frequent liquid-rich foods, but it occupies significant space. For occasional home use, the cost and weight are hard to justify.

Bag compatibility controls long-term cost

External suction machines generally need embossed or channel bags that let air escape. Check whether third-party rolls are permitted and whether using them affects warranty coverage.

Compare price per metre or foot, not only the box price. Precut bags save time; rolls reduce waste because you choose the length. Very narrow rolls are handy for single portions.

Moist foods need preparation

Liquid pulled into the seal area can weaken the seam and contaminate the machine. Chill moist food thoroughly, pat surfaces when appropriate, or briefly pre-freeze items before sealing. Leave enough clean bag material above the food.

Use a removable drip tray and clean it after contact with food. Do not vacuum-package foods for storage methods that conflict with recognized food-safety guidance.

Seal quality matters more than maximum suction

A reliable seam should be continuous and free of wrinkles, grease, crumbs, and moisture. Wider or double sealing can help, but careful bag preparation is still essential.

Allow the machine to cool between repeated seals according to the manual. Overheating can reduce consistency and shorten appliance life.

Counter space and storage

Measure the appliance with its lid open and confirm where the cord exits. A machine that stores vertically may fit a narrow cabinet, while an all-in-one model with a cutter needs more depth.

If you plan to store it away, lighter weight and quick access are more valuable than a few premium presets. Appliances used weekly deserve reachable storage.

Common buying mistakes

  • Ignoring the recurring price of compatible bags.
  • Trying to seal wet edges or overfilled bags.
  • Buying a chamber sealer without measuring its permanent footprint.
  • Assuming vacuum sealing eliminates normal food-safety rules.
  • Choosing many presets instead of pulse and manual seal controls.

Frequently asked questions

Can I use any bag with a vacuum sealer?

External suction models usually require compatible channel bags. Chamber units can often use smooth bags. Follow the machine’s specifications.

Can vacuum-sealed food still spoil?

Yes. Vacuum packaging does not sterilize food. Store and handle it at safe temperatures and follow reliable storage guidance.

Is a built-in cutter worth it?

It is convenient if you mostly use rolls. In a tiny kitchen, a separate cutter or scissors may be worth the smaller machine.

Should I freeze food before sealing?

Pre-freezing helps delicate, juicy, or liquid-rich foods keep their shape and stay out of the seal area.

Final winner

The best vacuum sealer for most homes is a compact external suction model with pulse control, a manual seal function, a removable drip tray, and flexible bag compatibility. It delivers the features that affect results without turning a useful food-storage tool into a large countertop commitment.

Complete your storage system with our glass vs plastic vs silicone container guide and small-kitchen pantry organizer guide.

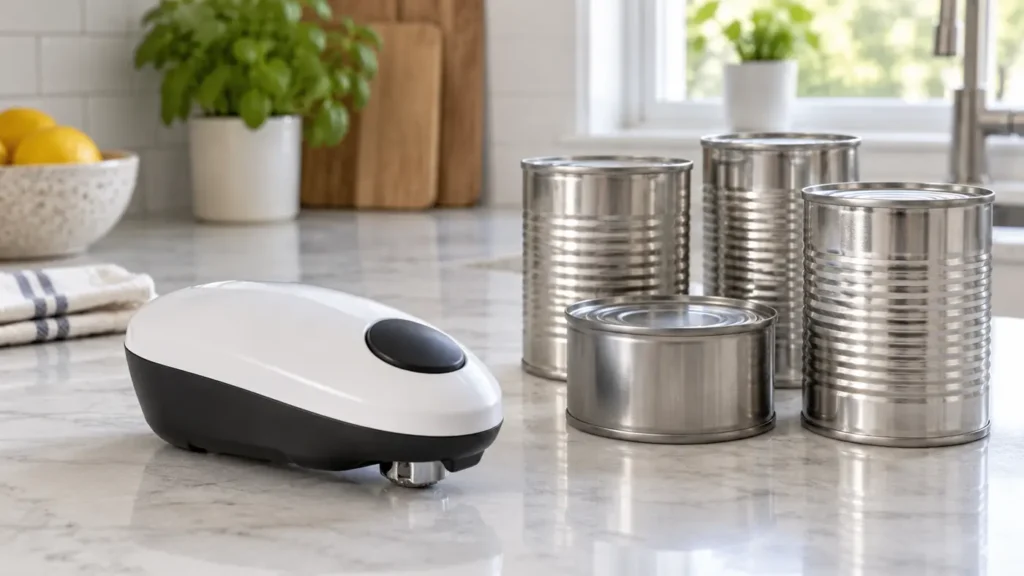
Compact one-touch electric can opener beside plain metal cans
Kitchen & Dining

Best Electric Can Opener for Easy One-Touch Use

Disclosure: As an Amazon Associate, My Indoor Space may earn from qualifying purchases made through links in this guide, at no extra cost to you.

An electric can opener can remove the repetitive twisting and gripping required by a manual model. The best option is easy to position, starts and stops predictably, handles the can sizes you use, and does not turn cleanup into a new problem.

One-touch designs include countertop openers that rotate the can vertically and compact battery models that travel around the lid. Each style has tradeoffs in stability, storage, power, and the type of cut it makes.

Quick verdict

Choose a stable countertop model for frequent use and varied can sizes, or a compact battery opener when storage and portability matter most. Look for clear controls, a dependable magnet or lid lift, easy access for cleaning, and a manual release for jams.

What to compare first

Feature Why it matters Practical target
Opener type Changes stability and storage Countertop or compact travel-around
Cut style Affects edge and lid reuse Top cut or side cut
Release Helps with jams Accessible manual release
Cleaning Prevents residue buildup Removable washable cutter

Choose countertop or compact operation

Countertop models usually hold the can against a cutting assembly while a motor turns it. They are convenient for frequent use and often handle a wider range of standard cans, but they require dedicated counter or cabinet space.

Compact openers sit on the lid and move around it. They store easily and may be useful for someone who cannot comfortably align a heavy can with a tall machine. Check the allowed can shapes and diameters because irregular or very large cans may not work.

Understand top-cut and side-cut designs

Traditional openers cut through the lid near the inner rim, which can leave a sharp edge and bring the cutting wheel close to food. Side-cut or smooth-edge models separate the lid at the seam, often creating a less sharp edge.

No cut is guaranteed harmless. Handle lids carefully, keep fingers away from the cutting mechanism, and discard damaged or swollen cans without opening or tasting the contents.

Look for simple, predictable controls

A true one-touch design should begin with a large, obvious control and stop automatically or with an equally clear second action. Tiny switches or multi-step alignment can undermine the convenience.

Check how a jam is released before purchase. A manual release lever, reverse function, or accessible battery compartment can help, but always unplug the unit or follow the manufacturer’s safety directions before touching the cutter.

Match the opener to your usual cans

Review maximum can height, diameter, weight, and shape. Tall countertop openers need enough clearance, while small travel-around units may struggle with heavy, dented, rimless, or non-round containers.

If you open only a few standard cans a month, a compact unit may be sufficient. For frequent cooking, prioritize motor consistency, a broad stable base, and a cord arrangement that will not pull the machine toward the counter edge.

Check power and battery requirements

Corded openers provide consistent power but need a nearby outlet. Battery-operated models reduce cord clutter, yet weak batteries can cause slow cutting or stalls. Rechargeable versions avoid disposable batteries but must be kept charged.

Confirm battery type, expected runtime, charging connector, and whether the device can be opened manually if power fails. Never mix old and new disposable batteries.

Make cleaning easy

Food residue can collect around the cutter and magnet. A removable cutting assembly is easier to clean than a fixed mechanism, provided it locks back into place securely after drying.

Do not immerse a motorized opener unless the manufacturer explicitly allows it. Wipe the body with a damp cloth, wash removable parts as directed, and let every component dry fully before reassembly.

Prioritize stability and safe placement

A wide non-slip base helps a countertop opener resist tipping. Set it on a dry, level surface with the cord away from burners, sinks, and walkways. Support unusually heavy cans rather than letting them hang from the mechanism.

Store compact units so the start button cannot be pressed accidentally. Keep the opener and removed lids away from children, and inspect the cutter for damage before use.

Common buying mistakes

  • Assuming every opener works with oversized, rimless, or non-round cans.
  • Choosing a model with no clear jam-release method.
  • Ignoring the cleaning instructions for the blade and magnet.
  • Letting a heavy can hang unsupported from a small countertop unit.
  • Handling a cut lid as if it cannot be sharp.

Frequently asked questions

Do electric can openers leave sharp edges?

It depends on the cutting design. Side-cut models often produce a smoother edge, while top-cut designs can leave a sharper rim. Handle every lid carefully.

Are one-touch openers suitable for limited grip strength?

They may reduce twisting and squeezing, but alignment, lifting, and cleaning still matter. Check control size and weight, and consider professional guidance for specific mobility needs.

Can an electric opener handle large cans?

Only if the manufacturer lists the can’s size and weight as supported. Tall or heavy cans may need a full-height countertop model and hand support during use.

How should I clean the cutter?

Unplug the opener or remove batteries, detach the cutter if designed to be removable, and follow the manual. Do not immerse the motor housing.

What should I do if the opener jams?

Stop the motor and use the model’s specified release or reverse procedure. Do not pull the can toward the exposed blade or insert fingers into the mechanism.

Who should buy it—and who should skip it

Buy it if: grip strength, wrist comfort, or frequent can opening makes a manual opener frustrating.

Skip it if: you rarely open cans or already have a manual opener that is easy and comfortable to use.

Best value

A stable one-touch countertop opener with simple controls and easy blade cleanup is the best value for most kitchens.

When the upgrade is worth it

Pay more for better stability, easier release, cleaner edge handling, and dependable operation with common can sizes. Extra styling is not a meaningful upgrade.

Final answer

The best one-touch electric can opener combines low-effort operation with stable positioning, a clear release method, and easy cleaning. Pick the format that matches your storage and can sizes, then treat the cutter and removed lid with the same care you would use with any sharp kitchen tool.

For related low-effort choices, read our ergonomic kitchen tools guide and food storage container comparison.

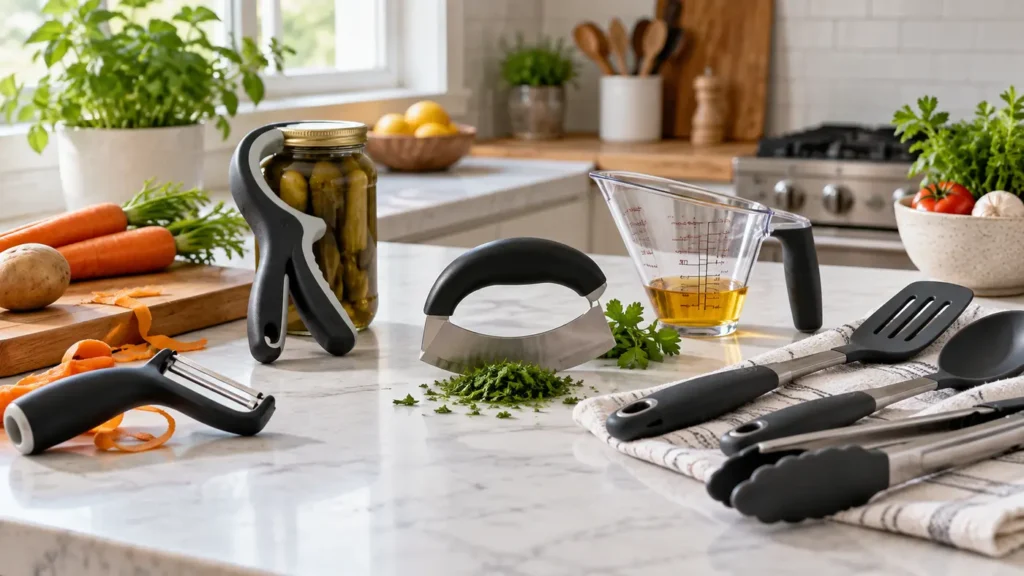
Ergonomic kitchen tools with wide handles arranged on a counter
Kitchen & Dining

Best Ergonomic Kitchen Tools for Easier Meal Prep

Disclosure: As an Amazon Associate, My Indoor Space may earn from qualifying purchases made through links in this guide, at no extra cost to you.

Comfortable kitchen tools can make chopping, peeling, opening, stirring, and serving feel less demanding. The most useful designs reduce unnecessary grip force, keep the wrist closer to a neutral position, and provide enough control without adding bulk.

Ergonomic is not a single certification or guarantee. Handle shape, weight, balance, leverage, and the task itself all matter. A tool that feels excellent in one hand may be awkward in another, so focus on fit and function instead of a label.

Quick verdict

Prioritize wide non-slip handles, low operating force, balanced weight, and controls that can be used without pinching. Start with the task that causes the most fatigue—such as peeling, opening cans, or cutting—then replace only the tools that will meaningfully improve it.

What to compare first

Feature Why it matters Practical target
Handle Controls grip pressure Wide, rounded, non-slip
Weight Affects fatigue and control Light but well balanced
Mechanism Determines operating force Leverage or powered assist
Cleaning Shapes daily usability Few seams, removable parts

What ergonomic design really means

A helpful tool should suit the motion required for the job. A broad handle spreads pressure across more of the hand, while a textured surface can reduce the need to squeeze. Angled handles may keep the wrist straighter during repetitive work.

Do not assume a thick handle is automatically comfortable. If it is too large, sharply contoured, or slippery, it can reduce control. Whenever possible, check dimensions and return policies before buying.

Choose knives and cutting tools for control

A sharp knife requires less force than a dull one. Look for a handle that feels secure, a manageable blade length, and balance that does not pull the wrist forward. A stable cutting board with a non-slip base is just as important.

Rocker knives, food choppers, or spring-assisted scissors can be alternatives for particular tasks. Keep guards and locks functional, follow the manufacturer’s care instructions, and store sharp edges safely.

Look for leverage in peelers and openers

A swivel peeler with a padded handle can follow the food while reducing wrist adjustment. Jar openers, bottle openers, and can openers should multiply force instead of depending on a tight pinch grip.

Powered tools may help with repetitive jobs, but they add batteries, motors, and cleaning steps. Check whether the controls are easy to reach and whether the device stops safely if it meets resistance.

Select mixing and serving tools by handle shape

Spatulas, spoons, ladles, and whisks with rounded handles are often easier to hold than thin flat metal shafts. A heat-resistant grip and a tool length matched to the pan can prevent awkward reaching.

For heavy mixtures, use a bowl with a non-slip base and a tool that does not flex excessively. Lightweight tools are useful, but an unbalanced head can still strain the wrist.

Consider appliance controls and setup

Large buttons, clear markings, one-touch operation, and easy-to-remove attachments can matter as much as motor power. Keep frequently used appliances within comfortable reach so they do not need to be lifted from a low cabinet each time.

An immersion blender can reduce transfers between a pot and countertop blender, while a lightweight electric can opener may reduce repetitive turning. Choose only appliances you can clean, store, and operate confidently.

Test grip, reach, and dominant-hand assumptions

Some tools are shaped for right-handed use, while others are symmetrical. Left-handed cooks should check blade orientation, locking mechanisms, and scale markings. People with smaller hands may prefer a narrower grip than generic ergonomic designs offer.

If pain, numbness, weakness, or loss of coordination is persistent, consult a qualified clinician or occupational therapist. Kitchen tools can improve convenience, but they do not diagnose or treat an underlying condition.

Make the work surface part of the solution

Tool choice cannot compensate for a counter that is too high, a sliding board, or ingredients placed out of reach. Bring the task close to the body, use a stable mat or damp towel under the board, and sit for prep when that is safer and more comfortable.

Break long prep jobs into shorter steps and alternate motions when possible. A simple mise en place—ingredients opened and arranged before cooking—also reduces rushed gripping and reaching.

Common buying mistakes

  • Buying a complete set without testing the most important handle sizes.
  • Choosing a heavy powered tool that is tiring to lift or difficult to clean.
  • Using dull blades, which require more force and are harder to control.
  • Assuming every ergonomic product works equally well for left- and right-handed users.
  • Treating a tool purchase as a substitute for professional advice about persistent pain or weakness.

Frequently asked questions

What makes a kitchen tool ergonomic?

It should reduce unnecessary force or awkward motion while remaining easy to control. Handle shape, texture, weight, balance, and leverage all contribute.

Are thicker handles always better?

No. A handle should match the user’s hand and the task. Too much thickness can make a tool difficult to control, especially for smaller hands.

Are electric kitchen tools easier to use?

They can reduce repetitive force, but only if the controls, weight, cleaning, and storage are manageable. Compare the full routine, not just the powered step.

Which tool should I replace first?

Replace the item used most often for a task that feels difficult or tiring. Common starting points are peelers, can openers, knives, jar openers, and mixing utensils.

Can ergonomic tools help with arthritis?

Some designs may make tasks more comfortable by reducing grip force, but needs vary. A clinician or occupational therapist can recommend adaptations for an individual condition.

Who should buy them—and who should skip

Buy ergonomic tools if: gripping, twisting, peeling, chopping, or opening containers causes fatigue and a better handle or leverage would make meal prep easier.

Skip replacing tools that already feel comfortable and give you good control.

Best value

Upgrade the one or two tools that cause the most strain first. A comfortable peeler, opener, or knife can deliver more value than buying a large matching set.

When the upgrade is worth it

Pay more for better handle shape, useful leverage, balanced weight, and replaceable parts when the tool is used often. Gimmicky multi-tools are rarely worth extra.

Final answer

The best ergonomic kitchen tools fit the user, reduce force, and remain simple to control and clean. Buy for a specific task, pay attention to handle dimensions and weight, and improve the workstation at the same time. Thoughtful choices can make everyday prep smoother without filling the kitchen with unnecessary gadgets.

You may also find our guides to the best immersion blender features and electric kettle buying considerations useful.

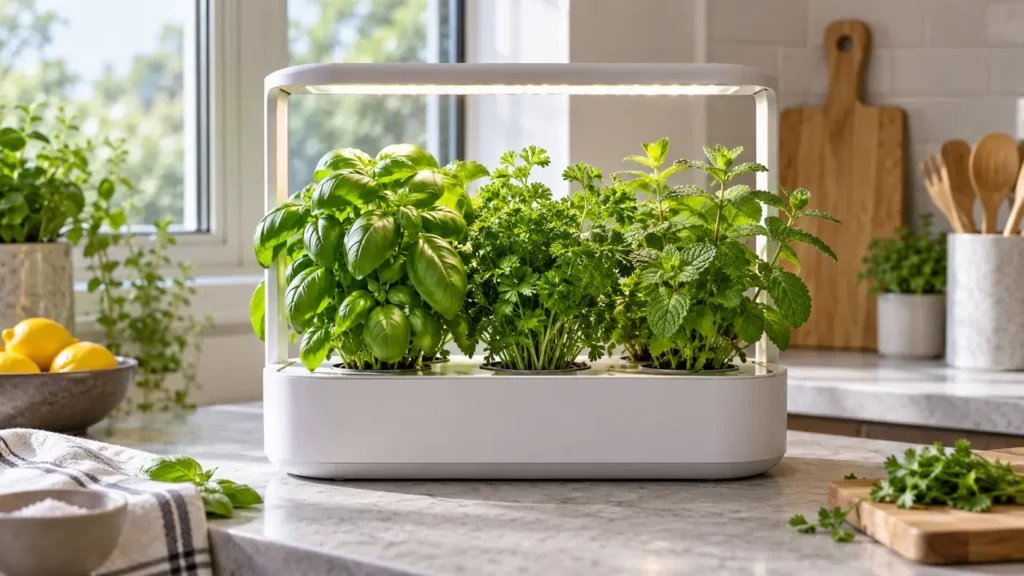
Indoor hydroponic herb garden with basil, parsley and mint on a kitchen counter
Kitchen & Dining

Best Indoor Herb Garden Kit: What to Know Before You Buy

Disclosure: This post contains affiliate links. If you buy through one of our links, we may earn a commission at no extra cost to you. Keep water away from electrical connections and use only approved nutrients and replacement parts. Some herbs are unsafe for pets.

An indoor herb garden kit can grow basil, parsley, mint and leafy greens under a built-in light even when a kitchen window is dim. The appliance simplifies lighting and watering, but it still needs pruning, cleaning and regular supplies.

The biggest long-term differences are growing height, pod compatibility, pump access and the price of replacement sponges, baskets and nutrients.

Quick verdict

Choose a six- to nine-pod garden with an adjustable light, visible water level, quiet replaceable pump and support for generic grow media or refillable baskets. Smaller gardens are easier to place; taller lights matter more than extra pod holes when herbs mature.

Indoor garden types

Choice Best for Advantage Watch for
Compact pod garden Herbs in a small kitchen Easy setup and small footprint Limited height and root space
Medium hydroponic garden Several herbs and greens Good balance of capacity and light Needs regular pruning
Large floor garden Leafy greens and larger harvests More growing area High cost and large footprint
Soil planter with grow light People avoiding proprietary pods Flexible seeds and natural medium More watering and mess

Growing height

Measure from the deck to the highest light position, not total appliance height. Basil and dill can quickly reach the lamp. A taller adjustable mast prevents leaf burn and reduces constant pruning.

Light quality and schedule

An automatic timer is convenient, but the controls should allow easy on/off timing that suits the room. Bright grow lights can be intrusive in an open living area, so plan placement before buying.

Pods and seed choice

Pre-seeded pods are easy but limit variety and create ongoing cost. Refillable baskets let you use ordinary seeds, though germination results vary. Check whether the system accepts generic sponges and caps.

Pump access and noise

A quiet water pump circulates nutrients and oxygen. It should be easy to remove for cleaning and replace when worn. Pump hum is more noticeable in a quiet open kitchen or studio apartment.

Water and nutrients

Use the approved nutrient concentration and maintain the water level. More nutrient is not better and can damage roots. Top up as plants grow, and refresh the reservoir on the recommended schedule.

Pruning and plant selection

Harvest from the top to encourage bushier herbs and prevent one plant from shading the rest. Group plants with similar growth rates. Mint can spread aggressively, while tall basil may dominate a small deck.

Cleaning routine

  1. Harvest or remove plants at the end of a cycle.
  2. Unplug the garden.
  3. Discard roots without sending large masses down the drain.
  4. Clean the reservoir, deck and pump as directed.
  5. Rinse thoroughly and reassemble dry.

Common buying mistakes

  • Choosing by pod count without checking growing height
  • Placing a bright garden where the light becomes annoying
  • Assuming pods and nutrients are inexpensive forever
  • Letting roots clog the pump
  • Mixing tall and slow-growing plants without pruning
  • Ignoring pet safety for herb choices

Frequently asked questions

Do indoor gardens need sunlight?

The built-in grow light supplies the main light, though room conditions still affect temperature and growth.

Can I use my own seeds?

Many systems allow it with refillable baskets, but check pod dimensions and growing-medium guidance.

Are they noisy?

A healthy small pump should be fairly quiet, but hum and water sounds vary. Pump maintenance matters.

How often do I add water?

Small plants use little; mature herbs can empty a reservoir quickly. Watch the level rather than relying only on a schedule.

Will herbs grow forever?

No. Plants eventually decline or outgrow the unit and need replacement.

Shop indoor herb garden kits

Compare plant capacity, maximum growing height, light schedule, pod compatibility, pump access, noise and replacement supplies.

Shop Amazon USA Shop Amazon Canada

Who should buy it—and who should skip it

Buy it if: you want fresh herbs year-round, have a small counter area with an outlet, and do not mind topping up water, nutrients, and pruning plants regularly.

Skip it if: you want a completely hands-off appliance, have very little vertical clearance, or would rather use inexpensive pots and a separate grow light.

Best value

A compact six- to nine-pod garden with an adjustable light and refillable baskets is the best-value choice for most kitchens. It gives enough growing room without locking you into the largest footprint or highest refill costs.

When the upgrade is worth it

Pay more for a taller light, easier pump access, quieter operation, and flexible grow-media compatibility when you plan to grow continuously. Extra pod positions alone are not a strong reason to upgrade.

Final answer

For most kitchens, a medium six- to nine-pod herb garden with an adjustable tall light and refillable baskets offers the best value. Prioritize pump access, generic supply compatibility and realistic counter dimensions. The ongoing routine—pruning, water, nutrients and cleaning—matters more than the number of starter pods.

Use the harvest with our immersion blender guide and organize leftovers with the food storage container guide.

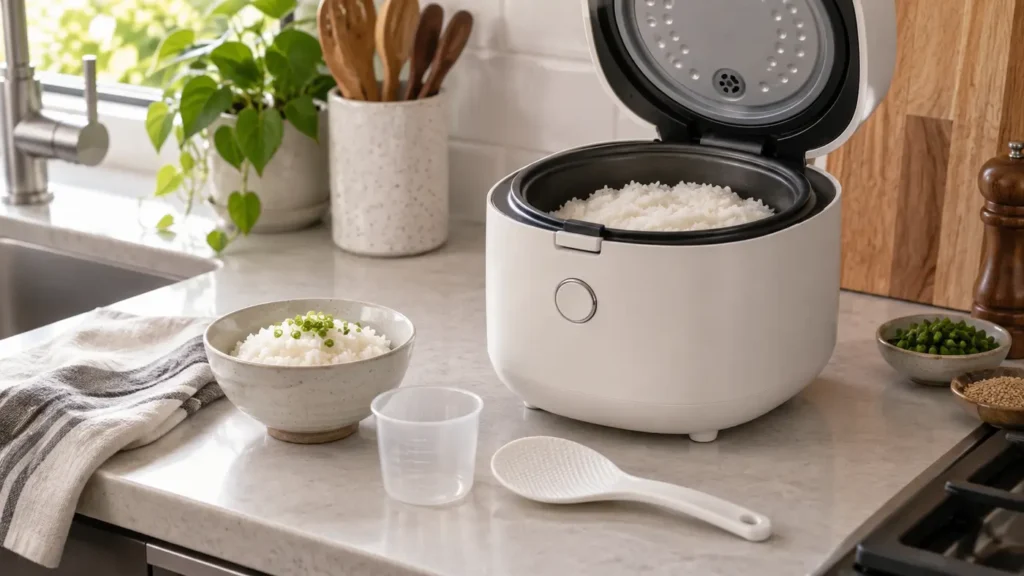
Compact rice cooker open with cooked rice on a modern kitchen counter
Kitchen & Dining

Best Rice Cooker for a Small Kitchen: Size and Features Guide

Disclosure: This post contains affiliate links. If you buy through one of our links, we may earn a commission at no extra cost to you. Follow the appliance instructions for measuring, steam release, food holding, cleaning and electrical safety.

A rice cooker can turn a basic side dish into a dependable part of meal preparation. Add measured rice and water, start the cycle and let the appliance switch to warm when cooking is complete. The challenge is choosing a cooker that matches your household without occupying more counter space than it earns.

Capacity labels can be confusing, fuzzy logic is not essential for everyone, and a long menu of programs can hide awkward cleaning. This guide focuses on practical size, bowl quality, controls and keep-warm performance.

Quick verdict

For one or two people, a compact three-cup cooker is usually enough; larger households and batch cooks often suit a five- or six-cup model. Choose a removable inner lid or easy-to-clean lid area, a clearly marked bowl and controls you will use. A simple one-touch cooker is excellent value for white rice, while fuzzy-logic models better suit several rice types and people who want more automatic adjustment.

Rice cooker types

Type Best for Advantages Tradeoffs
Basic switch cooker White rice and simple meals Affordable, quick to learn, few controls Less adjustment for different grains
Fuzzy-logic cooker Several rice varieties Adjusts time and temperature during the cycle Higher cost and longer programs
Pressure or induction cooker Enthusiasts seeking texture control Advanced heating and specialized programs Expensive, heavier and more complex
Multi-cooker Homes replacing several appliances Rice plus pressure, slow-cook or steam functions Larger footprint and more complicated interface

Understand the cup measurement

Many rice cookers include a small measuring cup that is not the same as a standard North American cup. Capacity is commonly stated in uncooked rice using the supplied cup. The cooked amount becomes much larger.

Use the included cup and the bowl’s matching water lines unless the recipe or manual says otherwise. Replacing it with a standard kitchen cup while following the same markings can produce poor results. Keep the supplied cup with the cooker or note its volume before it disappears into a drawer.

Choose capacity from real meals

A small cooker is easier to store and may handle small portions better. An oversized cooker can perform poorly below its minimum quantity and wastes counter space. Think about the largest normal batch, not a once-a-year gathering.

  • One or two people: a compact three-cup uncooked capacity is a practical starting point.
  • Three or four people: five to six cups offers room for leftovers.
  • Batch cooking: choose enough capacity for several meals, but confirm storage and minimum batch size.

Marketing varies, so compare the stated uncooked and cooked capacities as well as the physical dimensions.

Inner bowl materials and coatings

Most household rice cookers use an aluminum-based bowl with a nonstick coating. These release rice easily but should be used with the supplied plastic or silicone paddle. Replace a bowl when its coating is deeply scratched, peeling or damaged.

Stainless-steel bowls avoid a nonstick coating but can require more careful water ratios and cleanup. Ceramic-coated bowls may feel substantial, though they can still chip or wear. Check whether replacement bowls are sold before choosing an expensive model.

Keep-warm quality matters

Automatic keep-warm is convenient, but it is not a license to leave rice indefinitely. Good models hold an even temperature without drying the top or browning the bottom too quickly. The safe and recommended holding time depends on the appliance and food-safety guidance.

If you usually serve rice immediately, a basic warmer is enough. If family members eat at different times, look for an elapsed-time display, an easy reheat function and owner feedback about texture after several hours.

Programs you may actually use

  • White rice: the everyday standard.
  • Brown rice: uses a longer hydration and cooking cycle.
  • Quick cook: useful when texture can be slightly less refined.
  • Porridge: designed for higher water ratios and longer cooking.
  • Steam: can cook vegetables or proteins in a basket, subject to the manual.
  • Reheat: restores warm rice more gently than starting a full cycle.

Cake, yogurt and specialty programs add value only when you plan to use them. A clear interface with four useful modes beats a confusing panel with fifteen.

Lid design and cleaning

Steam carries starch into the lid and vent. A removable inner lid and detachable steam cap make thorough cleaning easier. Fixed lids can still work well if the accessible surfaces are smooth and the condensation collector is simple to empty.

Wash the bowl and accessories as directed, wipe the heating plate after it cools and keep the temperature sensor free of rice grains. The outside of the bowl should be dry before it returns to the cooker. Never immerse the main body.

Counter space and cord storage

Measure the cooker with the lid fully open. Steam needs clearance from upper cabinets, and the lid should not hit a shelf. A retractable or detachable cord can make storage easier, while a carrying handle is useful if the cooker moves between a cupboard and counter.

Place the cooker on a stable, heat-resistant surface away from a wall that could be damaged by repeated steam. Do not operate it beneath a closed shelf without the clearance required by the manual.

Common buying mistakes

  • Confusing the supplied rice cup with a standard measuring cup
  • Buying capacity for rare events instead of normal meals
  • Ignoring the minimum batch size
  • Choosing many programs with a difficult interface
  • Using metal utensils in a coated bowl
  • Forgetting to clean the inner lid, vent and condensation collector
  • Assuming keep-warm means unlimited safe storage

Getting better rice

  1. Measure with the supplied cup.
  2. Rinse only as appropriate for the rice type and package directions.
  3. Use the matching bowl line or recommended water ratio.
  4. Level the rice before cooking.
  5. Keep the outside of the bowl clean and dry.
  6. After the cycle, rest the rice as directed, then fluff with the proper paddle.

Freshness, rice variety, altitude and water hardness can change the ideal ratio. Make small adjustments and record what works instead of changing several variables at once.

Frequently asked questions

Is a three-cup rice cooker enough for two people?

Usually, yes. Confirm whether the rating refers to uncooked rice and compare it with your normal serving size and desire for leftovers.

Is fuzzy logic worth it?

It is useful when you cook several rice types or want the cooker to compensate for small measuring differences. For basic white rice, a simple model can be excellent.

Can I cook quinoa or oatmeal?

Many cookers can handle other grains, but ratios and foaming behavior vary. Use a program and recipe approved for the model.

Can I leave rice on warm overnight?

Do not assume so. Follow the manufacturer’s holding-time guidance and food-safety recommendations. When in doubt, cool leftovers promptly and refrigerate them.

Why does rice stick to the bottom?

Possible causes include an unsuitable ratio, damaged coating, incorrect program, very long warming or starch buildup. Check the bowl and repeat the manual’s standard method.

Shop rice cookers

Compare true uncooked capacity, minimum batch, bowl replacement, removable lid parts, keep-warm controls and lid-open dimensions.

Shop Amazon USA
Shop Amazon Canada

Who should buy it—and who should skip it

Buy it if: you cook rice regularly and want repeatable results with less stove attention.

Skip it if: you rarely make rice, already get consistent stovetop results, or do not have storage room for another appliance.

Best value

A compact three-cup class cooker with dependable keep-warm performance is the best value for one or two people.

When the upgrade is worth it

Pay more for better fuzzy-logic control, useful grain settings, a removable lid, and easier cleaning when rice is a frequent staple. Large capacity is not an upgrade for a small household.

Final answer

Pick the smallest rice cooker that comfortably handles your normal largest batch. A simple three-cup model is strong value for one or two people, while a five- or six-cup fuzzy-logic cooker suits families and multiple rice types. Prioritize easy lid cleaning, a replaceable bowl and useful keep-warm controls over a long program list.

Organize the results with our food storage container guide, and compare another compact appliance in our immersion blender guide.

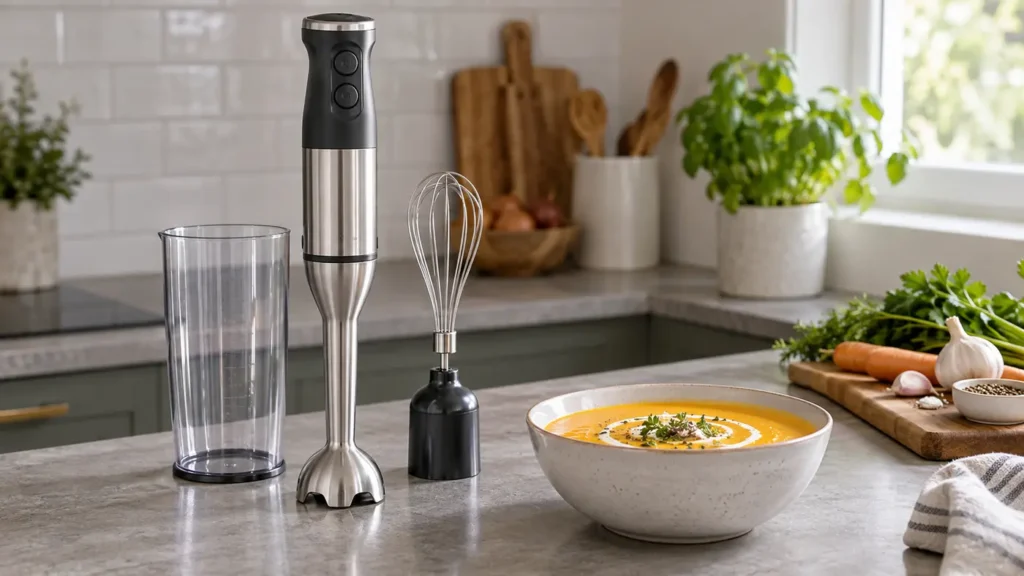
Immersion blender with blending cup and whisk attachment in a bright kitchen
Kitchen & Dining

Best Immersion Blender: Features That Actually Matter

Disclosure: This post contains affiliate links. If you buy through one of our links, we may earn a commission at no extra cost to you. Keep hands and utensils away from the blade, unplug before cleaning or changing attachments, and follow the manufacturer’s instructions.

An immersion blender can puree soup in the pot, make a quick smoothie in a cup and emulsify dressing without taking over the counter. It is one of the most space-efficient small appliances, but only when the motor body is comfortable to hold and the blending head is designed to control splashing.

The best model for most kitchens is not the one with the largest wattage claim or the biggest attachment bundle. Control, balance, shaft length, guard shape and cleaning are more important.

Quick verdict

Choose a variable-speed immersion blender with a stainless-steel removable shaft, a comfortable trigger or dial, and a blade guard that can move food without scratching cookware. A blending cup is useful; a whisk is worthwhile if you will actually use it. Buy a mini chopper attachment only when it replaces another appliance.

Immersion blender configurations

Setup Best for Advantages Tradeoffs
Basic blender Soups, sauces and dressings Lowest clutter and simplest cleaning Fewer extra jobs
Blender plus whisk Cream, eggs and light batters Useful second function with little storage Not a replacement for a heavy mixer
Multi-piece kit Small kitchens replacing several tools Can include cup, whisk, chopper and masher More parts, lids and storage
Cordless Fast jobs away from an outlet No cord around the pot Battery charging, weight and long-term replacement

Control matters more than maximum power

A powerful motor helps with fibrous vegetables and thicker mixtures, but a blender that jumps to full speed can throw hot soup up the sides of the pot. Progressive trigger control or several genuinely distinct speeds give you a gentler start.

Wattage is not a direct guarantee of blending performance. Blade geometry, guard openings, motor efficiency and how easily ingredients circulate all matter. Look for consistent results and manageable vibration rather than shopping by one number.

Choose the right shaft length

A longer shaft reaches into stockpots and tall pitchers, while a shorter shaft can feel easier to control in a small saucepan. Measure the containers you use most. The blade head needs to stay submerged, but the motor housing should remain well above the food.

A removable shaft is easier to wash and store. Stainless steel tolerates hot-food use better than some plastic shafts, but always confirm the model’s temperature limits. Never immerse the motor body.

Blade guard design and cookware

The bell around the blade controls circulation and helps protect the blade from the pot. Wide openings move thick food more freely; a very closed guard may trap chunks. Some guards have soft edges intended to reduce scratching, though safe technique is still important.

Keep the head slightly tilted and move slowly through the food rather than pressing hard against the bottom. If your cookware has a delicate nonstick coating, confirm the manufacturer’s recommendation before allowing a metal guard to touch it.

Corded or cordless?

A corded immersion blender is usually lighter, always ready and better suited to longer sessions. Check cord length and where the outlet sits in relation to your stove and prep area. Keep the cord away from heat, water and the pot rim.

Cordless models remove the cord from the workspace but add battery weight. Consider charging time, runtime, battery availability and whether the appliance can operate while charging. A cordless tool is only convenient if it is charged when you need it.

Attachments worth having

  • Blending cup: helps with small batches and gives the blade enough depth to work.
  • Whisk: useful for whipped cream, eggs and thin mixtures.
  • Mini chopper: valuable for herbs, nuts and onions when it truly replaces a separate chopper.
  • Potato masher: can produce an even texture without overworking starch when used correctly.

Attachment bundles often look like a bargain, but each part needs storage and cleaning. Start with the jobs you already do. A basic blender that lives within reach will be used more than a large kit buried in a cupboard.

Comfort and one-handed use

Weight is concentrated in the handle, so a small difference becomes noticeable during a long blend. Look for a grip you can hold securely with dry or slightly damp hands. Buttons should not require excessive pressure, and speed controls should be reachable without changing your grip.

If hand strength is limited, a lock-on design may feel easier than holding a stiff trigger, but it also requires careful control. Try the grip in person when possible and check the total assembled weight rather than motor weight alone.

Reducing splashes

  1. Use a container tall enough for the food volume.
  2. Submerge the blade guard before starting.
  3. Begin at low speed.
  4. Keep the head below the surface while the blade is moving.
  5. Stop the motor before lifting it out.
  6. Let very hot mixtures cool to the recommended temperature.

Do not fill a narrow cup so high that movement has nowhere to go. For hot soup, remove the pot from active heat and work in controlled pulses. Never blend in a container that can tip or shatter.

Cleaning and storage

Unplug the blender or disconnect the power unit before removing the shaft. Wash the detachable components as directed and take care around the sharp blade. If the shaft is dishwasher-safe, check whether the top rack is required. The motor body usually needs only a damp cloth.

Rinse soon after blending sticky foods so residue does not dry around the guard. Dry connections completely before reassembly. Store the shaft where its blade cannot be reached accidentally and where the coupling is not carrying the appliance’s weight.

Common buying mistakes

  • Buying the largest attachment kit without storage space
  • Choosing by wattage alone
  • Ignoring the assembled weight and button pressure
  • Using a metal guard carelessly on delicate cookware
  • Assuming every shaft is safe in very hot food
  • Expecting an immersion blender to crush large amounts of ice
  • Forgetting to check replacement attachment availability

Who may prefer a countertop blender?

A countertop blender is better for large smoothies, frequent ice crushing, very silky purees and jobs that need a closed jar. An immersion blender wins for soup in the pot, quick sauces, small batches and easy storage. Many homes need only one, so choose from the tasks you perform every week.

Frequently asked questions

Can an immersion blender blend hot soup?

Many are designed for soup, but the model’s temperature guidance must be followed. Remove the pot from active heat, keep the head submerged and start slowly to reduce splashing.

Can it replace a regular blender?

It can for soups, sauces, dressings and some smoothies. It is less suitable for large frozen drinks, heavy ice crushing or consistently ultra-smooth results.

Is a cordless model better?

It is more convenient around the pot, but usually heavier and dependent on a charged battery. A corded model is the better-value choice for many kitchens.

Do I need variable speed?

Yes, if you make hot soup or small batches. A gentle starting speed improves control and reduces splashing.

Will it scratch my pot?

It can if a hard metal guard is pressed or dragged against a delicate surface. Check both appliance and cookware instructions and use careful technique.

Shop immersion blenders

Compare grip comfort, variable-speed control, shaft length, guard material, attachment usefulness and cleaning instructions.

Shop Amazon USA
Shop Amazon Canada

Who should buy it—and who should skip it

Buy it if: you make soups, sauces, smoothies, or purées directly in a pot or tall container and value quick cleanup.

Skip it if: you mainly crush ice, make large frozen drinks, or need the broader capacity of a countertop blender.

Best value

A corded immersion blender with a removable stainless shaft and simple variable speed is the best value for most kitchens.

When the upgrade is worth it

Pay more for better low-speed control, a more comfortable grip, and useful whisk or chopper attachments when you will actually use them. Extreme wattage claims alone are not a reason to upgrade.

Final answer

For most kitchens, the best immersion blender is a balanced corded model with variable speed, a removable stainless-steel shaft and a useful blending cup. Add a whisk if it matches your routine, but avoid paying for attachments you will store rather than use. Control and cleanup matter more than an extreme power claim.

For other compact countertop choices, see our countertop ice maker guide and electric kettle guide.

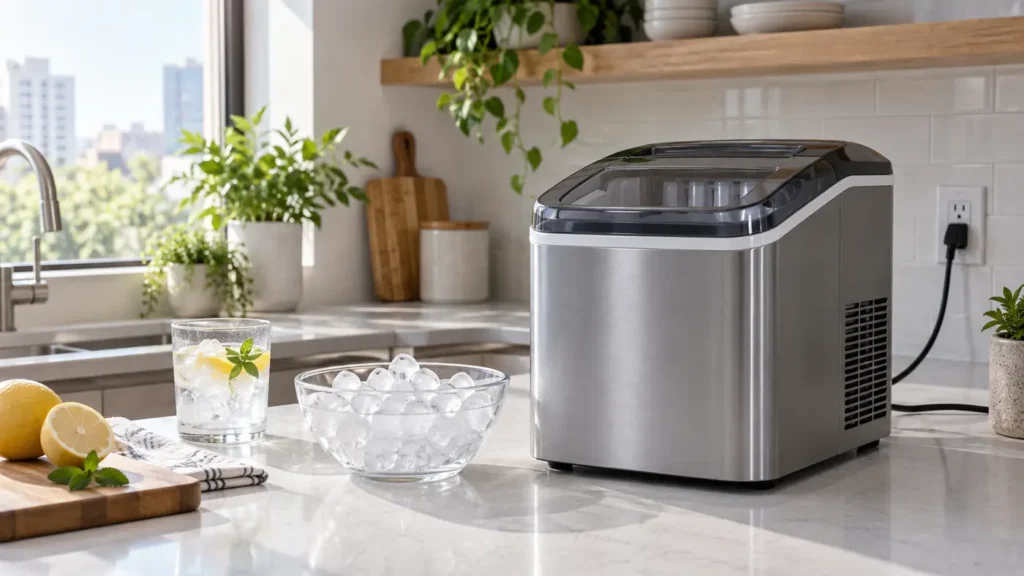
Compact countertop ice maker beside a bowl of ice in a bright kitchen
Kitchen & Dining

Best Countertop Ice Maker: What to Know Before You Buy

Disclosure: This post contains affiliate links. If you buy through one of our links, we may earn a commission at no extra cost to you. Countertop ice makers make ice; most do not keep it frozen. Follow the cleaning, water and electrical instructions for your exact model.

A countertop ice maker can be useful when a refrigerator cannot keep up, a freezer has no built-in ice maker, or guests arrive faster than trays can freeze. The best machine is not necessarily the one advertising the largest daily output. What matters is how quickly the first batch appears, how much ice the basket holds, how easy the water path is to clean and whether the appliance fits beneath your cabinets.

This guide explains the specifications that affect everyday use, including bullet versus nugget ice, reservoir size, noise, drainage and storage.

Quick verdict

For most homes, choose a compact self-cleaning bullet-ice machine with an accessible reservoir, removable basket, drain plug and clear low-water and full-basket indicators. If chewable ice texture is the priority, a nugget machine may be worth the higher price and extra maintenance. Measure the counter space and cabinet clearance before ordering.

Countertop ice maker types

Type Best for Advantages Tradeoffs
Bullet ice General drinks and occasional entertaining Fast batches, compact machines, usually lower cost Ice is often soft and melts faster than freezer-made cubes
Nugget ice People who prefer soft, chewable ice Distinct texture and easy drink blending Higher cost, more moving parts and more frequent cleaning
Clear cube ice Cocktails and slower dilution Denser, attractive cubes Longer cycle and typically larger or more expensive machine

Daily output is not basket capacity

A machine advertised to produce many pounds per day does not hold that amount at once. The daily figure assumes repeated cycles under specified room and water conditions, with the basket emptied whenever it fills. The actual basket may hold only a few pounds or less.

For daily convenience, compare three separate numbers: time to first batch, output per hour and basket capacity. A couple making iced drinks needs less holding capacity than a family filling coolers. If you want to bag ice for later, move finished ice to the freezer promptly and break apart pieces after they harden.

Counter space and ventilation

Measure width, depth and height with the lid fully open. Include clearance for ventilation around the side or rear vents and room to pull the drain plug. A machine that technically fits under a cabinet may be frustrating if the lid cannot open completely or the water reservoir is difficult to fill.

Place it on a stable, level, water-resistant surface near a properly grounded outlet. Do not block vents or crowd the unit against a warm appliance. Room temperature affects production speed and melting, so a sunny window or hot range is a poor location.

What “self-cleaning” really means

A self-clean cycle circulates water through part of the system; it does not eliminate manual cleaning. The basket, scoop, reservoir, lid and accessible surfaces still need regular washing. Mineral deposits can build up in the water path, particularly with hard water.

Look for a drain that lets the reservoir empty without lifting and tipping the whole machine. A removable water tank can also help, but check how many internal surfaces remain difficult to reach. Follow the manufacturer’s cleaning solution and descaling instructions rather than mixing unapproved chemicals.

Water quality and ice taste

Ice reflects the water used to make it. If tap water has a noticeable taste or odor, filtered water may improve results, provided the manual permits it. Do not use hot water, sparkling water or any liquid other than the type specified by the manufacturer.

Empty stale water, allow the reservoir to dry when the appliance will sit unused and clean the scoop separately. Keep the scoop in a clean holder instead of leaving its handle buried in the ice.

Noise to expect

Countertop ice makers cycle through water pumping, refrigeration and ice release. You may hear a fan, a compressor hum, water movement and a distinct clatter when ice drops into the basket. A quiet compressor matters in an open kitchen, but the falling ice may still be noticeable.

If the appliance will run near a bedroom or home office, look beyond a single decibel claim. Owner feedback about fan tone, vibration and alert beeps can be more useful. A level surface and proper clearance may reduce rattling.

Features worth paying for

  • Easy front or rear drain: makes cleaning and storage less awkward.
  • Removable basket and scoop: simplifies serving and washing.
  • Useful indicator lights: low water and full basket are more valuable than a complicated screen.
  • Automatic pause: prevents overfilling when the basket is full.
  • Simple self-clean cycle: helpful when paired with regular manual cleaning.
  • Accessible reservoir: reduces spills during refilling.
  • Documented replacement parts: useful for baskets, scoops or drain plugs.

Features you may not need

Wi-Fi, scheduling and app control sound impressive but add little if the basket must still be emptied and the ice transferred. Multiple ice-size settings on a bullet machine often change thickness more than overall shape. A window is convenient, but it should not replace a reliable full-basket sensor.

Common buying mistakes

  • Assuming the machine stores ice like a freezer
  • Comparing daily output while ignoring basket capacity
  • Forgetting lid-open height under wall cabinets
  • Choosing nugget ice without accepting the extra cleaning
  • Blocking the ventilation side against another appliance
  • Leaving meltwater and unused water in the reservoir for long periods
  • Expecting the first batch to be as cold and hard as freezer ice

How to use one efficiently

  1. Set the machine on a level counter with the required clearance.
  2. Clean it before first use according to the manual.
  3. Add approved water without exceeding the fill line.
  4. Let the first cycles run and check the manual on whether initial ice should be discarded.
  5. Transfer finished ice to a freezer bag if you are building a larger supply.
  6. Drain, clean and dry the unit after the recommended use interval.

Countertop ice can melt and be recirculated on many models. That saves water during a session, but it also means cleanliness matters. Do not treat the closed lid as long-term sanitary storage.

Frequently asked questions

Does a countertop ice maker keep ice frozen?

Most do not. They make ice and hold it temporarily in an insulated basket. As it melts, water may return to the reservoir for another cycle.

How fast is the first batch?

Many compact machines advertise a first batch within several minutes, but room temperature, water temperature and ice-size setting affect the result. Check the tested conditions and owner manual.

Is nugget ice worth the extra cost?

It can be if texture is the main reason you are buying the machine and you will use it frequently. For occasional drinks and parties, a simpler bullet-ice model is often better value.

Can I leave it running all the time?

Follow the manufacturer’s instructions. Most countertop units are intended for active ice-making sessions rather than permanent frozen storage, and they require regular cleaning and water changes.

Can I use it for a cooler?

Yes, but plan ahead. Basket capacity is limited, so you may need several cycles and freezer storage to build enough ice.

Shop countertop ice makers

Compare ice type, first-batch time, basket size, drain location, cleaning access, operating noise and exact countertop dimensions.

Shop Amazon USA
Shop Amazon Canada

Who should buy it—and who should skip it

Buy it if: you need frequent batches of fresh ice where a freezer ice maker is unavailable or too slow.

Skip it if: you only need occasional ice, have very limited counter space, or expect the machine to store ice frozen for long periods.

Best value

A compact bullet-ice machine with a drain plug and easy-clean reservoir is the best value for most homes.

When the upgrade is worth it

Pay more for quieter operation, a self-clean cycle, easier draining, and a larger water reservoir when the machine runs often. Higher advertised daily output matters only if you can use or freeze the ice quickly.

Final answer

A compact bullet-ice maker is the practical choice for most households: fast, relatively affordable and simple to operate. Choose nugget ice only when that texture is important enough to justify more cost and cleaning. Measure the full lid-open footprint, prioritize a convenient drain and remember that the basket is temporary holding space—not a freezer.

For more small-kitchen buying help, see our food storage container guide and air fryer size guide.

Glass, plastic and silicone food storage containers arranged in a bright kitchen
Kitchen & Dining

Best Food Storage Containers: Glass vs Plastic vs Silicone

Disclosure: This post contains affiliate links. If you buy through one of our links, we may earn a commission at no extra cost to you. Always follow the container maker’s temperature, microwave, freezer, dishwasher and oven instructions.

The best food storage containers are not simply the set with the most pieces. A useful set fits your refrigerator, stacks without wasting cabinet space, closes without a wrestling match and matches the way you actually cook. Glass, plastic and reusable silicone each solve different problems, which is why many kitchens work best with a small mix instead of one enormous matching collection.

This guide compares the three main materials, explains which lid and shape details matter, and helps you avoid paying for sizes that will sit unused.

Quick verdict

Choose glass for leftovers, reheating and stain resistance; lightweight plastic for lunches and everyday portability; and silicone bags or collapsible containers for snacks, freezer organization and space-saving storage. For most homes, the best starting set is a stackable rectangular glass set for meals plus a few lightweight containers for travel.

Glass vs plastic vs silicone

Material Best for Main advantages Watch for
Glass Leftovers, meal prep, reheating Resists odors and stains; easy to see contents; sturdy feel Heavier; can chip or break; lids are usually not oven-safe
Plastic Work lunches, children’s snacks, lightweight storage Light, affordable and easy to carry Can stain, scratch or retain odors; heat limits vary
Silicone Snacks, freezer storage, travel and compact cabinets Flexible, reusable and often space-saving Can be slower to dry; seals and support vary by design

Who should choose glass containers?

Glass is the strongest all-round choice for people who cook several portions at once and want to move food from refrigerator to microwave without changing containers. It does not absorb tomato, curry or garlic odors as readily as many plastics, and the clear sides make forgotten leftovers easier to spot.

Look for tempered glass from a reputable manufacturer, but remember that no household glass is indestructible. Sudden temperature changes, chips and hard impacts can cause breakage. Do not move a frozen glass container directly into a hot oven or onto a hot surface unless the instructions explicitly permit that use. The plastic or bamboo-style lid is normally not oven-safe, even when the glass base is.

Glass is less convenient for commuting. A full container adds noticeable weight to a lunch bag, and a drop onto concrete can end its useful life. If you carry meals daily, keep glass at home and use a lighter travel container.

Who should choose plastic containers?

Plastic makes sense when low weight and easy handling matter most. It is practical for lunches, snacks, picnics and sending leftovers home with family. A carefully chosen set can also cost less than glass while offering more sizes.

Do not assume every plastic container is suitable for every kind of heating. Check the exact microwave and dishwasher directions. Vent the lid as directed, avoid heavily scratched containers and replace pieces that are warped, cracked or no longer seal correctly. A microwave-safe label describes intended use under specified conditions; it does not mean the container is immune to staining, wear or overheating.

Square and rectangular plastic containers use refrigerator space more efficiently than round ones. Transparent bodies are easier to manage than opaque containers because you can see what needs to be eaten first.

When silicone storage works best

Reusable silicone bags are useful for chopped produce, sandwiches, snacks and freezer portions. Their flexible shape can squeeze into gaps that rigid boxes cannot, and some designs stand upright for filling. Collapsible silicone bowls can save cabinet room in an RV, apartment or small kitchen.

The tradeoff is structure. A soft bag filled with soup can be awkward to carry, and a shallow closure can open if it is packed carelessly. Test the seal over a sink before transporting liquid. Dry silicone fully before putting it away, especially around folded edges and closure tracks.

Shape matters more than piece count

A 24-piece set may mean 12 bases and 12 lids. More importantly, half the bases may be too small or too large for your normal portions. Before buying, list the jobs you need covered:

  • Two-portion dinner leftovers
  • Single lunch portions
  • Cut fruit or vegetables
  • Sauces and toppings
  • Freezer-ready batch cooking
  • Dry snacks or pantry ingredients

Rectangles are usually the best use of shelf space. Round containers are excellent for soups and stirring, but they leave gaps when lined up. Shallow containers cool food faster and make stacked leftovers easier to identify. Tall containers suit soups and bulky produce but can become unstable when stacked.

Look closely at the lids

The base may last for years while the lid becomes the weak point. Hinged locking tabs can create a reassuring seal, but the hinge area can eventually fatigue. Press-on lids are fast and compact, though they may loosen if the rim warps. Flexible stretch lids fit several bowl sizes but are not always ideal for transport.

Check whether replacement lids are sold separately. That one detail can extend the life of the entire set. Also look for:

  • A removable gasket that can be cleaned and dried completely
  • Tabs large enough to open without straining fingers
  • Lids that nest or clip together for storage
  • A vent designed for microwave use, if you reheat often
  • A seal description that distinguishes leak-resistant from genuinely leakproof

Stacking and nesting: two different things

Stacking describes how securely filled containers sit on top of one another in the refrigerator. Nesting describes how empty containers fit inside each other in the cabinet. A set can be good at one and poor at the other.

For a small kitchen, measure your cabinet shelf and the refrigerator space you normally use. Straight-sided containers may not nest as tightly, but they often stack neatly when full. Deeply tapered containers nest well but sacrifice some usable interior volume. The best compromise keeps two or three common footprints across several heights.

Freezer, microwave and oven use

Read the instructions for every component rather than assuming the base and lid share the same limits. Leave expansion space when freezing liquids. Cool hot food as recommended before sealing and refrigerating it, and avoid thermal shock with glass.

Microwave venting matters because steam pressure builds under a tight lid. Loosen or open the specified vent and use short heating intervals, stirring when practical. Even when a container is dishwasher-safe, the top rack may be recommended for lids and flexible components.

Food storage habits matter too

A good container cannot make unsafe storage practices safe. Refrigerate perishable food promptly, label leftovers with the date and discard food when you are unsure how long it has been stored. Use first-in, first-out organization so older portions remain visible.

A simple erasable label system prevents mystery containers. Put the food name and date on the lid, then group ready-to-eat items on one refrigerator shelf. This small routine works well alongside our guide to small kitchen habits that keep counters looking clean.

Features worth paying for

  • Replaceable lids: protects the value of the bases.
  • Consistent footprints: makes refrigerator stacking more stable.
  • Clear capacity markings: useful for meal prep and portioning.
  • Removable gaskets: allows better cleaning around the seal.
  • Useful medium sizes: generally earn more use than novelty mini containers.
  • A restrained set: fewer well-chosen pieces are easier to store than a giant bundle.

Common buying mistakes

  • Counting lids as full pieces without checking the number of actual containers
  • Buying mostly tiny sizes because the set looks generous
  • Assuming every glass base is oven-safe
  • Transporting soup in a container described only as airtight
  • Ignoring the stored height of nested lids
  • Choosing a complicated gasket that is difficult to remove and dry
  • Buying a brand that offers no replacement lids

Care that keeps containers usable

Let oily or strongly colored food cool before storing it in plastic, provided food-safety timing is respected. Wash soon after use. A baking-soda paste may help with some odors or stains, but follow the manufacturer’s care directions and avoid abrasive tools that scratch the surface.

Inspect glass rims for chips and plastic for deep scratches, clouding or warping. Dry lids and gaskets separately before reassembly. Store containers with lids loose or off when possible so trapped moisture and odors can escape.

Frequently asked questions

Are glass containers always better than plastic?

No. Glass is excellent for home storage and reheating, while plastic is lighter and easier to carry. The better material depends on the job.

Do airtight containers prevent all leaks?

Not necessarily. Airtight usually refers to air exchange, while leakproof describes resistance to liquid escaping. Check the product’s exact wording and test before carrying soup or sauce.

Can I freeze food in glass containers?

Many are designed for freezer use, but leave room for expansion and follow the temperature-change instructions. Do not use chipped glass or force a frozen container into sudden high heat.

How many containers does a household need?

Start with the number of leftover and lunch portions you normally store over two or three days. A modest set of frequently used sizes is usually easier to manage than a large set with duplicates.

Are reusable silicone bags hard to clean?

Wide-opening, stand-up designs are easier to wash and dry. Turn them only if the manufacturer permits it, and make sure seams and closure tracks are fully dry.

Shop food storage containers

Compare usable sizes, stored dimensions, replacement-lid availability and temperature instructions before ordering.

Shop Amazon USA
Shop Amazon Canada

Who should buy it—and who should skip it

Choose glass if: you prioritize stain resistance, reheating, and long service life. Choose plastic if: low weight and drop resistance matter most. Choose silicone if: collapsible storage is the priority.

Skip replacing what you own if your current containers seal well, are food-safe, and still fit your routine.

Best value

A small matched set in the material you use most is better value than a huge assortment of odd sizes. Replace only the sizes you repeatedly reach for.

When the upgrade is worth it

Pay more for dependable seals, replaceable lids, stackable shapes, and oven/freezer compatibility you will actually use. Premium branding alone does not improve storage.

Final answer

For most homes, glass rectangular containers are the best core set because they handle leftovers, reheating and stains well. Add a few lightweight plastic containers for travel and reusable silicone bags for snacks or flexible freezer storage. Buy by the sizes you use, not by the piece count, and prioritize replacement lids, secure stacking and care instructions you will actually follow.

Building a compact cooking setup too? See our air fryer size guide and electric kettle buying guide.

Scroll to Top