DIY & Decorating

Approachable decorating ideas and small DIY upgrades with a big impact.

Full-length mirror in a bright room
DIY & Decorating

Leaning vs Wall-Mounted Full-Length Mirror: A Renter’s Buying Guide

Disclosure: As an Amazon Associate, My Indoor Space earns from qualifying purchases through links in this article, at no extra cost to you.

Quick verdict

Choose wall mounting when the product and wall support it and you want to preserve floor space. Choose a mirror approved for leaning when its footprint works and you can install its required anti-tip restraint. A leaning mirror should not be assumed to be a no-drill rental solution.

Research-based buying guide. Product information checked October 16, 2026. We have not tested these products hands-on; recommendations distinguish published features from our buying judgments.

leaning full-length mirrors

wall-mounted full-length mirrors

Full-length mirror in a bright room
Illustrative mirror placement; follow the selected product’s anchoring instructions. Photo: Pexels.

A full-length mirror can make dressing easier without occupying a large room. But a leaning design uses floor depth, while a mounted design depends on the wall and fixing method. For renters, installation requirements should be checked before ordering a large, fragile item.

Compare the space and installation

Question Leaning mirror Wall-mounted mirror
Floor area Needs its specified lean and stable footprint Can keep the floor below clear
Fixings May still require anti-tip attachment Needs suitable mounting hardware
Placement Floor, wall and restraint must suit the design Wall type and viewing height must suit the design

Leaning does not mean unsecured

Umbra’s Hub Leaning Mirror is an example approved for vertical leaning or wall mounting, with anti-tip hardware included for the leaning arrangement. That is a product-specific instruction, not evidence that any wall mirror can be placed on the floor. Check the actual manual for your chosen mirror.

In a rental, confirm whether the required restraint or brackets can be installed. Permission and suitable fixings matter for either arrangement. If you cannot use the specified method, choose another product explicitly designed for your permitted installation rather than improvising with adhesive or omitting the restraint.

Check the route through the room

Mark the mirror’s width and floor projection with removable tape. Open nearby doors and drawers, walk through the usual route and consider vacuuming access. A slim frame can still create an obstruction at floor level, especially behind a door or at the end of a bed.

For wall mounting, mark the full outline and check the viewing position from where you will stand. Consider switches, outlets and furniture. Follow the installation instructions for the wall material, mirror weight and required mounting points. Do not assume hardware supplied for one wall type suits another.

Buy the right orientation and size

A product described as vertical-only must be used that way. Umbra explicitly distinguishes the approved orientation for its cited Hub mirror. Check hanging-point placement rather than deciding to rotate a large mirror after delivery. “Full length” also does not mean the same dimensions across brands.

Read the actual height and width, then assess the viewing distance available in your room. A photograph taken in a large studio does not establish how the mirror will work in a narrow hallway. A smaller product in the right position may be more useful than an oversized one you cannot install correctly.

What makes an upgrade worthwhile?

Pay for a suitable construction, clear installation documentation and a size that fits the room. Include necessary fixings and any installation assistance in the total price. Keep an existing mirror if it provides the view you need and is installed as intended. Changing from mounted to leaning solely for appearance adds little value if the new footprint makes daily movement harder.

Compare current listings in your country

These buttons open matching Amazon search listings rather than a guaranteed in-stock offer. Confirm the exact model, seller, included parts, delivered price and return terms. Offers can differ between the United States and Canada.

leaning full-length mirrors

wall-mounted full-length mirrors

Related guides on My Indoor Space

Sources and research

Illuminated kitchen cabinet containing glassware
DIY & Decorating

Plug-In vs Rechargeable Under-Cabinet Lights: Which Is Better?

Disclosure: As an Amazon Associate, My Indoor Space earns from qualifying purchases through links in this article, at no extra cost to you.

Quick verdict

Choose plug-in lights for long, regular countertop use when you can route the cord properly. Rechargeable lights make sense for brief use or places without a convenient outlet, provided you can remove or reach them for charging. Brightness and runtime must be compared together.

Research-based buying guide. Product information checked October 16, 2026. We have not tested these products hands-on; recommendations distinguish published features from our buying judgments.

plug-in under-cabinet lights

rechargeable cabinet lights

Illuminated kitchen cabinet containing glassware
Illustrative cabinet lighting photo; the power system is not identified. Photo: Pexels.

A light that works beautifully for finding a mug may be frustrating over a chopping board for an hour. Before comparing packs and discounts, decide how long each light will stay on and whether you want to manage charging. Power type is a practical choice as much as an installation choice.

Compare the daily routine

Question Plug-in Rechargeable
Long sessions No routine battery recharge Runtime must suit brightness and duration
No nearby outlet Needs a suitable cord route Can operate away from an outlet
Maintenance Keep connections accessible Recharge and reinstall as required

When plug-in is the better buy

For regular food preparation, a plug-in fixture can avoid the cycle of dimming batteries and recharge reminders. Check the cord length and where the power adapter sits. Do not plan a cable path across a hot surface, sink work area or moving cabinet door. Follow the fixture’s mounting and location instructions.

Linkable products can simplify multiple sections, but linkability is model-specific. Jasco offers UltraPro fixtures with stated linking features; that does not mean any two similar-looking light bars can connect. Verify the permitted number, connecting accessories and total arrangement in the manual. Include those parts in the purchase cost.

When rechargeable earns its place

A rechargeable bar is useful for a cupboard, coffee corner or short evening visits where a cord would be awkward. Confirm whether the mounting lets you detach the bar easily, or whether you must bring a charging cable to its installed position. A neat-looking installation is less useful if removal damages the adhesive every time.

Compare the stated runtime at the setting you intend to use. A maximum-duration claim at low brightness does not describe continuous use at full output. Motion activation can save charge during brief visits, but check sensor placement and whether an always-on mode is available. A light that times out while you work may suit storage better than a main prep counter.

Brightness and controls come before pack size

The cited Energizer rechargeable set includes white and colored lighting features and published output information. Those features are not a substitute for adequate illumination across your work area. Compare usable length, beam spread, shadows under cabinet lips and the visibility of individual LEDs. More short bars do not automatically give even coverage.

Check dimming, color temperature and control access on the exact model. Remote operation may be useful with a concealed fixture, while a simple local switch can be easier for guests. Verify what is supplied for charging and mounting, including whether a wall power adapter is separate.

Value decision

Buy plug-in for sustained use with a suitable outlet and cord route. Buy rechargeable for occasional light where you accept recharge maintenance. Start with one well-specified fixture if coverage is uncertain; expand after checking its actual position and light spread instead of committing to an oversized multipack.

Compare current listings in your country

These buttons open matching Amazon search listings rather than a guaranteed in-stock offer. Confirm the exact model, seller, included parts, delivered price and return terms. Offers can differ between the United States and Canada.

plug-in under-cabinet lights

rechargeable cabinet lights

Related guides on My Indoor Space

Sources and research

Person positioning framed artwork on a wall
DIY & Decorating

Command Picture Strips vs 3M CLAW: Which Wall Hanger Should You Buy?

Disclosure: As an Amazon Associate, My Indoor Space earns from qualifying purchases through links in this article, at no extra cost to you.

Quick verdict

Choose Command picture strips for a compatible, sound, smooth surface and a frame within the exact package’s limits when avoiding holes matters. Choose the appropriately rated 3M CLAW for a suitable drywall installation when small penetrations are acceptable. Neither is a universal choice for every wall, frame or valuable object.

Research-based buying guide. Product information checked October 16, 2026. We have not tested these products hands-on; recommendations distinguish published features from our buying judgments.

Command picture hanging strips

3M CLAW drywall hangers

Person positioning framed artwork on a wall
Illustrative decorating photo; the hanging hardware is not identified. Photo: Pexels.

A wall hanger should be chosen as a combination of wall material, frame shape and load. Adhesive strips and a drywall hanger work by different mechanisms. Avoiding a nail does not automatically mean avoiding holes or eliminating the possibility of paint damage.

The basic distinction

Question Command picture strips 3M CLAW
Attachment approach Adhesive strip pairs Metal claws enter drywall
Wall requirement Specified smooth compatible surface Suitable drywall
Removal issue Follow stretch-release method Expect small penetrations to address
Capacity Exact strip size, pairs and frame limits Exact hanger’s published rating

When Command strips make sense

They are worth considering for an approved surface and a compatible frame you may later move. Command lists clean, smooth surfaces in good condition and warns against wallpaper and heavily textured surfaces for these products.

Check whether the frame provides suitable contact areas. Paper, fabric or soft backing is not an acceptable substitute for the specified mounting surface. A package of adhesive strips cannot correct peeling paint or an unsuitable frame construction.

When CLAW makes sense

3M describes CLAW as a drywall hanger with hardened steel claws that enter the wall. Choose the exact rating and installation instructions appropriate to the item. The product is not a general masonry, tile or plaster anchor.

This can be a useful alternative when the frame’s hanging hardware suits a hook and small drywall penetrations are acceptable. In a rental, confirm the permitted hanging and repair approach rather than assuming “no nails” means there is no alteration.

Read both load and frame-size limits

Do not generalize a weight printed on one package to every strip or hanger in the range. Command limits can depend on the number of pairs and the frame dimensions. CLAW is sold in several distinct load ratings.

Weigh the complete framed object, including glass and backing, then follow the exact installation limits. Do not invent extra capacity by adding random strips or combining hangers without an approved method.

Application and removal are part of the product

Command’s picture-strip directions include preparing the surface, pressing and reinforcing the strips, waiting before loading and a specific removal sequence. The cited instructions also say to wait at least seven days after painting, while the surface must otherwise be suitable.

For removal, stretching the tab along the wall as directed is different from pulling the strip outward. Leave access for that procedure when positioning the frame. Correct preparation and removal reduce avoidable problems, but this guide does not guarantee damage-free results on every painted wall.

What should not go on these strips?

Command warns against hanging valuable or irreplaceable items and against placing these picture strips over beds. Follow the full product instructions for other restrictions. Do not choose a mounting method solely because an online photo shows a superficially similar frame.

If the item is unusually heavy, fragile or difficult to mount, choose an appropriate rated mounting solution rather than improvising. This comparison is not a structural assessment of your wall.

Cost and practical value

Adhesive replacements can add up if you rearrange a gallery frequently, because reused strip components may require new adhesive according to the maker’s instructions. A mechanical hanger may have a different removal and repair routine.

Compare complete local packs, sizes and ratings in Canada or the U.S. A large mixed pack is poor value if most pieces cannot support your actual frames. Buy for a measured job rather than filling a drawer with mismatched hardware.

Final choice

Command strips fit approved surfaces where avoiding holes is a priority. CLAW fits suitable drywall where a rated hook and small penetrations are acceptable. Surface, frame compatibility and the exact load rating should decide the purchase before convenience claims.

Compare current listings in your country

These buttons open matching Amazon search listings rather than a guaranteed in-stock offer. Confirm the exact model, seller, included parts, delivered price and return terms. Offers can differ between the United States and Canada.

Command picture hanging strips

3M CLAW drywall hangers

Related guides on My Indoor Space

Sources and research

Indoor herb garden with potted plants on a shelf
DIY & Decorating

Grow Light for an Indoor Herb Shelf: Bulb or Bar?

Disclosure: As an Amazon Associate, My Indoor Space may earn from qualifying purchases through links in this guide, at no extra cost to you.

A dim apartment shelf is convenient for herbs but often too far from a window for steady growth. The first decision is the shape of the light: one screw-in grow bulb over a single pot, or a slim light bar covering several pots along a shelf. That fit matters more than a colourful “full spectrum” label by itself.

Quick verdict

Use a short light bar for a row of herbs. A Barrina T5 2-foot 5000K bar is designed for shelves and can illuminate a longer planting area. Use a bulb for one or two pots under a suitable fixture. Soltech’s Vita is a 20-watt E26 bulb with a warmer appearance that can live in a visible kitchen lamp. This is based on published maker details and layout reasoning, not a growing trial.

Choose by the shelf, not the box photo

Setup Better fit Main check
Long narrow shelf with several pots Under-shelf LED bar Mounting surface, cord path, plant height
Single herb on a counter Grow bulb in a suitable lamp E26 socket and fixture rating
Bright window with healthy growth No additional lamp Observe the plants before spending

Bar lights distribute the light differently

Barrina’s 2-foot T5 product is a 10-watt linkable 5000K unit aimed at plant shelves and cabinets. A bar can spread light across a row of basil, parsley, and mint more evenly than one distant lamp. Check whether the particular pack includes clips, adhesive, a switch, or a timer; bundles differ. Leave clearance for a plant to grow toward the fixture and avoid getting water on plugs or connectors.

Bulbs make a visible kitchen corner easier

Soltech lists the Vita at 20 watts with an E26 base and warm-white appearance. It can fit an appropriate screw-base lamp, but it is physically larger than an ordinary household bulb. Check the shade opening, ventilation requirements, bulb weight, and recommended mounting distance for the plant. A beautiful pendant aimed at the room instead of the leaves may be a poor grow light.

Who buys, who skips

Bar: Buy for several pots along one shelf when a neat under-shelf mount and a safe cord route are available. Skip if installing a bar would damage a rental or the shelf has no practical outlet. Bulb: Buy for a single visible plant or a small grouping below a compatible fixture. Skip if the lamp is too far away or too narrow to cover the full row.

Best value and upgrade

Start with one well-placed light matched to the actual planted area; a timer can make a consistent daily schedule easier. Paying for a decorative bulb is worthwhile when the lamp is part of a living space. Paying for multiple bars is worthwhile when each shelf has plants receiving light. Neither is a substitute for watering, drainage, and the species’ actual light needs.

Buying mistakes to avoid

  • Choosing by the “full spectrum” label without checking coverage at the intended distance.
  • Buying a bulb before measuring the socket, shade, and available clearance.
  • Mounting a bar without leaving room for plant growth and a safe watering routine.
  • Buying a multipack when only one small planted area needs light.

Questions herb growers ask

How far above the herbs should the light sit?

Use the exact light’s mounting guidance and the plant’s requirements. A distance that suits one bulb or bar may not suit another. Leave room to adjust the position as the herbs grow.

Does a higher wattage mean better coverage?

Not by itself. Wattage describes power consumption; the light’s optics, distance, and the shape of the planted area affect where that light lands. Match the fixture to the shelf or individual pot.

Do I need a timer?

A compatible timer can make a consistent schedule easier. Choose the schedule for the herb and the daylight it already receives, and check whether the light or bundle includes a timer before buying another.

Final winner

For an indoor herb shelf, the light bar wins. For an individual counter herb under a visible lamp, the bulb is neater. Measure first and check the exact fixture and pack contents before ordering.

Related: indoor herb garden kits and under-cabinet lighting for renters.

Research: Barrina T5 2-foot specifications; Soltech Vita bulb specifications.

Clear removable window insulation film being applied in an apartment
DIY & Decorating

Best Window Insulation Kit for Renters

Disclosure: As an Amazon Associate, My Indoor Space may earn from qualifying purchases made through links in this guide, at no extra cost to you.

An interior window film kit creates an additional air layer when installed around a window frame. It is a seasonal project with real trade-offs: you may lose easy access to the window, and the supplied tape may affect painted surfaces. For renters, removal matters as much as installation.

Quick verdict

Start with a clear, shrink-to-fit interior film kit sized for the whole frame and a tape that is compatible with the surface. Repair obvious gaps in the weatherstripping through the landlord where appropriate. Do not cover a window you need to open for ventilation or emergency exit.

Who this is for—and when to skip it

Buy it for: A drafty window with a sound frame that can remain closed for the season, provided the tape suits the finish and your rental allows it.

Skip it when: You need to open the window regularly, it serves as an emergency exit, or the frame has leaks or damage that need the landlord’s attention. If the window already seals well, buying film may add little practical value.

How this guide was made: a research-based comparison of window-covering options using the ENERGY STAR guidance linked below. We have not claimed hands-on testing of a particular kit.

Which type fits your home?

Type Best for Trade-off
Shrink-fit film Seasonal interior air barrier Covers window access until removed
Removable weatherstripping Drafty movable sash or frame Must suit how window opens
Thermal curtain Comfort and privacy Does not seal a leaky frame
Interior storm panel Longer-term reusable solution Higher upfront cost and fit effort

Measure the whole frame

The film must attach around the window, not to the moving glass. Measure outer frame height and width, then allow for the tape placement and corner overlaps specified by the kit. ENERGY STAR’s installation guidance says to leave a few inches of film on either side and clean the frame before applying it.

Surface compatibility and removal

Double-sided tape may pull weak paint or leave adhesive. Clean and dry the frame as directed and test a small hidden area before covering the opening. If the trim is damaged or freshly painted, speak with the landlord about the underlying window instead of risking the finish.

Apply the film without shortcuts

Follow the kit’s directions for tape, corner overlaps, film tension, and heat shrinking. A hair dryer held too close can damage film or trim. Smooth wrinkles gradually rather than pulling so hard that the tape releases. Inspect for loose edges after installation.

Know what film will and will not do

The interior layer can help reduce drafts and heat loss at the opening, but it does not repair water infiltration, broken glazing, or structural damage. Condensation trapped at a damaged window deserves investigation. Keep any required exit and regularly used ventilation route usable.

Best value

A standard clear interior film kit from a reputable supplier is the sensible low-cost choice when the frame is sound and seasonal window access is not essential.

When the upgrade earns its price

A reusable interior storm panel can be worth the higher price for a window you treat every winter, provided it fits and the installation is allowed in your rental.

Buying mistakes to avoid

  • Ordering film to match glass dimensions instead of the outer frame.
  • Applying adhesive without testing the paint or trim.
  • Sealing a window needed for ventilation or exit.

Common questions

Can window film be removed in spring?

Seasonal kits are designed to come down, but the tape may leave residue or lift weak paint. Test first and remove as directed.

Does film fix condensation between double panes?

No. Moisture trapped between sealed panes indicates a different window problem that film does not repair.

Final pick

A removable film kit is a sensible seasonal option for a sound frame and a window you will not need to open. Test the tape and preserve access to ventilation and exits.

Keep comparing with our blackout curtains guide, apartment draft stopper guide.

Further reading: ENERGY STAR: Applying Plastic Over Windows.

Peel-and-stick wallpaper samples beside a finished botanical bedroom accent wall
DIY & Decorating

Best Peel-and-Stick Wallpaper for Renters

Disclosure: This post contains affiliate links. If you buy through one of our links, we may earn a commission at no extra cost to you. Landlord rules and wall finishes vary. Test a sample for adhesion and clean removal in a hidden area before covering a wall.

Peel-and-stick wallpaper can create an accent wall without paste, but “removable” is not a guarantee on every paint or surface. The quality of the wall preparation, adhesive and installation matters as much as the pattern.

The best renter choice begins with a sample. Live with the colour in morning and evening light, then test removal after several days before buying full rolls.

Quick verdict

Choose a thicker repositionable wallpaper from a seller offering samples and consistent batch numbers. Use it on smooth, fully cured paint only when the manufacturer approves the surface. Order extra from one batch to cover pattern matching and trimming.

Peel-and-stick materials

Choice Best for Advantage Watch for
Vinyl Kitchens and high-traffic areas Wipeable and durable Can look glossy and trap wall moisture
Woven fabric Bedrooms and living rooms Matte, forgiving and easier to reposition Higher price
Paper-based removable Low-moisture decorative areas Natural texture Less washable and can tear
Textured film Covering minor visual flaws Adds surface interest May be harder to align

Check the wall first

Wallpaper adheres best to clean, smooth, fully cured paint. Textured walls reduce contact, while chalky, peeling or damp surfaces are unsuitable. Fresh paint may need weeks to cure according to the paint and wallpaper makers.

Always order a sample

A screen cannot show real colour, texture or sheen. Apply a sample in a hidden area, leave it through temperature and humidity changes, then remove it carefully. Check for paint lift, residue and edge curl.

Calculate total material

Measure wall width and height, then account for pattern repeat and trimming. Large repeats create more waste. Order extra from the same batch because colour can vary between production runs.

Pattern and room scale

Large patterns can make a compact wall feel dramatic but require careful matching. Small busy patterns hide minor alignment errors. Vertical motifs can emphasize height, while horizontal lines reveal uneven ceilings quickly.

Installation tools

A smoothing tool, sharp replaceable blades, level, measuring tape and clean cloth are essential. Dull blades tear edges. Work with manageable lengths and avoid stretching the material as you smooth it.

Application method

  1. Repair and clean the approved wall.
  2. Mark a true vertical starting line.
  3. Peel a small amount of backing.
  4. Align the top and smooth from centre outward.
  5. Match the next panel without stretching.
  6. Trim with a fresh blade against a safe straightedge.

Removal

Warm the room, start at a top corner and pull slowly at a low angle as directed. Do not yank. If paint begins lifting, stop and reassess. Keep product instructions and batch information until moving day.

Common buying mistakes

  • Skipping the sample test
  • Installing over textured, dusty or uncured paint
  • Ordering exact coverage with no allowance for repeat
  • Stretching panels during alignment
  • Using a dull blade
  • Mixing production batches
  • Assuming removable means damage-proof

Frequently asked questions

Will it work on textured walls?

Often poorly. Some products tolerate light texture, but a sample test is essential.

Can it be used in a bathroom?

Only if approved for that moisture level and installed away from direct water and heat.

How much extra should I buy?

It depends on pattern repeat and wall layout. Add enough for matching, trimming and a future repair.

Can I reuse it after removal?

Some fabric products may be reusable, but many lose shape or adhesive quality. Do not assume reuse.

Why are the seams opening?

Causes include wall texture, dust, stretching, humidity, temperature or inadequate overlap/alignment.

Shop peel-and-stick wallpaper

Compare material, roll dimensions, pattern repeat, sample availability, wall compatibility, removability and batch consistency.

Shop Amazon USA Shop Amazon Canada

Who should buy it—and who should skip it

Buy it if: you want a reversible visual change, your wall is smooth and fully cured, and you can test a sample before covering a large area.

Skip it if: the paint is fresh, chalky, textured, peeling, or the landlord does not allow adhesive wall coverings.

Best value

A thicker repositionable roll from a seller that offers samples is the best value. The sample test matters more than choosing the cheapest roll because wall damage or mismatched batches can erase any savings.

When the upgrade is worth it

Pay more for heavier material, better print consistency, and reliable batch matching when covering a large wall or using a detailed pattern. For a small accent area, a simpler removable design is often enough.

Final answer

The best peel-and-stick wallpaper for renters is a thicker repositionable product tested on the actual wall before purchase. Sample first, order one batch with extra material, mark a level starting line and remove slowly. The pattern is the fun part; surface compatibility protects the deposit.

For other low-commitment upgrades, see 10 small changes that make a home feel more expensive and small living room changes.

Adhesive under-cabinet lights illuminating a clean kitchen counter
DIY & Decorating

Best Under-Cabinet Lighting for Renters

Disclosure: This post contains affiliate links. If you buy through one of our links, we may earn a commission at no extra cost to you. Follow electrical and mounting instructions, keep lights away from heat and water, and test adhesive in a hidden area before installation.

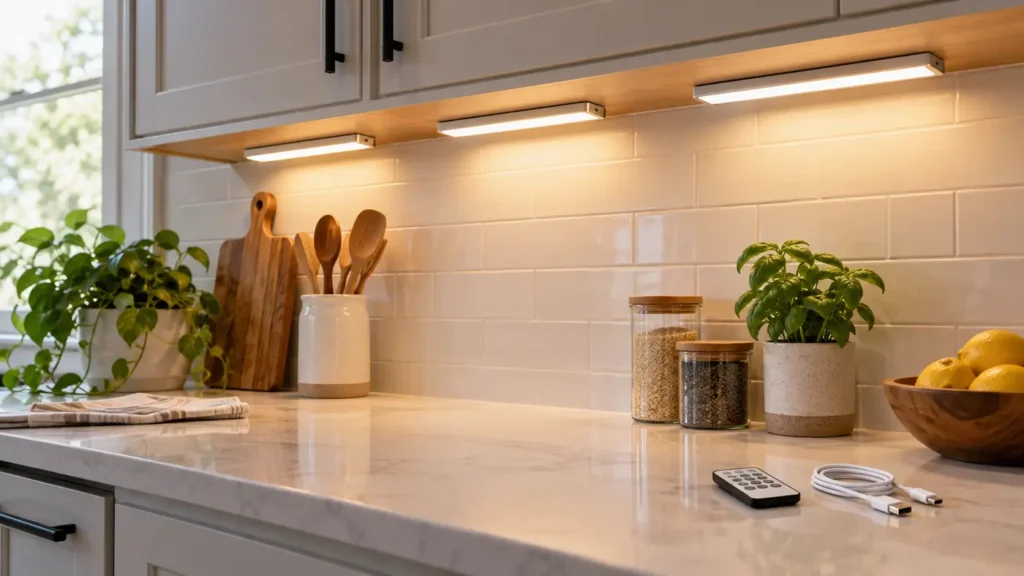
Under-cabinet lighting can make a rental kitchen easier to use without opening walls or changing fixtures. Rechargeable bars, plug-in strips and puck lights each solve a different problem, but adhesive quality and removal matter as much as brightness.

A good renter setup illuminates the work surface evenly, hides the light source from normal view and can be removed without damaging the cabinet finish.

Quick verdict

Choose slim rechargeable or plug-in light bars with magnetic mounts, adjustable brightness, warm-to-neutral colour and a manual override for the motion sensor. Magnetic adhesive plates let you remove the light for charging while leaving a low-profile mount in place.

Renter-friendly lighting types

Choice Best for Advantage Watch for
Rechargeable bar No nearby outlet Clean installation and easy removal Needs regular charging
Plug-in LED strip Long counters and daily use Continuous power and even light Visible cord routing
Puck lights Small zones and display shelves Flexible placement Can create bright spots and shadows
Battery bars Occasional use Simple and inexpensive Battery waste and lower output

Measure the work area

Measure cabinet length, depth and the distance to outlets. One long bar often gives more even light than several pucks. Mount toward the front edge so light reaches the counter instead of washing only the backsplash.

Brightness and dimming

Look for stated lumen output rather than vague terms such as super bright. Dimming helps switch between food preparation and evening ambience. More brightness is not useful when glare reflects from polished counters.

Colour temperature and quality

Warm light feels cosy; neutral white is often better for food preparation. Adjustable colour temperature offers flexibility. A higher colour-rendering rating helps food and surfaces look more natural.

Motion sensors

Motion activation is handy for late-night use but can be irritating during cooking if the light times out. Choose a model with always-on, off and sensor modes. Check whether the sensor can see movement from the counter position.

Mounting without damage

Clean the surface as directed and test adhesive on a hidden area. Painted, waxed or delicate finishes may lift. Magnetic plates simplify charging, while removable strips can reduce damage when used correctly.

Charging and cords

For rechargeable bars, check runtime at the brightness you will use and whether they operate while charging. For plug-in lights, route low-voltage cords neatly without pinching them in doors or placing them near heat.

Installation plan

  1. Test the light temporarily with painter’s tape.
  2. Check glare while standing and sitting.
  3. Confirm sensor coverage and cabinet-door clearance.
  4. Clean and dry the approved mounting spot.
  5. Apply the mount and observe the specified cure time.
  6. Save spare adhesive for moving day.

Common buying mistakes

  • Mounting at the back edge where light misses the counter
  • Buying pucks that create harsh spots
  • Ignoring charging frequency
  • Choosing a sensor with no manual-on mode
  • Applying adhesive to a fragile finish without testing
  • Routing cords near a toaster, range or sink

Frequently asked questions

Are rechargeable lights bright enough?

Many are suitable for task lighting on a short counter, but compare lumens and expect shorter runtime at full brightness.

Where should the bar be mounted?

Usually near the front underside of the cabinet, hidden from view but aimed across the work surface.

Will adhesive damage cabinets?

It can. Test first, follow removal directions and avoid fragile, peeling or uncured finishes.

Do motion sensors work during the day?

Some have ambient-light sensors and stay off in bright rooms. Check whether that behaviour is adjustable.

Are plug-in lights renter-friendly?

Yes when cords can be routed safely and mounts removed cleanly. They avoid charging and suit daily use.

Shop renter-friendly under-cabinet lights

Compare mounting strips, lumen output, colour temperature, charging, sensor behaviour, controls and replacement adhesive.

Shop Amazon USA Shop Amazon Canada

Who should buy it—and who should skip it

Buy it if: your kitchen needs more task light and you want a renter-friendly setup that can be removed later.

Skip it if: the mounting surface cannot safely take adhesive, the light would sit close to heat or water, or you need permanent hardwired lighting.

Best value

Rechargeable magnetic light bars are the best value when outlets are inconvenient and the lights run for short periods. A plug-in strip is the better value for long daily use when an outlet is nearby.

When the upgrade is worth it

Pay more for smoother dimming, better colour consistency, replaceable mounting hardware, and reliable motion controls. Do not pay extra for app features if simple manual controls fit the job.

Final answer

For most renters, magnetic rechargeable light bars offer the cleanest balance of easy installation and removal. Choose manual control alongside the sensor, mount near the cabinet’s front edge and keep brightness adjustable. A plug-in strip is better when an outlet is close and the lights run for hours every day.

Improve the rest of the room with our small-kitchen habits guide and relaxing lighting ideas.

Layered neutral blackout curtains drawn across a cozy bedroom window
Bedroom & Comfort, DIY & Decorating

Best Blackout Curtains for a Bedroom

Disclosure: This post contains affiliate links. If you purchase through one of our links, we may earn a commission at no extra cost to you. Product dimensions, materials, and care instructions should always be confirmed before ordering.

Blackout curtains can make a bedroom feel calmer, reduce early-morning glare, and give you more control over privacy. But the word “blackout” on a package does not guarantee a truly dark room. Fabric density matters, yet most disappointing results come from light leaking above, beside, or between the panels.

The best setup is a system: correctly sized curtains, enough fabric fullness, thoughtful rod placement, and—when needed—a wraparound rod, side channel, or layered shade. This guide shows you how to choose and hang blackout curtains so they work as well as they look.

Quick verdict

For most bedrooms, choose two machine-washable, triple-weave or lined panels totaling 1.5 to 2 times the width of the curtain rod. Hang the rod 4 to 8 inches above the window frame and extend it 4 to 8 inches beyond each side where wall space allows. A wraparound rod and floor-length panels usually block more edge light than a standard rod with short curtains.

Who blackout curtains are best for

  • Light sleepers whose windows face streetlights or early sunrise
  • Shift workers who sleep during daylight hours
  • Nurseries and children’s rooms where flexible nap conditions help
  • Bedrooms that need more nighttime privacy
  • Renters seeking a reversible change with a large visual impact

They are less useful if your main light leak comes from a door, skylight, or bright electronics. Curtains also do not soundproof a room; heavy fabric may soften echoes slightly, but it cannot block traffic or neighbor noise the way structural changes can.

Blackout curtain buying checklist

Decision What to look for Why it matters
Light blocking Dense triple-weave or separate blackout lining Darkens the glass area; edge control completes the job.
Width Total panel width 1.5–2× rod width Creates fullness and prevents stretched-flat gaps.
Length Floor length or slightly longer Reduces light below the window and looks more intentional.
Rod Wraparound or return-style rod Brings fabric closer to the wall at both sides.
Header Grommet, rod pocket, back tab, or rings Changes light gaps, movement, and overall style.
Care Machine washable if practical Bedroom textiles collect dust and need periodic cleaning.
Safety Cord-free design and secure hardware Especially important in children’s rooms.

Blackout vs room-darkening curtains

Room-darkening curtains reduce a noticeable amount of light but may still glow in direct sun. They can be enough for a guest room or a bedroom where you want softened morning light.

Blackout curtains use dense fabric, a woven dark layer, or an applied lining to block much more light through the panel. Even a strong blackout panel will not stop light entering around its edges.

Thermal curtains focus on slowing heat transfer and drafts. Some are also blackout curtains, but the terms are not interchangeable. Verify both claims if you want both functions.

How to measure correctly

1. Measure the window and the usable wall

Record the outside width of the trim, the height from your planned rod position to the floor, and the clear wall space on both sides. Check for vents, radiators, outlets, furniture, and baseboard heaters before deciding on length.

2. Choose the rod width

A practical starting point is the window’s outside width plus 8 to 16 inches. That lets the rod extend 4 to 8 inches past each side, giving the curtain room to cover the edges and stack away from the glass when open.

3. Calculate panel fullness

Multiply the finished rod width by 1.5 for a cleaner, tailored look or by 2 for fuller folds and better coverage. For a 60-inch rod, aim for 90 to 120 inches of total fabric width. With two panels, each panel would ideally be about 45 to 60 inches wide.

4. Select the finished length

Measure from the point where the curtain will actually hang—not simply from the top of the rod. Rings, clips, grommets, and rod pockets change the drop. Common lengths are 63, 84, 95, and 108 inches, but your measurement should make the decision.

Which curtain header blocks light best?

A rod pocket or back-tab curtain can sit relatively close to the rod, but it may be slower to open and close. Grommets slide easily, yet their top edge often sits below the rod and can admit small arcs of light. Rings and clips are flexible and polished-looking, though they may create a larger gap above the fabric.

If maximum darkness matters, mount the rod higher and choose a pelmet, cornice, or layered shade to control the top gap. The header style alone will not overcome poor placement.

Fabric, color, and lining

Dark colors often appear more opaque, but construction matters more than face color. A well-made lined cream curtain can outperform a thin black panel. Hold a sample toward a bright window if possible and inspect the seams, lining, and pinholes.

Triple-weave curtains place a dense inner layer between decorative faces. Separately lined curtains may feel heavier and drape more formally. Foam-backed options can block light effectively, but confirm care directions because some coatings should not be ironed or machine dried.

How to get a darker room

  1. Mount high and wide. Give the fabric enough overlap around the window.
  2. Use a wraparound rod. Returning the panel toward the wall closes side gaps.
  3. Close the center overlap. Arrange the panels to overlap slightly or use discreet magnetic closures designed for fabric.
  4. Add a shade. A blackout roller or cellular shade inside the frame tackles the glass while curtains cover the edges.
  5. Control the top. A valance, cornice, or higher rod helps with overhead glow.
  6. Check other light sources. Cover bright device lights and address door gaps where appropriate.

Best setup by bedroom type

Small bedroom

Choose curtains close to the wall color to keep the room visually calm. A ceiling-near rod and floor-length panels can make the wall feel taller without adding furniture.

Rental bedroom

Use properly rated no-drill brackets only when the surface and curtain weight are compatible. Tension rods work best inside a sturdy recess, but they may leave edge gaps. Keep all original hardware so the room can be restored later.

Nursery or child’s room

Prefer cord-free window coverings, secure every bracket into suitable structure or anchors, and keep beds and climbable furniture away from the window. Avoid loose tiebacks or accessible cords.

Hot, sunny bedroom

Close curtains before strong sun reaches the glass. If heat control is the priority, compare products specifically designed for thermal performance and consider a light-colored exterior-facing surface. Do not block heating or cooling vents.

Shift-worker bedroom

Layer an inside-mounted blackout shade with wide, floor-length curtains on a wraparound rod. This addresses the center, sides, top, and bottom instead of relying on fabric alone.

Common mistakes to avoid

  • Buying panels equal to the window width: the fabric pulls flat and may separate in the center.
  • Mounting directly on the trim: this often leaves bright side and top gaps.
  • Ignoring the pair count: some listings are sold as one panel, others as two.
  • Choosing length before header style: the hanging method changes where the hem lands.
  • Covering a heater or vent: keep fabric clear of heat sources and airflow.
  • Skipping care instructions: heat can damage some blackout backings.

Installation tips for a polished result

Use a level, measure both bracket positions from the ceiling or floor, and select anchors appropriate for the wall and total curtain weight. Heavy lined panels need stronger hardware than sheers. After hanging, steam or iron only as the care label permits. Train the folds by arranging the fabric evenly and loosely tying it for a day or two.

If the bedroom still feels visually busy, pair the curtains with the furniture-editing approach in How to Organize a Bedroom Without Buying More Furniture.

Frequently asked questions

Do blackout curtains make a room completely dark?

The panels may block nearly all light through the fabric, but complete darkness depends on controlling gaps around the window. Layering and wider coverage usually make the biggest difference.

Should blackout curtains touch the floor?

Floor-length panels generally look finished and reduce light below the window. Keep them safely clear of heaters, vents, damp surfaces, and anything that could soil or overheat the fabric.

Are blackout curtains always black?

No. They come in many colors. Construction and lining determine performance more than the decorative face color.

Can blackout curtains help with temperature?

Heavy, well-fitted window coverings can reduce drafts and solar heat entering the room, but results vary with the window, climate, fabric, fit, and time of day. Choose a product with specific thermal information if energy performance is your main goal.

How should blackout curtains be cleaned?

Follow the label. Some are machine washable; coated or lined panels may require gentle washing, air drying, or spot cleaning. Vacuuming with an upholstery attachment can remove surface dust between washes.

Shop blackout curtains

Compare panel quantity, individual panel dimensions, header style, lining, care instructions, and return policy before ordering. Measure the rod—not only the glass—and buy enough combined width for full coverage.

Shop Amazon USA
Shop Amazon Canada

Who should buy them—and who should skip

Buy blackout curtains if: outside light disrupts sleep, glare affects a screen, or you want another layer between the room and a bright window.

Skip them if: you prefer daylight in the morning or only need mild light filtering rather than a dark room.

Best value

A well-sized pair with a dense blackout lining and enough width to overlap the window edges is the best value. Good coverage matters more than a premium label.

When the upgrade is worth it

Pay more for better lining, thermal performance, heavier fabric, or custom sizing when light leaks and window dimensions make standard panels ineffective.

Final answer

The best blackout curtains for a bedroom are wide enough to hang with full folds, long enough to cover the bottom edge, and mounted high and wide on a rod that brings the fabric close to the wall. For most rooms, lined or triple-weave floor-length panels at 1.5 to 2 times the rod width offer the best balance of darkness, style, and everyday ease. If you need near-total darkness, layer them with an inside-mounted blackout shade.

For more bedroom comfort ideas, see Why My Bedroom Finally Started Feeling Like a Place to Rest and our guide to choosing a bedroom humidifier.


Bright living room filled with natural daylight
Cozy Living, DIY & Decorating

Why I Started Using More Natural Light During the Day

Disclosure: As an Amazon Associate, My Indoor Space may earn from qualifying purchases through links in this article, at no extra cost to you.

For years, I automatically turned on lights the moment I entered a room. It was simply a habit. But recently, I started opening the blinds more often and relying on natural daylight whenever possible. The change was surprisingly simple, yet it made my home feel brighter, more inviting, and even a little more spacious.

Natural light is one of the easiest and most affordable ways to improve the feel of a home.

The Difference I Noticed

After making an effort to let more sunlight into my living space, I noticed several benefits:

  • Rooms felt larger and more open
  • My home looked cleaner and brighter
  • I used less artificial lighting during the day
  • Indoor plants seemed healthier
  • The space felt more welcoming and comfortable

It’s amazing how much a room can change simply by pulling back the curtains.

Buy on Amazon USA

NICETOWN Blackout Curtains

Great for controlling light when needed while still allowing flexibility during the day.

Command Curtain Rod Hooks

An easy solution for hanging lightweight curtains without major installation.

Brightech Sky LED Floor Lamp

Perfect for maintaining a warm atmosphere when the sun goes down.

Simple Ways to Maximize Natural Light

You don’t need to remodel your home to get more daylight.

Try these simple ideas:

  • Open blinds and curtains first thing in the morning
  • Keep windows clean
  • Use mirrors to reflect sunlight around the room
  • Choose lighter-colored décor when possible
  • Avoid blocking windows with large furniture

Even small adjustments can make a noticeable difference.

Natural Light and Comfort

Natural light can help create a more pleasant indoor environment throughout the day. Bright spaces often feel more cheerful and welcoming than rooms that rely entirely on artificial lighting.

Many homeowners spend money trying to make rooms feel bigger and brighter when the solution may already be sitting just outside the window.

Final Thoughts

One of the simplest changes I’ve made at home was using more natural light during the day. It didn’t cost anything, took almost no effort, and immediately improved how my living space felt.

Before buying new furniture or redecorating a room, try opening the blinds and letting the sunshine in. You might be surprised by how much of a difference it makes.

Buy on Amazon Canada

NICETOWN Blackout Curtains

Provide flexibility for controlling daylight and privacy throughout the day.

Command Curtain Rod Hooks

A simple way to update window treatments without complicated installation.

LED Floor Lamp

Helps maintain a cozy atmosphere after sunset.

Natural light is free, abundant, and one of the easiest ways to make your home feel brighter, warmer, and more inviting. ☀️🏡✨

For window light control, see the blackout curtain guide before measuring.

Bright comfortable living room improved with simple decor changes
Cozy Living, DIY & Decorating

Small Living Room Changes That Make a Big Difference

Disclosure: As an Amazon Associate, My Indoor Space may earn from qualifying purchases through links in this article, at no extra cost to you.

You don’t need a complete makeover to transform your living room. In fact, a few small changes can make the space feel larger, brighter, and more inviting.

Start by removing anything that doesn’t belong in the room. Clearing clutter instantly creates a cleaner look. Next, add a few throw pillows or a soft blanket to make the space feel warm and comfortable. Rearranging furniture to improve traffic flow can also make a surprising difference.

Lighting is another game changer. A floor lamp or table lamp can create a cozy atmosphere that overhead lights often can’t match. Finally, add a plant or two to bring life and color into the room.

Small improvements add up quickly and can make your living room feel like a brand-new space.


Make the free changes first

Walk through the room as you normally would and notice where furniture narrows the path. Move a side table or angle a chair before ordering anything. Try one evening with the overhead light off and existing lamps on; that tells you whether another light is useful. Remove or relocate one visible pile, then decide whether a storage ottoman would actually solve that specific problem.

Choose one purchase with a purpose

If the room feels bare, a rug can define the seating area, but measure the floor and furniture footprint before choosing a size. Check the care instructions and whether you need a suitable pad for your floor. If the room is dim, compare the lamp’s height, shade, bulb compatibility, and outlet placement. If you already like the layout and lighting, removable pillow covers or a throw may give you a change for less than replacing furniture. For plants, pick a location with suitable light and keep any plant choices appropriate for the people and pets in your home.

Quick choice: Fix the traffic flow first, then buy only for the issue you can name: poor light, an undefined seating area, or clutter without a home. Skip a decorative purchase if it adds another object to a crowded room. The U.S. and Canada links below are separate searches, so compare the current size, care details, and price for the item you select.

🇺🇸 Buy on Amazon USA

Decorative Throw Pillows

Add color, texture, and comfort to any living room.

Cozy Throw Blankets

Perfect for creating a warm and inviting atmosphere.

Floor Lamps

Improve lighting and make the room feel larger and brighter.

Indoor Plants and Planters

Bring natural beauty into your living space.

Storage Ottomans

Add seating while hiding clutter.

Area Rugs

Help define the room and add warmth underfoot.


🕯️ Final Thoughts

Creating a more comfortable living room doesn’t have to be expensive or time-consuming. A few thoughtful updates can completely change how the space looks and feels, making it a place you’ll enjoy spending time in every day.


🍁 Buy on Amazon Canada

Decorative Throw Pillows

An easy way to refresh your living room without redecorating.

Cozy Throw Blankets

Add warmth and comfort year-round.

Floor Lamps

Create a relaxing atmosphere for evenings at home.

Indoor Plants and Planters

A simple way to add color and life to your space.

Storage Ottomans

Stylish storage that helps reduce clutter.

Area Rugs

Make your living room feel more finished and welcoming.

If a rug anchors the living room, see the washable area rug guide.

Scroll to Top