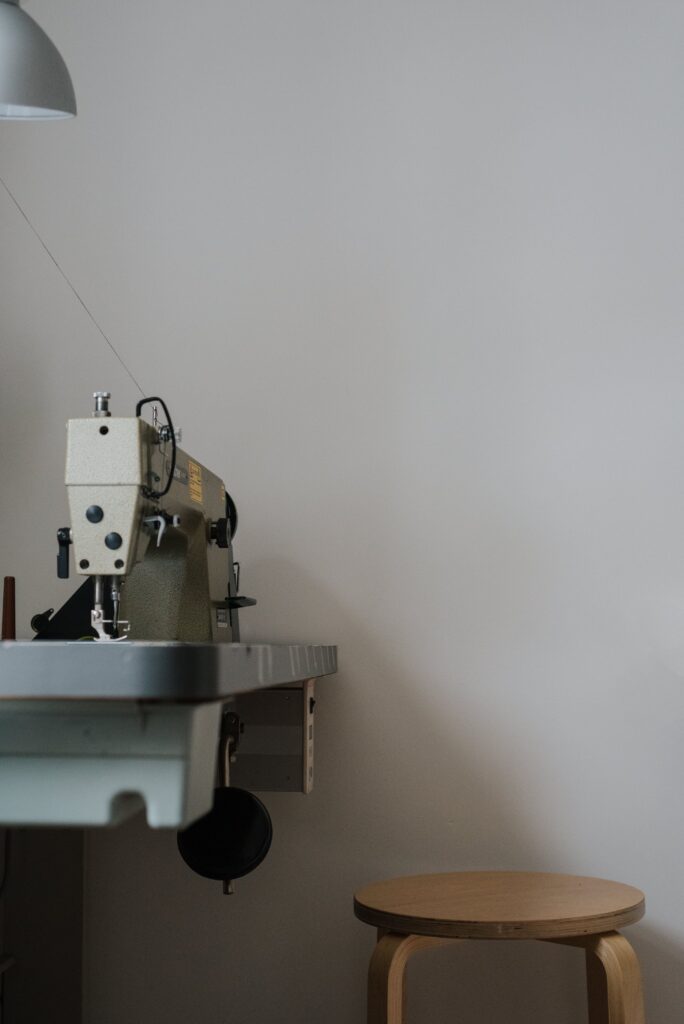
Sewing machine in a bright indoor workspace
Cozy Living

Mechanical vs Computerized Sewing Machine for Beginners

Disclosure: As an Amazon Associate, My Indoor Space may earn from qualifying purchases through links in this guide, at no extra cost to you.

A first sewing machine can be a simple mechanical dial model or a computerized machine with stitch selection on a screen. Neither choice makes a crooked seam straight automatically. What matters for a beginner is how easily you thread it, control speed, change feet, and clear a mistake at the kitchen table.

Quick verdict

Computerized is the more forgiving start for varied projects when it has adjustable speed. The Brother CS7000X illustrates this: it includes speed control, a quick-set bobbin, automatic needle threader, a wide table, and 10 feet. Mechanical suits a learner who wants direct dial controls and mainly basic mending. Singer’s 4423 illustrates that approach, with 23 built-in stitches. This is a comparison based on manufacturer documentation, not our own sewing trials.

Features that matter at a first table

Question Computerized example Mechanical example
How are stitches chosen? Buttons and screen; more programmed choices Physical dials and basic marked choices
Can you slow it down? CS7000X has an adjustable speed control Check how the particular foot pedal responds
What is in the box? Brother lists 10 presser feet and a wide table Verify feet, bobbins, and cover on the exact 4423 listing
Will it sew heavy layers? Use the correct needle, fabric, and foot; test a scrap “Heavy duty” still needs suitable needles and sensible feeding

Do not buy on stitch count alone

The CS7000X has 70 built-in stitches, but a beginner can do a great deal with straight stitch, zigzag, a usable buttonhole, and the appropriate foot. More decorative stitches are valuable if you use them, not as a substitute for stable feeding and clear instructions. Brother also includes a free arm for cuffs and sleeves, helpful when mending narrow garments.

Test the thickest real project in mind

If you want to hem jeans, consider the folded seam at the side, not just a single denim layer. Ask the seller or maker about recommended needles, presser-foot clearance, and support for that fabric. Neither a “heavy duty” label nor a high stitch count guarantees effortless sewing through every bulky seam. Never force fabric under the needle by pulling it.

Apartment setup and storage

Allow room for fabric on both sides of the machine, an iron nearby, and a clear space to remove pins. A detachable wide table is useful for a larger piece but requires storage when not in use. If you share a table, check total weight with the hard cover and whether carrying it from a cupboard is comfortable.

Who buys and who skips

Choose computerized if a speed limiter and guided controls make learning easier or you plan to try quilting and varied garments. Skip a larger accessory set if you only repair the occasional seam. Choose mechanical if straightforward dials appeal and mending is the main job. Skip either machine until you know whether local classes, servicing, and replacement needles are available where you live.

Best value and upgrade

The value is a machine you can thread and maintain, with a useful straight stitch and the feet needed for your first three projects. The CS7000X earns its extra features when you use the speed control and wide table. A mechanical model can be the better use of money for simple repairs. Compare current US and Canadian listings, bundles, warranty terms, and service access.

Buying mistakes to avoid

  • Choosing by stitch count instead of threading, speed control, and the projects you actually plan to sew.
  • Assuming a heavy-duty label means every thick seam will feed easily.
  • Buying a bundle before checking which feet, bobbins, and cover are included in your country.
  • Forgetting the table space, storage space, and local service needed after purchase.

Questions beginners ask

Is a computerized machine easier for a beginner?

It can be, especially when adjustable speed helps you practise slowly. A mechanical machine may feel simpler if you prefer marked dials. Choose the controls you can understand and use comfortably rather than assuming either category teaches sewing for you.

Do I need dozens of decorative stitches?

For basic mending, start with a straight stitch, zigzag, and a suitable buttonhole. Extra stitches are useful when a planned project calls for them; they should not outweigh clear threading instructions and practical controls.

Can either machine handle jeans hems?

Check the exact machine manual and recommended needle for the fabric. The bulky folded seam is the important test, and a heavy-duty label is not a promise that every thickness will feed. Try a scrap with the same layers before working on the garment.

Final winner

For a beginner with several projects in mind, the Brother CS7000X-style computerized machine wins on learning controls. For mostly basic mending and a preference for dials, a mechanical Singer 4423-style machine is the more direct choice.

Related: indoor hobbies for small spaces and fabric shaver guide.

Research: Brother CS7000X specifications; Singer heavy-duty machine descriptions.
Book and bedside lamp in a cozy bedroom
Bedroom & Comfort

Clip-On vs Neck Reading Light for Bed

Disclosure: As an Amazon Associate, My Indoor Space may earn from qualifying purchases through links in this guide, at no extra cost to you.

A reading light for a shared bedroom needs to illuminate the page without lighting the entire room. Clip-on lights attach to the book or headboard; neck lights move with the reader. Both are small, rechargeable purchases, but they feel very different when you turn pages or change position.

Quick verdict

Clip-on wins for a book in bed. It follows the pages and stays off your shoulders. Neck light wins when you switch between reading, knitting, and small hands-free tasks. Glocusent’s current clip-on and slimmer neck models illustrate these layouts. This comparison uses manufacturer specifications and practical use cases; it is not an account of testing either model.

What moves when you move?

Light Best use Trade-off
Clip-on book light Paper book in one reading position May need moving when pages or books change
Neck light Book plus crafts or occasional standing tasks Worn on the body; beam shifts with your head or shoulders
Bedside lamp Broad room or desk light More spill onto a sleeping partner

Check the clip before buying

A small bookmark-style light clips to pages and moves with the book. A larger headboard clamp can stay fixed but requires a suitable edge and may cast shadows when you roll over. Check the grip thickness, weight, flexible arm, and whether the light lands on both pages without glare. Glocusent lists adjustable colour temperatures and brightness on its updated bookmark model; exact controls differ between models.

When the neck format earns its place

A neck light leaves hands free and can point two sides toward a book or project. Glocusent’s slimmer rechargeable model lists five brightness levels. For someone who reads lying flat and dislikes anything around the neck, that design may be less comfortable than a tiny clip. Look for independent beam aiming, easy-to-reach controls, and a charging port you already use.

Who buys and who skips

Choose clip-on for a reader mostly holding one book, especially beside a sleeping partner. Skip a delicate page clip if you mainly read on a tablet or change between very thick books and thin magazines. Choose neck when knitting or repairs share the same light and you often move between chairs. Skip it if a wearable light feels distracting.

Value and upgrade

The best value is the simplest rechargeable light with a low setting you will actually use. Paying for more colour and brightness options is useful when you change tasks and room lighting. Battery-runtime figures depend heavily on brightness, so compare the maker’s conditions rather than a single headline maximum.

Buying mistakes to avoid

  • Buying the brightest light without checking its lowest usable setting.
  • Choosing a clip that is too heavy for your book or too narrow for the headboard.
  • Comparing maximum battery runtimes without checking the brightness used for those figures.
  • Assuming a neck light will stay aimed at the page as you change position.

Questions readers ask

Which format is better beside a sleeping partner?

Start with a light you can aim closely at the page and dim comfortably. A small clip-on is a practical first choice for a paper book, but beam direction and brightness matter more than the label. Check light spill from your partner’s side of the bed.

Can a neck light replace a bedside lamp?

It can light a book or a small hands-free task, but it does not provide the same broad illumination as a bedside lamp. Choose it for the task and how it feels when worn, rather than as a general room light.

Will the advertised runtime apply at full brightness?

Do not assume so. Compare the manufacturer’s brightness settings and runtime conditions for the exact model. Plan charging around the setting you use, not just the largest number on the box.

Final winner

For reading a paper book in bed, the clip-on light wins. For a multipurpose hands-free lamp, the neck light earns its extra flexibility. Check the physical attachment or fit before ordering.

Related: reading nook ideas and night-light guide.

Research: Glocusent bookmark-style light; Glocusent slimmer neck light.

Laundry hampers in a bright laundry room
Laundry & Cleaning

Dual Laundry Hamper vs Rolling Sorter for an Apartment

Disclosure: As an Amazon Associate, My Indoor Space may earn from qualifying purchases through links in this guide, at no extra cost to you.

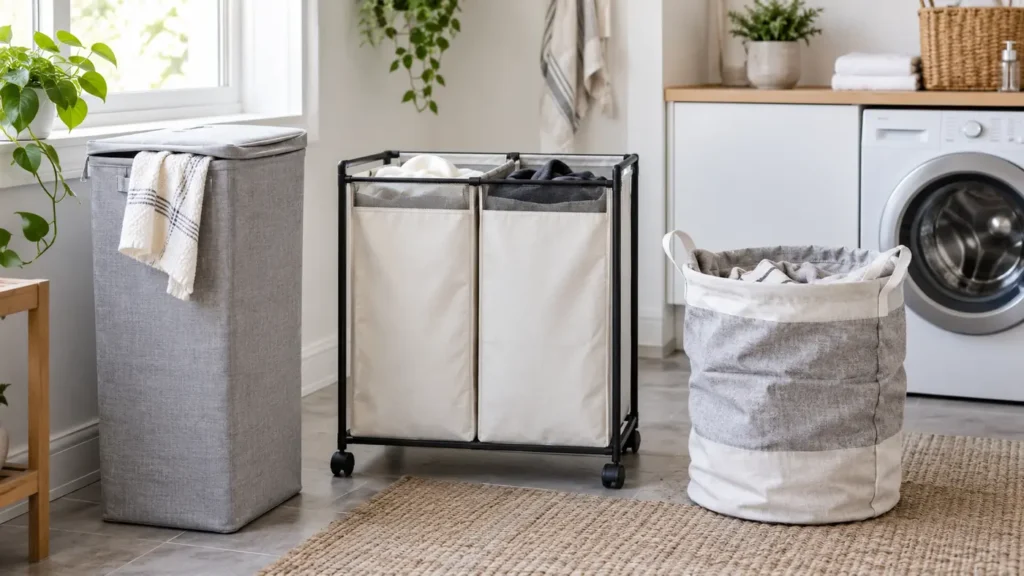
Sorting laundry before wash day sounds efficient until the sorter blocks the bedroom doorway. In a small apartment, a tall dual-bin hamper and a wide rolling three-bag sorter solve different problems. The right one depends on floor area, how you carry clothes to the machine, and whether you actually separate more than two loads.

Quick verdict

Choose a dual-compartment hamper for a tight bedroom or closet. Choose a rolling three-bag sorter for a dedicated laundry corner and a household that divides loads at least three ways. Brabantia’s 55 L Selector illustrates a compact two-section bin; Honey-Can-Do’s rolling triple sorters illustrate the wider, transportable format. These are examples from maker documentation, not products we have personally tested.

What changes in daily use?

Choice Helps with Costs you
Dual-bin hamper Sorting lights and darks where floor area is scarce Two categories and carrying the liner to laundry
Three-bag rolling sorter Separating towels, delicates, and clothing before wash day More width, caster clearance, and exposed bags
One simple hamper A one-person household doing mixed loads Sorting later when it becomes necessary

Measure the path, not just the corner

A sorter can fit along a wall but still block a door when pulled out. Honey-Can-Do lists one three-bin mesh model at 28.25 by 13.5 by 30 inches, with removable drawstring bags. Add room to remove each bag and turn the frame. In an apartment with a shared laundry room or stairs, carrying a removable bag may be more practical than rolling a full frame.

Think about what actually goes in each bin

The Brabantia Selector has two openings and a washable divided liner for two categories. That can prevent the top of a single hamper becoming a pile of separately sorted clothes. A third compartment earns its space only if the household consistently has a third distinct wash load. Labels or different bag colours can help everyone sort the same way, but they cannot fix a capacity mismatch.

Who buys and who skips

Dual hamper: Buy for a bedroom, closet, or narrow laundry nook where two categories are enough. Skip when towels and delicate items need their own bags and are frequently washed separately. Rolling sorter: Buy when you have a floor-level laundry area and a repeatable three-load routine. Skip when moving it over thresholds or carrying it downstairs is harder than lifting one bag.

Best value and upgrade

If you are one person with one mixed load, use a simple hamper first. For two streams, a divided liner or dual-bin hamper is the efficient upgrade. A sturdy wheeled sorter is worth more when the household volume and the route to a nearby washer justify its footprint.

Buying mistakes to avoid

  • Measuring the storage corner but not the doorway or the space needed to lift out a bag.
  • Buying three compartments when you usually wash only one or two categories.
  • Assuming wheels make a sorter convenient on stairs or across high thresholds.
  • Choosing capacity without checking whether a full removable bag is comfortable to carry.

Questions apartment dwellers ask

Is a rolling sorter useful with shared laundry facilities?

Only if the route is suitable for the frame and wheels. For stairs, tight doors, or a trip outside the building, removable bags may be the useful feature. Measure the route before choosing the larger sorter.

Do I need two compartments or three?

Match the compartments to the loads you regularly wash. Two can suit a simple split; a third earns its floor space when you consistently separate another category. A single hamper remains sensible when you sort only on wash day.

Can the bags or liner be washed?

Check the care instructions for the exact model. Honey-Can-Do describes washable mesh bags for the example linked below; do not apply that instruction to every hamper liner or put its frame in the washing machine.

Final winner

In a small apartment, the dual-compartment hamper wins on space. A three-bag roller wins only when there is a dedicated route and three real laundry categories. Measure width, bag removal space, and the laundry-room journey before buying.

Related: small-space hamper guide and folding drying racks.

Research: Brabantia Selector details; Honey-Can-Do three-bin size and bag features.

Office chair and desk in a modern home workspace
Home Organization

Chair Mat for Carpet vs Hard Floor: Buy the Right Backing

Disclosure: As an Amazon Associate, My Indoor Space may earn from qualifying purchases through links in this guide, at no extra cost to you.

A chair mat for carpet and a chair mat for a smooth floor may look almost identical from above. Turn them over. A gripper back helps anchor a mat into suitable carpet; those same teeth can damage a wooden or vinyl floor. Buying by floor type, carpet pile, and chair movement saves a lot of sliding and cracking.

Quick verdict

For carpet, choose a mat explicitly rated for your pile depth with a gripper back. For hard flooring, choose a smooth-backed mat. On a polished surface, a maker-approved anti-slip backing can help. This is a research-based selection guide using Floortex’s materials and care advice, not a hands-on durability test.

Match the backing to the surface

Floor Mat backing Main risk
Low or medium carpet pile Grippers, with the product rated for that pile A mat designed for very low pile can sink and crack on deeper carpet
Wood, tile, vinyl, laminate Smooth backing designed for hard floors Carpet grippers can mark or damage the floor
Polished or glossy hard floor Smooth or maker-approved anti-slip layer Movement and trapping grit beneath the mat

Measure the chair’s actual travel

Put the chair under the desk, then roll it fully back to stand up. Trace where all five casters travel, including the space for turning. A mat that covers only the chair when tucked in can let a wheel fall off the edge repeatedly. For a cramped home office, check door swing and whether a lip or extension fits beneath the desk.

Pile depth changes the material choice

Floortex warns that a mat meant for short pile may lack support on deep pile and crack under a rolling chair. Polycarbonate options provide a stiffer rolling surface; less expensive PVC models may need time to flatten after unrolling. Neither material is automatically right for every carpet. Check the maker’s pile-depth rating and floor compatibility for the exact size and backing variant.

Who buys and who skips

Carpet mat: Buy if chair wheels drag or carpet wear is appearing. Skip a spiked underside when you might move the mat onto hard flooring. Hard-floor mat: Buy when caster scuffs and grit are a concern. If your chair already rolls well and the floor is protected by suitable soft casters, measure the benefit before filling a small room with a large plastic sheet.

Best value and when to upgrade

The value choice is a mat correctly rated for the floor and big enough for your movement, not the thickest advertised sheet. Pay more for a rigid polycarbonate design when carpet pile and daily rolling make a thin mat unstable. Clean and dry the floor before laying a mat so grit and moisture are not trapped underneath.

Buying mistakes to avoid

  • Putting carpet grippers on wood, vinyl, laminate, or tile.
  • Choosing a carpet mat without checking its maximum supported pile depth.
  • Measuring only the parked chair instead of the full rolling area.
  • Laying the mat over grit or a damp floor.

Questions buyers ask

Can I use a carpet chair mat on a hard floor?

Do not use a gripper-backed carpet mat on a hard floor unless its manufacturer explicitly approves that use. Choose a backing designed for your surface and check the flooring manufacturer’s guidance too.

Is a thicker mat always better?

No. Floor compatibility, carpet-depth rating, stiffness, and the area covered matter together. A thick mat with the wrong backing or insufficient room for the chair can still be a poor fit.

How large should the mat be?

Measure where the casters travel when you sit down, turn, and push back to stand. Include the space beneath the desk if the wheels roll there, while keeping doors and walkways clear.

Final winner

Choose a model explicitly rated for your floor. For typical plastic mats, use a gripper-backed, pile-rated version on carpet and a smooth-backed version on hard floors. Some specialist mats are approved for more than one surface; follow the exact model’s compatibility guidance. Choose the backing first, then the material and dimensions.

Related: under-desk footrest and monitor arm for a small desk.

Research: Floortex floor/backing guide; Floortex materials guide.

Indoor herb garden with potted plants on a shelf
DIY & Decorating

Grow Light for an Indoor Herb Shelf: Bulb or Bar?

Disclosure: As an Amazon Associate, My Indoor Space may earn from qualifying purchases through links in this guide, at no extra cost to you.

A dim apartment shelf is convenient for herbs but often too far from a window for steady growth. The first decision is the shape of the light: one screw-in grow bulb over a single pot, or a slim light bar covering several pots along a shelf. That fit matters more than a colourful “full spectrum” label by itself.

Quick verdict

Use a short light bar for a row of herbs. A Barrina T5 2-foot 5000K bar is designed for shelves and can illuminate a longer planting area. Use a bulb for one or two pots under a suitable fixture. Soltech’s Vita is a 20-watt E26 bulb with a warmer appearance that can live in a visible kitchen lamp. This is based on published maker details and layout reasoning, not a growing trial.

Choose by the shelf, not the box photo

Setup Better fit Main check
Long narrow shelf with several pots Under-shelf LED bar Mounting surface, cord path, plant height
Single herb on a counter Grow bulb in a suitable lamp E26 socket and fixture rating
Bright window with healthy growth No additional lamp Observe the plants before spending

Bar lights distribute the light differently

Barrina’s 2-foot T5 product is a 10-watt linkable 5000K unit aimed at plant shelves and cabinets. A bar can spread light across a row of basil, parsley, and mint more evenly than one distant lamp. Check whether the particular pack includes clips, adhesive, a switch, or a timer; bundles differ. Leave clearance for a plant to grow toward the fixture and avoid getting water on plugs or connectors.

Bulbs make a visible kitchen corner easier

Soltech lists the Vita at 20 watts with an E26 base and warm-white appearance. It can fit an appropriate screw-base lamp, but it is physically larger than an ordinary household bulb. Check the shade opening, ventilation requirements, bulb weight, and recommended mounting distance for the plant. A beautiful pendant aimed at the room instead of the leaves may be a poor grow light.

Who buys, who skips

Bar: Buy for several pots along one shelf when a neat under-shelf mount and a safe cord route are available. Skip if installing a bar would damage a rental or the shelf has no practical outlet. Bulb: Buy for a single visible plant or a small grouping below a compatible fixture. Skip if the lamp is too far away or too narrow to cover the full row.

Best value and upgrade

Start with one well-placed light matched to the actual planted area; a timer can make a consistent daily schedule easier. Paying for a decorative bulb is worthwhile when the lamp is part of a living space. Paying for multiple bars is worthwhile when each shelf has plants receiving light. Neither is a substitute for watering, drainage, and the species’ actual light needs.

Buying mistakes to avoid

  • Choosing by the “full spectrum” label without checking coverage at the intended distance.
  • Buying a bulb before measuring the socket, shade, and available clearance.
  • Mounting a bar without leaving room for plant growth and a safe watering routine.
  • Buying a multipack when only one small planted area needs light.

Questions herb growers ask

How far above the herbs should the light sit?

Use the exact light’s mounting guidance and the plant’s requirements. A distance that suits one bulb or bar may not suit another. Leave room to adjust the position as the herbs grow.

Does a higher wattage mean better coverage?

Not by itself. Wattage describes power consumption; the light’s optics, distance, and the shape of the planted area affect where that light lands. Match the fixture to the shelf or individual pot.

Do I need a timer?

A compatible timer can make a consistent schedule easier. Choose the schedule for the herb and the daylight it already receives, and check whether the light or bundle includes a timer before buying another.

Final winner

For an indoor herb shelf, the light bar wins. For an individual counter herb under a visible lamp, the bulb is neater. Measure first and check the exact fixture and pack contents before ordering.

Related: indoor herb garden kits and under-cabinet lighting for renters.

Research: Barrina T5 2-foot specifications; Soltech Vita bulb specifications.

Coffee beans stored in a container on a kitchen counter
Kitchen & Dining

Airscape vs Fellow Atmos: Which Coffee Canister?

Disclosure: As an Amazon Associate, My Indoor Space may earn from qualifying purchases through links in this guide, at no extra cost to you.

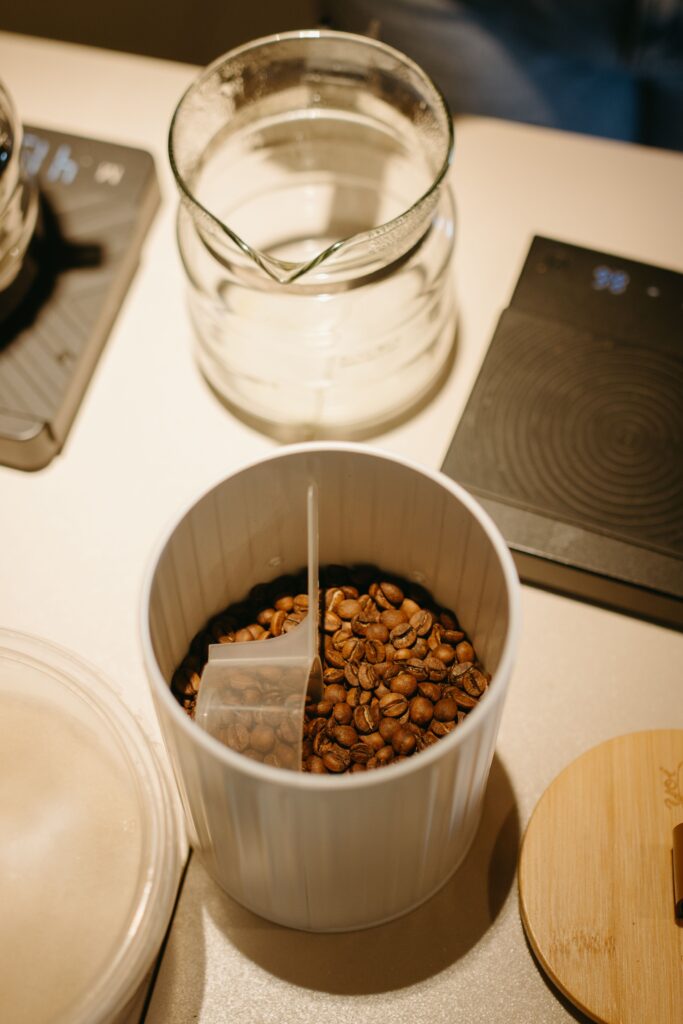
A coffee canister cannot rescue stale beans. Its practical job is to make daily storage easy while reducing exposure to air, light, and moisture. Airscape Classic and Fellow’s manual Atmos take different routes: a plunger lowers the air space in one; a lid pump creates a vacuum in the other.

Quick verdict

Airscape Classic is the simpler choice for mixed pantry use or ground coffee. Manual Atmos suits whole-bean coffee drinkers who will maintain the vacuum seal. Fellow cautions against putting grounds or fine powders in Atmos because they can clog its valve. This recommendation is based on manufacturer instructions and fit, not home testing or a claim that either keeps beans fresh for an exact number of days.

How the lids change use

Choice Sealing routine Practical fit
Airscape Classic Push inner plunger down toward the contents; place outer lid Beans and other dry pantry goods; low-tech storage
Manual Fellow Atmos Twist the lid to pump out air; release it to open Whole beans and users willing to refresh the seal
Resealed original bag Press out air and clip or zip tightly Lower-cost starting point when beans are used quickly

Buy the size that matches your bag

Airscape’s Classic comes in 250 g and 500 g versions, approximately half-pound and pound bag sizes. Fellow lists 0.4 L, 0.7 L, and 1.2 L Atmos sizes; its 1.2 L version holds up to 16 ounces of light or medium roast beans, with less room for bulky dark roast. Those capacity figures are approximate. Look at your usual bag size before choosing a canister that will need a second container for the remainder.

What maintenance buys you

Fellow advises twisting a manual Atmos lid again every four to five days to maintain the vacuum. Its built-in pump cannot go in the dishwasher. Airscape calls for hand washing as well, but does not require a pumping routine. If you open the container many times a day, think about whether the extra lid step will become a habit or an annoyance.

Who buys and who skips

Airscape: Choose it for straightforward daily storage and the flexibility to store other dry goods. Skip if you specifically want a lid that indicates a vacuum seal. Atmos: Choose it for whole beans and a vacuum-oriented routine. Skip it for ground coffee, flour, sugar, or anyone unwilling to twist the lid periodically. Both belong away from heat and direct sunlight.

Best value

First improve the basics: buy a quantity you will use, close the bag tightly, and store it in a cool, dark cupboard. A canister earns its space when bags keep opening or the sealing routine is frustrating. The Airscape is the more flexible purchase; an Atmos upgrade makes sense when you prize a vacuum seal and accept its extra care.

Before you order

This comparison covers the manual, twist-lid Atmos, not Electric Atmos. Match the lid type and canister capacity when comparing listings. The Amazon buttons below open Airscape search results, not a fixed product listing; check the selected size, seller, and delivery country before buying. For the alternative, see Fellow’s Atmos model and size options.

Final winner

Airscape Classic wins for everyday versatility. Manual Atmos wins for a deliberate whole-bean coffee station. Check the exact model and size before ordering; a glass Atmos also needs protection from strong light.

Related: Baratza grinder comparison and OXO 8-Cup review guide.

Research: Airscape Classic design and care; Fellow Atmos sizes, use, and grounds warning.

Manual coffee brewer preparing fresh coffee in a home kitchen
Kitchen & Dining

AeroPress Original vs XL: Which Size Makes Sense?

Disclosure: As an Amazon Associate, My Indoor Space may earn from qualifying purchases through links in this article, at no extra cost to you.

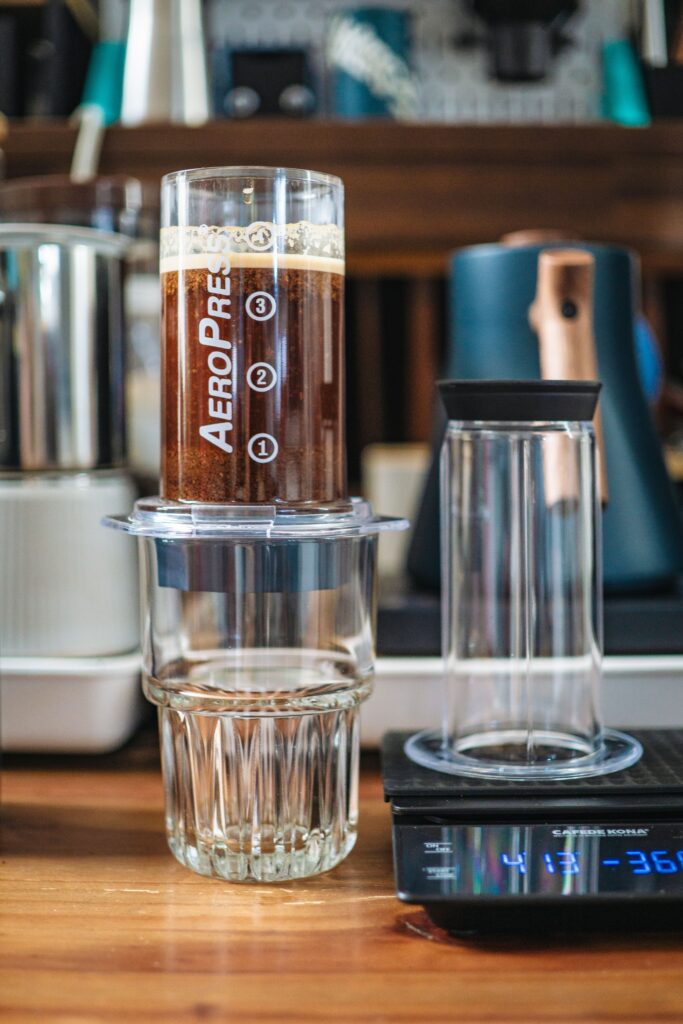
The AeroPress Original works neatly for one cup. Its XL sibling exists for people who kept making two batches or wanted to fill a large travel mug in one press. Capacity sounds like a simple upgrade, but the XL also changes the filter you buy and the vessel you press into.

Quick verdict

Original wins for one regular cup and minimal storage. It makes up to a 10-ounce brew by AeroPress’s specification. XL wins for two people or a larger single serving. It is rated for 20 ounces and includes a Tritan carafe. Those are maker specifications, not our measurements or hands-on tasting results.

The size difference changes the daily work

Choice For Watch for
Original One cup, small kitchen, occasional travel Two drinkers may need two separate presses
Original XL Two mugs in a single batch or a larger travel mug Larger body and XL-only filters
Drip coffee maker Several cups with little manual attention Counter space and more pieces to clean

Match capacity to your actual mugs

The stated 10-ounce and 20-ounce capacities refer to US fluid ounces: approximately 296 mL and 591 mL. Two 350 mL mugs need 700 mL in total, so even the XL does not fill both to the rim in one full-volume brew. Measure your usual serving before upgrading. Brewing a concentrate and adding water is a different recipe, not extra chamber capacity.

Filters are not interchangeable

The XL has a wider chamber and needs its own XL paper filters. AeroPress says its standard filters fit the Original and several other standard-size models, but not the XL. Its help page also explains that the lower production volume of XL filters can make each filter cost more. Add the local cost and availability of replacements to the purchase decision.

Press into a sturdy vessel

The XL comes with a 20-ounce Tritan carafe, which is the intended receiving vessel. AeroPress specifically advises against pressing the XL into a glass mug or carafe. With the Original, use only a sturdy mug or carafe and follow the same caution against delicate glass. The inverted brewing method adds a tipping and hot-water risk, so follow the maker’s upright instructions.

Who should buy and who should skip

Original: The person who brews a single 10-ounce-or-smaller serving and puts the brewer away afterward. Skip if you routinely repeat the process for another person. XL: A couple sharing a brew or someone wanting one bigger batch without a permanent countertop machine. Skip if you rarely use the capacity and do not want to stock a second filter size.

Value and upgrade

Buying a larger press does not improve every cup automatically. The Original is the lower-clutter value for a single drinker. The XL’s extra cost earns its place when it removes a second brewing and pressing cycle most mornings. You can grind enough beans and heat enough water for two Original brews together, so those steps are not automatically repeated. A full drip brewer is the more hands-off option when you regularly serve several people.

Final winner

Choose Original for one cup and XL for one press shared by two. Check filter availability in the US or Canada and whether the included carafe fits your serving routine before paying for more capacity.

Related: OXO 8-Cup for one or two and Encore grinder comparison.

Research: AeroPress Original; AeroPress Original XL, filter, and safety details.

Compact espresso machine brewing coffee in a modern kitchen
Kitchen & Dining

Breville Bambino vs Bambino Plus: Is the Upgrade Worth It?

Disclosure: As an Amazon Associate, My Indoor Space may earn from qualifying purchases through links in this guide, at no extra cost to you.

Breville’s Bambino and Bambino Plus are compact espresso machines with very different approaches to milk. The extra money for the Plus is easiest to justify when you make cappuccinos and lattes regularly. If you mainly drink espresso and want to learn manual steaming, the basic Bambino can be the smarter purchase.

Quick verdict

Bambino: best value for espresso and hands-on milk practice. Bambino Plus: best for frequent milk drinks with less work. Breville specifies a 54 mm portafilter and rapid ThermoJet heat-up for both; the Plus adds an automatic steam wand with selectable milk temperature and texture. This verdict comes from published Breville documentation, not personal testing.

Which machine fits your routine?

Feature Bambino Bambino Plus
Milk texture Manual steam wand; you control the jug Automatic texture and temperature settings, with manual option
Espresso workflow One- and two-shot controls One- and two-shot controls
Who gains most Espresso drinker who wants lower entry cost Household making several milk drinks most days
Ongoing work Clean wand, tray, baskets, and descale Same core care, plus keep auto-steam sensor area clean

Pay for the milk routine you actually use

On the Bambino, positioning the milk jug and ending the steam at the right point are part of the job. The Plus can steam hands-free and offers three temperature settings and three texture levels according to Breville. That reduces the learning curve for lattes shared by a household. It does not eliminate wiping and purging the wand or cleaning the machine.

Espresso needs a grinder, not just a machine

Breville’s 54 mm portafilter is paired with single-wall and dual-wall filter options. If you plan to dial in single-wall baskets with fresh beans, reserve money and counter space for a capable grinder. Spending the entire budget on the Plus while relying on inconsistent grounds may be a poor trade. A pressurized dual-wall basket is more forgiving for beginners and pre-ground coffee; check what your exact package includes.

Check the baskets included in your country

Breville’s Canadian Bambino accessory list names dual-wall baskets, while its US list names both single-wall and dual-wall baskets. The Plus lists both types in Canada and the US. Confirm the exact box contents with the seller before budgeting for fresh-ground espresso in a single-wall basket; compatibility does not guarantee that basket is included.

Small-kitchen reality check

Breville lists the Bambino at 30.2 × 15.4 × 34.2 cm, but measure the whole working zone: grinder, tamping area, milk jug, cup, knock bin, and reservoir access. A narrow espresso machine does not make the entire routine narrow. Breville’s Canadian page lists the Plus at 30.3 × 18.8 × 36.2 cm. Allow room to lift the water tank and move the steam wand; the machine’s body measurements alone are not the working clearance.

Who buys and who skips

Choose Bambino when you drink straight espresso or are happy to practice manual steaming. Skip the Plus premium if its automated milk feature will sit idle. Choose Plus for regular milk drinks, multiple people, or a preference for consistent, repeatable milk texture. Skip both if you want the convenience of a pod with almost no daily cleanup; semi-automatic espresso takes more steps.

Best value and upgrade worth

The basic Bambino is the value choice for espresso. The Plus earns its extra cost when the automatic milk function is used often enough to change the morning routine. Compare current US and Canadian prices and the contents of each box; do not treat a brief promotion as a permanent price gap.

Final winner

For most espresso-first buyers, the Bambino wins on value. For households that make lattes every day, the Bambino Plus wins on convenience. Either way, budget for fresh beans, a suitable grinder, and cleaning supplies.

Related: Encore vs Encore ESP grinders and digital kitchen scale basics.

Research: Breville Bambino specifications; Breville Bambino Plus specifications.

Coffee maker on a warm home kitchen counter
Kitchen & Dining

Is the OXO Brew 8-Cup Worth It for One or Two?

Disclosure: As an Amazon Associate, My Indoor Space may earn from qualifying purchases through links in this guide, at no extra cost to you.

An eight-cup coffee maker sounds oversized for one person until you realize that some full-pot brewers handle a single mug poorly. OXO’s Brew 8-Cup is designed to switch between a carafe and a mug without using pods. That makes it interesting for a small household whose weekday and weekend routines differ.

Quick verdict

Worth it for one or two people who alternate between a mug and a carafe. Its separate single-serve accessory and adjustable mug well are the reason to buy it. If you always brew one small cup and enjoy a hands-on routine, a manual brewer occupies less counter space and costs less. This is a research-based assessment of OXO’s published features; we have not tested the appliance.

Which routine matches it?

Option Best for Give-up
OXO Brew 8-Cup One mug on workdays, several cups on weekends Takes permanent counter space and uses paper filters
Small basic drip brewer A modest pot every day Check how it performs with less than a full batch
Manual press or pour-over One cup and minimal storage Requires a kettle, attention, and manual cleanup

The podless single-cup feature is the point

OXO supplies a single-serve brew accessory that sits in the larger basket, and the well cover can be repositioned for a short mug or removed for a taller travel mug. You still add grounds and a filter. The benefit is brewing a smaller amount without buying sealed pods; the trade-off is washing the accessory and disposing of grounds.

Thermal carafe instead of a hot plate

The double-wall insulated carafe is designed to hold heat rather than reheat coffee over a burner. Preheating the carafe with hot water can help if you drink slowly. OXO recommends hand washing the carafe and lid; the removable brew baskets, scoop, well cover, and showerhead are listed as top-rack dishwasher safe. Check the exact manual for your model before washing anything.

Measure more than the footprint

OXO lists dimensions of 13.5 by 10.5 by 7 inches, but check the orientation of each figure on the product drawing and leave room above for filling the water reservoir. A brewer that fits under a cabinet but cannot be filled in place may become inconvenient. Plan a nearby space to set down the hot carafe and the wet filter basket.

Who buys, who skips

Buy: A one- or two-person household that entertains or wants a travel mug in the morning and a pot on slower days. Skip: Someone who makes only one small cup daily, rarely has guests, or cannot spare a spot on the counter. If a built-in grinder or programmed start time is essential to you, verify those functions separately; do not assume the 8-Cup includes them.

Best value and upgrade

For a single daily cup, an AeroPress matched to your serving size or a simple pour-over plus a kettle can keep the setup smaller. Compare the total cost, including a kettle if you do not already own one. OXO earns its higher appliance cost when both brewing sizes are used frequently and pressing a button is worth the counter space. Buying a brewer with more cup capacity alone is not an upgrade for a small household.

Which 8-Cup model is this?

This guide covers OXO’s thermal-carafe model, SKU 8718800. Match that model and carafe type to the seller’s listing. The shopping buttons open search results, which can include other OXO brewers and replacement parts.

Before checkout

  • Confirm the listing is the thermal-carafe 8-Cup model, since OXO also sells a glass-carafe version.
  • Check whether the single-serve accessory is included with the exact listing.
  • Compare cabinet clearance, filter type, return terms, and current availability in your country.

Final winner

The OXO Brew 8-Cup wins for the household that truly uses both a single mug and a carafe. For one cup every day, buy a compact manual brewer and keep the counter open.

Related: Encore versus Encore ESP grinder and electric kettle buying guide.

Source: OXO Brew 8-Cup features, dimensions, and care instructions.

Modern coffee grinder on a kitchen counter
Kitchen & Dining

Baratza Encore vs Encore ESP: Which Coffee Grinder Fits?

Disclosure: As an Amazon Associate, My Indoor Space may earn from qualifying purchases through links in this article, at no extra cost to you.

The ordinary Baratza Encore and the Encore ESP look like close relatives, but their most useful difference appears when you try to dial in espresso. If you brew drip coffee, pour-over, or French press at home, the standard Encore is the sensible starting point. If a non-pressurized espresso machine is part of your setup, pay attention to the ESP.

Quick verdict

Buy the Encore for filter coffee. Its straightforward hopper adjustment covers the typical home brewing range. Buy the Encore ESP if you also make espresso. Baratza divides the ESP’s 40 numbered positions into a finer-adjustment espresso range (1–20) and a broader filter range (21–40). That extra control solves a specific problem: a small grind change can alter espresso flow markedly. This is a research-based comparison of manufacturer specifications, not a claim of hands-on testing.

Where the upgrade matters

Your brewing routine Better fit Why
Drip, pour-over, French press Encore Pay for a solid filter grinder without an espresso-focused adjustment range.
Espresso with a non-pressurized basket Encore ESP Smaller changes in its espresso range make dialing in practical.
Espresso plus filter coffee Encore ESP One grinder covers both ranges; expect to change settings and purge some grounds between brews.
Pre-ground coffee only Neither Buy a grinder once grinding fresh beans becomes part of the routine.

Who should buy and who should skip

Choose the standard Encore when you mainly brew a pot, a single pour-over, or a French press. Skip its apparent saving if you are actively buying an espresso machine that needs fine adjustment. Choose the ESP if you plan to tune shots by grind size. Skip the upgrade if your coffee maker never uses its finer control; the extra features then do little work.

Do not confuse the number of settings with the result

Both grinders have 40 marked positions. The numbers alone do not tell you how finely each step changes the grind. Baratza describes the ESP positions 1–20 as its higher-resolution espresso section. Its positions 21–40 serve filter and coarser methods. The standard Encore is marketed primarily for filter brewing, despite a broad 40-setting range. A manufacturer’s mention of “espresso fine” on a general grinder does not make it equally easy to dial in a non-pressurized shot.

Counter space and daily cleanup

Measure the clearance below your cabinets with room to lift the hopper lid, and plan where the grounds container will sit during filling. The ESP includes a dosing cup for an espresso workflow. Both machines require occasional burr and chute cleaning; beans leave residue, and a clogged chute can change how much coffee reaches the cup. Consult the manual for the exact cleaning and burr-removal steps rather than washing electrical parts.

Best value and when to pay more

For a filter-only household, the Encore is the better value because the ESP’s main advantage goes unused. For a household moving into non-pressurized espresso, buying the ESP once can be more useful than saving on a filter grinder and replacing it later. Prices vary by seller and country, so compare the actual checkout totals and return terms rather than relying on a fixed price here.

What to check before ordering

  • Whether your espresso machine uses a pressurized or non-pressurized basket; the latter makes grind adjustment much more consequential.
  • Cabinet clearance, hopper access, and the power outlet location.
  • The exact product name in the listing: Encore and Encore ESP are separate models.
  • Availability of replacement burrs and support in your country.

Final winner

The Encore wins for filter coffee. The Encore ESP wins for a mixed filter-and-espresso setup because its espresso range gives the meaningful extra control. If you do not make espresso, keep the simpler purchase.

For another compact kitchen appliance decision, read our electric kettle guide. For accurately weighing beans, see our kitchen scale guide.

Research: Baratza Encore; Baratza Encore ESP; Baratza’s espresso and filter adjustment description.

Scroll to Top