
Adjustable under-desk footrest beneath a compact home office desk
Bedroom & Comfort

Best Under-Desk Footrest

Disclosure: As an Amazon Associate, My Indoor Space may earn from qualifying purchases made through links in this guide, at no extra cost to you.

An under-desk footrest is useful when the chair is set high enough for the desk but your feet no longer rest comfortably on the floor. The right model supports different positions without sliding away or crowding the limited space around chair legs.

Quick verdict

For most home offices, choose a height-adjustable footrest with a tilting or rocking platform, nonslip feet, a grippy surface, and enough width to change foot position. A firm platform offers more consistent support than a soft cushion, while a cushion is easier to move and lounge with.

Who it is for—and who should skip it

A footrest suits shorter users at fixed-height desks, anyone whose feet dangle after raising the chair to keyboard height, and people who like to change lower-leg position while working.

Skip it as a substitute for addressing a chair, desk, or workstation that is fundamentally the wrong size. Persistent pain, numbness, swelling, or circulation concerns deserve advice from an appropriate health professional.

Compare the main types

Type Best for Main trade-off
Fixed platform Simple dependable support Limited fit adjustment
Height-adjustable platform Precise workstation setup Larger and more expensive
Rocking footrest Frequent position changes May move more than some users like
Foam cushion Soft support and casual use Compresses and offers less stable height
Foot hammock Travel and lightweight desks Requires compatible attachment points

Best value: tilting nonslip platform

A basic platform that tilts under foot pressure offers the best value. It supports the feet while allowing ankle movement and does not require bending down to change angle settings.

Look for a textured top that works with socks or shoes and a base that grips your floor type. Some hard plastic feet slide on smooth flooring unless a mat is added.

Upgrade worth it: adjustable height and angle

Height adjustment is worth paying for when several people use the desk or when the chair must sit much higher than the floor. Tool-free adjustment makes it more likely that the setting will actually be changed.

A large platform provides room to move, but measure the desk opening first. The footrest must fit between legs, drawers, computer towers, and chair wheels without becoming a trip point.

Set the chair before the footrest

Adjust the chair so the keyboard and pointing device can be used with relaxed shoulders and supported arms. Then use the footrest to meet the feet rather than lowering the chair until the desk feels too high.

The thighs should feel supported without hard pressure behind the knees. A footrest can help fill the height gap, but the entire workstation needs to work together.

Firm platform vs soft cushion

A firm platform creates a predictable height and angle. It is easier to use with office shoes and holds its shape through long sessions. A rocking version encourages small position changes.

A foam cushion feels warmer and can be flipped for gentle rocking, but its usable height changes as it compresses. Choose a washable cover and dense foam that returns to shape.

Stability and floor protection

Rubber feet or a full nonslip base keep the footrest from creeping forward. Confirm that the base material will not mark wood, vinyl, or carpet.

Rocking models need clear space so they do not strike a wall, power bar, or chair caster. Keep cables away from every moving edge.

Movement features

Some footrests add rollers, massage bumps, or separate moving bars. These can make short breaks pleasant, but they should not create sharp pressure or force one repeated motion.

A simple tilting platform provides enough movement for many users and is easier to clean than mechanisms with narrow grooves.

Cleaning and durability

Hard platforms wipe clean and handle outdoor footwear. Fabric cushions collect dust and need a removable washable cover. Inspect seams, zippers, hinges, and height locks regularly.

Check the load guidance if you tend to press down firmly or stand on the product. Most footrests are not steps and must never be used as one.

Common buying mistakes

  • Buying before measuring under-desk width and depth.
  • Choosing a fixed height that is too low to help.
  • Ignoring how easily it slides on the floor.
  • Placing it where chair wheels catch the edge.
  • Expecting a footrest to correct an unsuitable desk or chair by itself.
  • Using it as a step stool.

Frequently asked questions

How high should a footrest be?

High enough to support the feet after the chair is adjusted for the desk, without creating uncomfortable pressure behind the knees. Adjustable models handle more body and desk combinations.

Is a rocking footrest better?

It is useful for people who enjoy small position changes. Someone who wants firm stationary support may prefer a locking or fixed platform.

Are foam footrests supportive?

Dense foam can feel comfortable, but it compresses more than a hard platform. Check the real compressed height and return policy.

Can a footrest help at a standing desk?

A low bar or sturdy product specifically designed for standing use can support position changes. Do not stand on a seated footrest unless it is rated for that purpose.

Final winner

The best under-desk footrest for most home offices is a wide, height-adjustable platform with free tilt, a nonslip textured surface, and a base that stays put. It supports a properly adjusted chair while leaving enough freedom to change position through the day.

Complete the workspace with our small-desk monitor arm guide and our guide to the under-desk heated foot pad.
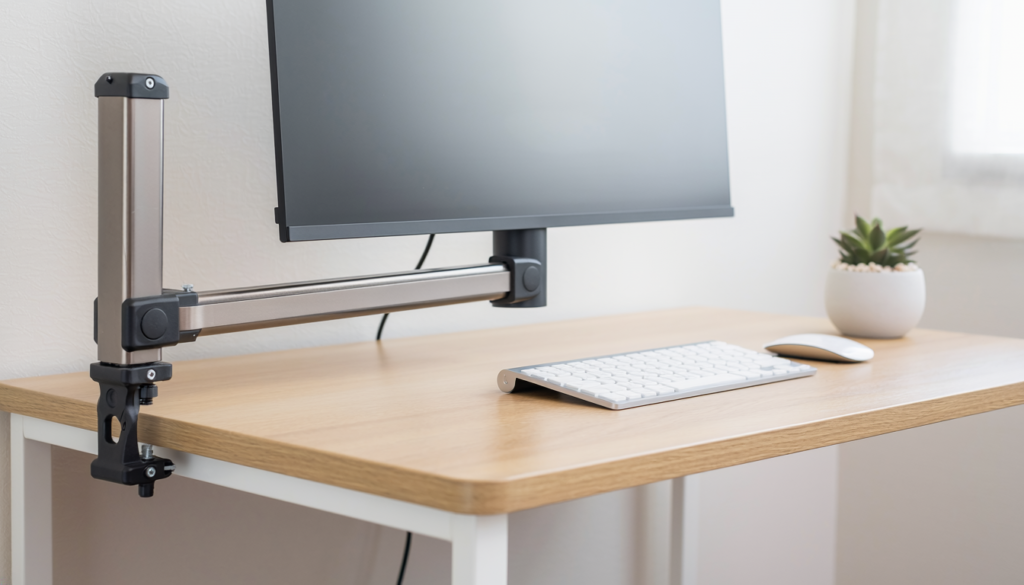
Adjustable monitor arm mounted to a compact home office desk
Bedroom & Comfort

Best Monitor Arm for a Small Desk

Disclosure: As an Amazon Associate, My Indoor Space may earn from qualifying purchases made through links in this guide, at no extra cost to you.

A monitor arm can reclaim desk space and improve screen positioning, but only when the display, mount, clamp, and desktop are compatible. The most common mistake is buying from screen size alone while ignoring weight, VESA pattern, desk thickness, and rear clearance.

Quick verdict

For most small desks, choose a single gas-spring arm with a strong edge clamp, verified support for the monitor’s weight without its stand, standard VESA compatibility, smooth height adjustment, and a short enough rear reach to avoid hitting the wall.

Who it is for—and who should skip it

A monitor arm suits small workstations, sit-stand desks, shared desks, and anyone who needs to move the display between reading, video calls, and focused work. It also clears the bulky factory stand from the work surface.

Skip a clamp mount on glass, thin hollow-core furniture, damaged particleboard, rounded edges, or a desk whose maker prohibits concentrated loads. A monitor riser or wall mount may be safer.

Compare the main mount styles

Style Best for Main trade-off
Gas-spring arm Frequent movement Needs correct tension and weight range
Pole mount Simple height adjustment Less flexible after setup
Dual monitor arm Matched two-screen layouts More leverage on the desk
Wall mount Maximum desk clearance Permanent placement and wall requirements
Freestanding base Desks that cannot be clamped Still consumes surface space

Best value: single gas-spring arm

A single arm offers the best combination of space savings and flexibility. Look for a published weight range that includes the monitor itself, not the shipping weight or weight with the original stand.

The arm should tilt without drifting, rotate for portrait use if needed, and lower far enough for a comfortable eye line. A quick-release VESA plate makes installation easier.

Upgrade worth it: heavy-duty arm

A heavy-duty arm is worth paying for with a large ultrawide or heavy professional display. Stronger joints and a broader weight range reduce sagging when the monitor sits extended.

Higher capacity does not automatically mean better for a light monitor. Gas springs need the display within their working range, or the arm may rise instead of staying down.

Check VESA and weight

Look for the four threaded mounting holes on the back of the monitor and confirm the exact pattern, commonly measured in millimetres. Some recessed mounts need spacers or longer manufacturer-approved screws.

Use only screws of the correct diameter and length. Screws that are too long can damage the display; screws that are too short may not hold securely.

Measure the desk clamp area

Measure desktop thickness, the flat underside area, rear apron depth, cable tray position, and distance to the wall. A clamp may fit the edge but collide with a support rail underneath.

Small desks pushed against a wall need an arm that can position the monitor without swinging far behind the desktop. Side-mounted placement can preserve rear clearance.

Desk strength and load spreading

A monitor arm concentrates force at the clamp. Solid wood and sturdy engineered desktops handle this better than thin hollow panels. A reinforcement plate can spread the load when approved, but it cannot repair weak or damaged furniture.

Tighten the clamp firmly according to the instructions, not excessively. Recheck it after the first few days and whenever the desk moves.

Range of motion

Consider minimum height, maximum extension, tilt, rotation, and how the elbow folds. Product photos often show maximum reach, not the compact position needed on a shallow desk.

Set the screen so the upper portion is near a comfortable eye line, then adjust distance based on screen size, vision, and work. Comfort matters more than copying a universal measurement.

Cable management

Leave enough cable slack for full movement without pulling connectors. Route power and display cables through the arm’s clips, but avoid tight bends or pinching at joints.

A docking station or power strip mounted nearby can reduce the number of cables stretching across the desk.

Common buying mistakes

  • Matching by screen inches instead of weight and VESA pattern.
  • Ignoring a desk apron or cable tray under the clamp.
  • Mounting to weak glass or hollow furniture.
  • Buying an arm that swings into the wall.
  • Using the wrong screw length.
  • Routing cables with no movement slack.

Frequently asked questions

Will a monitor arm damage my desk?

It can if the surface is weak, unsuitable, overtightened, or overloaded. Confirm desk construction and use an approved reinforcement solution when needed.

What does VESA mean?

It describes the standardized spacing of mounting holes on the monitor. The arm and display must support the same pattern.

Is a gas-spring arm better?

It is better for frequent repositioning. A pole mount is simpler and may feel more rigid if the screen rarely moves.

Can I mount two monitors on one arm?

Use a purpose-built dual system rated for both screens and the desk. Two monitors create more total weight and leverage.

Final winner

The best monitor arm for most small desks is a compact single gas-spring model with verified VESA and weight compatibility, a strong clamp, smooth tension adjustment, and limited rear swing. Correct fit and desk strength matter more than maximum extension.

Finish the workstation with our home-office desk lamp guide and smart power strip guide.

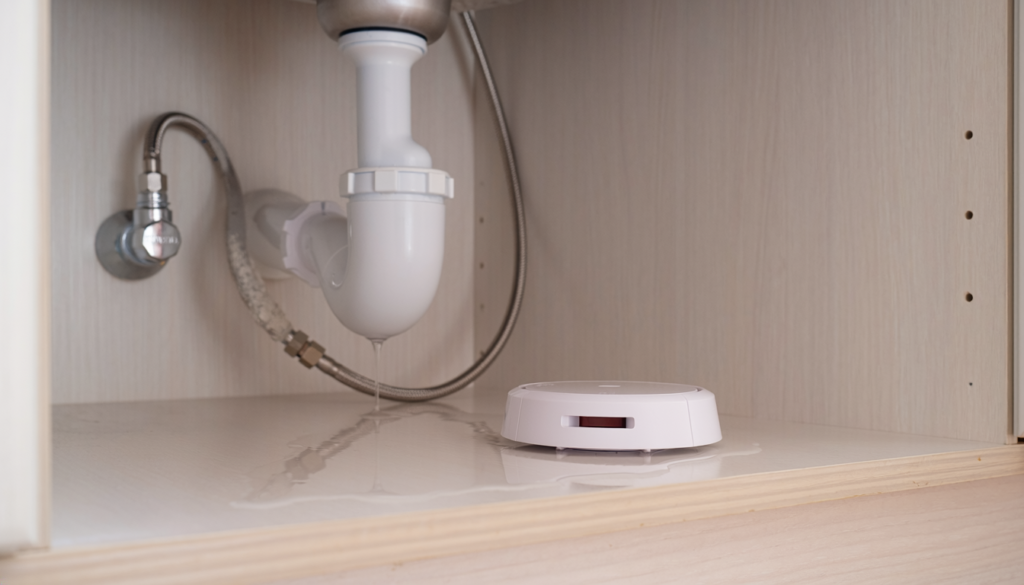
Compact water leak detector placed beside an apartment sink cabinet
Smart Home

Best Water-Leak Detector for Apartments

Disclosure: As an Amazon Associate, My Indoor Space may earn from qualifying purchases made through links in this guide, at no extra cost to you.

A water-leak detector cannot stop every leak, but it can warn you while a small puddle is still becoming a bigger problem. In an apartment, the best sensors are compact, loud, easy to place under appliances, and capable of sending an alert when nobody is home.

Quick verdict

Choose a battery-powered sensor with contacts on both the top and bottom, a loud local alarm, clear low-battery warnings, and optional phone alerts that do not depend on an expensive subscription. Place several inexpensive sensors at the most likely leak points rather than relying on one premium device.

Who it is for—and who should skip it

Leak sensors suit apartments with washing machines, dishwashers, water heaters, sinks, aquariums, air conditioners, or aging supply hoses. They are especially useful when a leak could affect a neighbour below.

Skip a connected model if it requires a hub, subscription, or network setup you will not maintain. A simple audible sensor is better than a smart device that stays offline.

Compare the main types

Type Best for Main trade-off
Audible spot sensor Low-cost local warning No alert when away
Wi-Fi spot sensor Direct phone notifications Higher battery and network demands
Hub-based sensor Multiple sensors and automation Requires compatible hub
Sensor cable model Coverage along appliances or walls More careful placement
Automatic shutoff system Whole-home protection Installation, permission, and cost

Best value: loud audible sensor

A basic sensor provides strong value under a sink or beside a washing machine. It needs no account or network and can run for a long time on replaceable batteries.

Choose a test button, loud alarm, corrosion-resistant contacts, and a design that detects a shallow puddle. Test from the next room with doors closed, not only while standing beside it.

Upgrade worth it: connected multi-sensor kit

A connected kit is worth the upgrade if you travel, work away from home, or have several leak points. One hub can connect multiple small sensors and send phone notifications.

Confirm whether alerts require a subscription, how the system behaves during internet or power outages, and whether the hub has battery backup. A local siren remains important.

Sensor design and coverage

Bottom contacts detect water spreading across the floor. Top contacts can detect drips from above. A remote cable or probe reaches behind appliances where the main alarm body would be hard to hear or retrieve.

Do not place contacts on permanently damp surfaces or where routine mopping causes false alarms. A small tray beneath a connection can direct early drops toward the sensor.

Best places in an apartment

  • Under kitchen and bathroom sinks near supply and drain connections.
  • Behind or beside the washing machine.
  • Near a dishwasher without blocking ventilation or service access.
  • Beside a water heater or fan-coil drain area when permitted.
  • Near a portable air conditioner drain point.
  • Beside an aquarium, humidifier, or refrigerator water line.

Keep the device accessible enough to test and replace batteries. Never push it against moving, hot, or electrically unsafe components.

Phone alerts and privacy

Check app support, update history, account security, multi-factor authentication, and data-sharing policies. Give the device only the permissions necessary for alerts.

Set notifications so they are loud and distinct. A silent alert buried among promotions offers little protection.

Build a response plan

Know where the apartment water shutoff is, whether tenants are permitted to operate it, and how to contact building management or emergency maintenance. Save the number in the phone.

A sensor is an early-warning tool, not a repair. Address supply hoses, seals, blocked drains, condensation, and damaged appliances promptly.

Common buying mistakes

  • Buying one sensor for an apartment with several risk points.
  • Choosing app alerts without testing the local siren.
  • Ignoring subscription or hub requirements.
  • Placing the sensor where cleaning water triggers it.
  • Forgetting battery replacement and monthly testing.
  • Receiving an alert without knowing whom to call or what to shut off.

Frequently asked questions

Do leak detectors need Wi-Fi?

No. Basic models sound a local alarm. Wi-Fi or a hub is only needed for remote notifications and connected automations.

How many sensors does an apartment need?

Use one at each meaningful risk point. Kitchens, bathrooms, laundry equipment, water heaters, and connected appliances are common priorities.

Can a renter install an automatic shutoff valve?

That is a plumbing modification and normally needs landlord approval and qualified installation. Portable sensors require far less commitment.

How often should sensors be tested?

Follow the manufacturer’s schedule and test after battery changes, app updates, router changes, or moving the device.

Final winner

The best apartment setup is a multi-pack of compact battery sensors with loud local alarms, top and bottom contacts, clear battery warnings, and optional subscription-free phone alerts. Coverage and a response plan are more valuable than one expensive sensor in the wrong location.

Monitor related conditions with our home humidity monitor guide, and compare no-fee monitoring options in our indoor security camera guide.

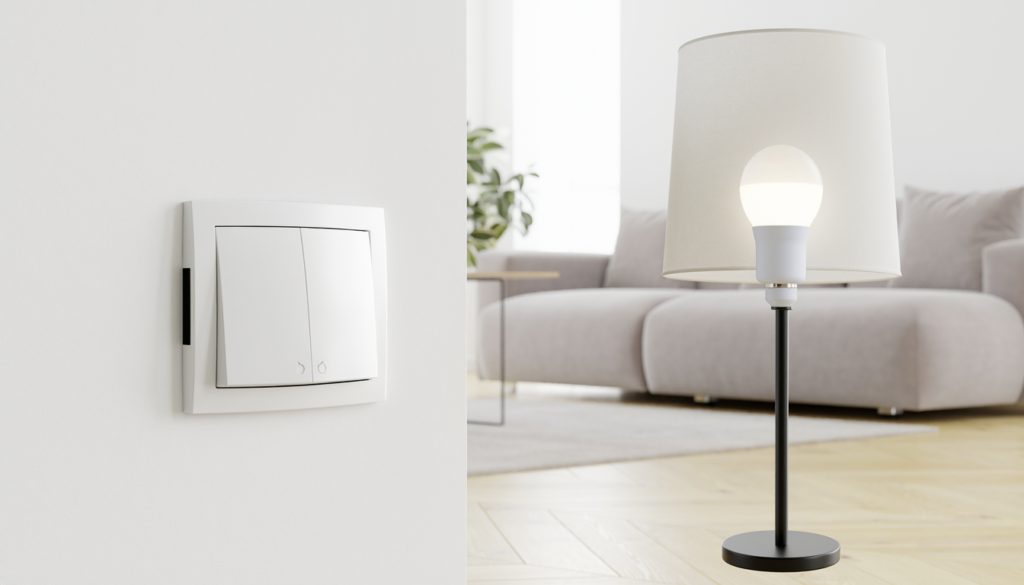
Smart wall light switch and smart bulb shown in a modern apartment
Smart Home

Smart Light Switch vs Smart Bulb

Disclosure: As an Amazon Associate, My Indoor Space may earn from qualifying purchases made through links in this guide, at no extra cost to you.

A smart bulb controls the lamp itself. A smart switch controls the electrical circuit. That difference affects installation, reliability, household habits, and whether someone can accidentally disable the smart features with an ordinary wall switch.

Quick verdict

Choose a smart switch for permanent, whole-room control when the wiring is compatible and installation is allowed. Choose smart bulbs for renters, lamps, colour-changing light, and quick installation. For many homes, switches handle main fixtures while bulbs add colour or flexibility in selected lamps.

Who each option is for

Smart switches suit homeowners, approved installations, ceiling fixtures with ordinary dimmable bulbs, and shared rooms where everyone expects the wall control to work normally.

Smart bulbs suit renters, table and floor lamps, colour scenes, and fixtures where wiring changes are not practical. They work best when the controlling wall switch remains on.

Side-by-side comparison

Factor Smart switch Smart bulb
Installation Electrical wiring required Screws into compatible socket
Renter-friendly Usually needs permission Easy to remove
Wall control Natural for everyone Wall switch must stay powered
Colour options Depends on installed bulbs Widely available
Multi-bulb fixture One switch controls all Each bulb adds cost
Power-off behaviour Smart features usually remain ready No control when switch is off

Best value: smart switch for a multi-bulb room

One compatible switch can control several ordinary bulbs, making it the value winner for a living room, kitchen, or hallway fixture. Household members can still use the wall normally without reaching for an app.

Compatibility is critical. Check line, load, neutral, ground, box depth, bulb load, dimming type, and single-pole or multi-way wiring. Use a qualified electrician when required or whenever you are uncertain.

Upgrade worth it: smart bulbs with a hub

A coordinated bulb system with a hub is worth the upgrade for colour scenes, room grouping, accessories, and more dependable local control. Wireless buttons can preserve physical control without cutting power to the bulbs.

The upgrade makes most sense in entertainment spaces and lamps. Filling a large multi-bulb ceiling fixture with premium colour bulbs becomes expensive quickly.

Wiring and neutral requirements

Many smart switches require a neutral wire, though some models are designed for compatible no-neutral installations. Never assume wire colour proves function, and do not install a device outside its rated wiring configuration.

Older switch boxes may be shallow or tightly packed. The smart device must fit without crushing conductors or exceeding box capacity. Building codes and landlord rules apply.

Dimmers and bulb compatibility

A smart dimmer needs compatible dimmable bulbs and a load within its stated range. Mixing bulb types can cause flicker, buzzing, limited dimming, or failure to turn fully off.

Do not put ordinary smart bulbs on a traditional wall dimmer unless both manufacturers expressly support that arrangement. Smart bulbs normally expect constant full power.

Wi-Fi, hubs, and local control

Wi-Fi products are easy to start but add devices to the network. Hub-based systems add initial cost yet can provide strong device coordination and continue some automations locally when internet service fails.

Check update support, account security, multi-factor authentication, and what happens if the manufacturer ends cloud service. Basic physical control should remain understandable.

Household usability

The best smart home works for people who never open the app. Switches win here because the familiar control remains on the wall. Bulb systems improve when paired with a labelled wireless button or remote.

Place automations around real routines—arrival, bedtime, or a dim evening scene—rather than creating dozens of commands nobody remembers.

Common buying mistakes

  • Buying a switch before checking neutral and box depth.
  • Installing smart bulbs where people routinely turn off the wall switch.
  • Pairing smart bulbs with an incompatible dimmer.
  • Buying several colour bulbs when one switch would control the room.
  • Ignoring app support, account security, and update history.
  • Making lighting impossible to use without a phone.

Frequently asked questions

Can renters use a smart switch?

Only with required permission and safe installation. Smart bulbs and plug-in lamps are more reversible.

Do smart bulbs work when the switch is off?

No. They need continuous power for app, voice, schedule, and automation control.

Do smart switches work without internet?

Physical switching normally remains, and some local automations may work. Remote access and cloud-dependent features vary by system.

Which is better for colour lighting?

Smart bulbs. The switch controls power, while the bulb produces the selectable colours.

Final winner

A smart switch is the overall winner for main room lighting because it keeps familiar wall control, handles multiple bulbs, and avoids accidental power loss to the smart system. Smart bulbs win for renters, lamps, colour effects, and rooms where wiring changes are off the table.

Start with simpler automation in our smart plugs for beginners guide, and add low-level lighting with our hallway motion-sensor night light guide.

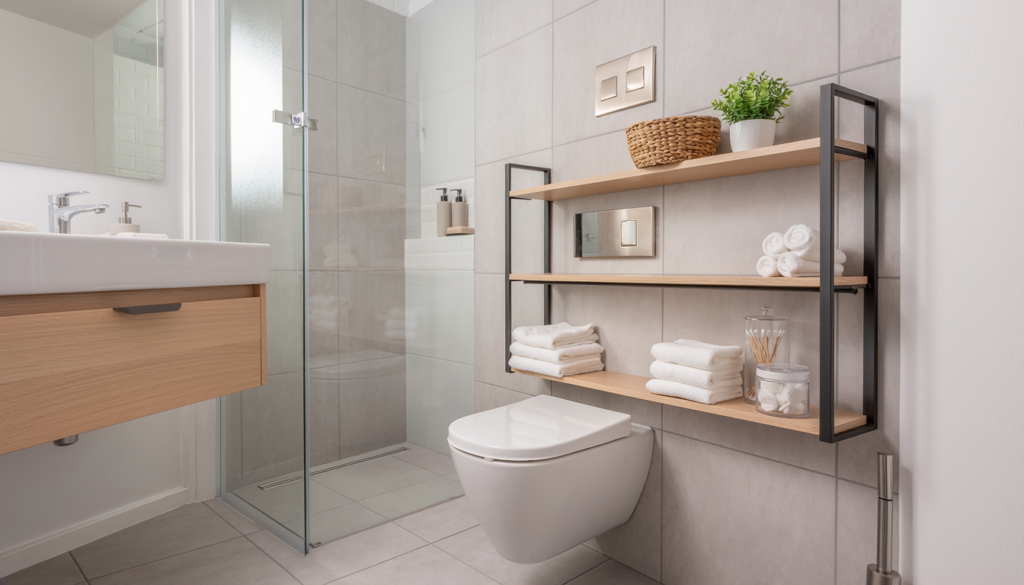
Over-the-toilet storage shelving in a small modern bathroom
Home Organization

Best Over-the-Toilet Storage

Disclosure: As an Amazon Associate, My Indoor Space may earn from qualifying purchases made through links in this guide, at no extra cost to you.

The wall above a toilet is valuable storage space, but an oversized unit can make a small bathroom feel cramped and interfere with the tank, lid, flush control, or shutoff valve. The best design adds reachable storage while preserving access and stability.

Quick verdict

For most small bathrooms, choose a narrow freestanding unit with adjustable shelves, moisture-resistant surfaces, open lower clearance, and proper anti-tip hardware. A wall-mounted cabinet looks cleaner but requires suitable wall structure, permission, and careful installation.

Who it is for—and who should skip it

This storage suits bathrooms without a linen closet, renters who need a reversible organizer, and households that want towels, toilet paper, and cleaning supplies off the floor.

Skip it when the toilet sits under a low window, the wall is crowded with plumbing or controls, or a freestanding frame would block the shutoff valve. A slim rolling cart or wall shelf elsewhere may fit better.

Compare the main styles

Style Best for Main trade-off
Freestanding shelf Renters and flexible storage Needs floor clearance and anti-tip support
Cabinet-and-shelf unit Concealing supplies Heavier and visually larger
Ladder shelf Light open look Usually shallow and must lean securely
Wall-mounted cabinet Clear floor and built-in appearance Requires strong mounting and permission
Tension-pole shelves Minimal wall holes Fit and stability depend on ceiling and floor

Best value: narrow freestanding shelf

A metal or moisture-resistant composite unit with two or three adjustable shelves offers the best balance of cost and capacity. Open sides make the bathroom feel less boxed in and let you see when supplies run low.

Look for levelling feet, cross-bracing, and a shape that can be assembled around existing plumbing. Some units cannot slide behind the toilet after assembly because the tank or supply line blocks the lower frame.

Upgrade worth it: wall-mounted cabinet

A wall cabinet is worth the upgrade when you want concealed storage and an unobstructed floor. It also avoids narrow legs that collect dust behind the toilet.

Mounting must suit the cabinet weight, stored items, wall material, and available studs or rated anchors. In a rental, obtain permission before drilling and keep clear of hidden wiring and plumbing.

Measure every obstruction

Measure floor-to-tank height, tank width and depth, flush-handle location, toilet-lid swing, wall width, baseboard projection, and the shutoff-valve area. Leave enough room to remove the tank lid for service.

Mark the outside dimensions with painter’s tape. Sit and stand normally to make sure shelf depth does not crowd the user’s head or shoulders.

Stability comes first

Tall narrow furniture can tip. Use the manufacturer’s anti-tip system and appropriate wall attachment where installation is allowed. Do not rely on the toilet tank to brace the unit.

Place heavier items on the lowest safe shelf and light towels or paper goods higher. Do not store glass, heavy appliances, or hazardous products where they can fall.

Choose bathroom-ready materials

Powder-coated metal, sealed wood, quality plastic, and moisture-resistant board can all work when maintained. Exposed particleboard edges swell quickly if water reaches them.

Open shelving dries faster, while closed doors hide clutter but may trap moisture. Wipe condensation and maintain bathroom ventilation.

Plan what belongs above the toilet

Good choices include extra toilet paper, hand towels, lightweight baskets, and frequently used toiletries. Medicines and items affected by heat or humidity usually belong elsewhere according to their storage directions.

Keep cleaning chemicals secured and away from children or pets. A pretty basket is not a substitute for safe storage.

Common buying mistakes

  • Measuring only toilet width and forgetting tank height.
  • Blocking the shutoff valve or tank lid.
  • Skipping anti-tip attachment on a tall unit.
  • Choosing shelves deep enough to crowd the user.
  • Using unfinished material in a damp room.
  • Assembling the lower frame before checking how it passes around plumbing.

Frequently asked questions

How much clearance belongs above the toilet tank?

Allow enough space to remove the tank lid and reach controls or plumbing. The exact amount depends on the toilet and storage design.

Is freestanding storage renter-friendly?

It can be, but tall units still need safe anti-tip restraint. Confirm what the lease permits before attaching anything to the wall.

Can towels be stored above the toilet?

Clean towels can be stored there in a well-ventilated bathroom, ideally in a protected or regularly cleaned area away from splashes.

Is bamboo good in a bathroom?

Properly finished bamboo can work, but it still needs ventilation and dry care. Inspect joints and finish for moisture damage.

Final winner

The best over-the-toilet storage for most small bathrooms is a narrow freestanding unit with adjustable shelves, washable moisture-resistant surfaces, open tank access, levelling feet, and correct anti-tip hardware. Choose a wall cabinet when permission and solid mounting support are available.

Finish the small-bathroom setup with our shower caddy guide and renter-friendly bidet attachment guide.

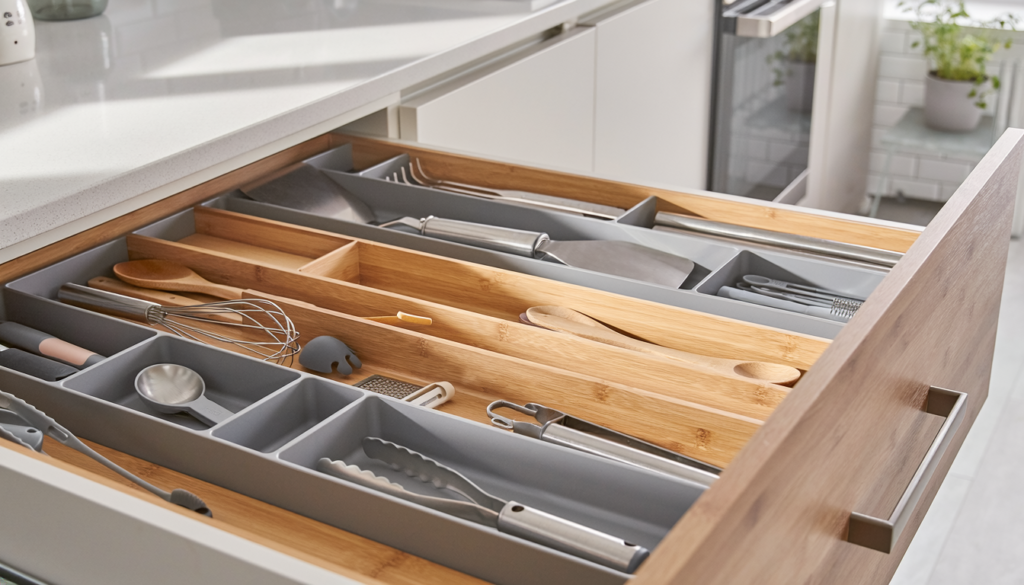
Organizers fitted inside a deep kitchen drawer
Home Organization

Best Organizers for Deep Kitchen Drawers

Disclosure: As an Amazon Associate, My Indoor Space may earn from qualifying purchases made through links in this guide, at no extra cost to you.

Deep kitchen drawers can hold pots, lids, dishes, food containers, and utensils, but depth alone does not create order. The best organizer keeps items upright, visible, and easy to lift without wasting space under bulky fixed compartments.

Quick verdict

For most deep drawers, adjustable dividers plus a few removable bins offer the best value. Use a pegboard system for dishes and cookware, a vertical rack for lids, and tiered inserts only when the drawer opens far enough to reveal the back section.

Who it is for—and who should skip it

Deep-drawer organization suits kitchens with lower drawers used for cookware, mixing bowls, plates, containers, baking tools, or pantry items. It also helps prevent heavy stacks from sliding each time the drawer closes.

Skip a complex insert if the drawer already has a specific purpose and stays tidy. An organizer that reduces usable space without solving a real access problem becomes clutter itself.

Compare the main organizer types

Type Best for Main trade-off
Adjustable dividers Mixed utensils and pantry items Need firm tension and exact height
Pegboard system Plates, bowls, pots, and lids Higher cost and reduced floor area
Removable bins Small packets and tools Can leave awkward gaps
Vertical rack Lids, boards, and pans Requires enough drawer height
Tiered insert Spices and small containers Rear items can hide in shallow-opening drawers

Best value: adjustable dividers

Spring-loaded or locking dividers create zones without committing the entire drawer to a fixed layout. They adapt when cookware or food-storage needs change.

Measure interior width and height at several points. Drawer sides may taper, screw heads may protrude, and slides can reduce usable space. Choose padded ends that grip without damaging the finish.

Upgrade worth it: custom-fit peg system

A pegboard base with movable pegs is worth the upgrade for heavy dishes and cookware. Pegs stop stacks from sliding and can be repositioned for bowls, pots, and lids.

Check the weight rating of the drawer and slides before loading ceramic dishes or cast iron. The organizer does not increase what the cabinet hardware can safely carry.

Measure the opening, not only the drawer box

Record the inside width, depth, height, and the vertical clearance at the cabinet frame when the drawer moves. Tall dividers may fit inside but strike the frame while opening.

Also measure how far the drawer extends. If several inches remain under the counter, keep rarely used items at the back or choose bins that lift out easily.

Organize by movement and frequency

Place frequently used items near the front and keep heavy pieces low. Group tools by task—baking, food prep, storage, or serving—rather than by colour or appearance.

Leave a little open space so items return easily. A perfectly packed drawer in a photograph can be frustrating in daily use if every tool has to be positioned exactly.

Keep stacks stable

Nonslip liner can reduce movement but must lie flat and remain clean. Vertical lid organizers need wide enough slots for handles and knobs. Pan racks need protective contact points to avoid scratching finishes.

Do not stand sharp blades loose in a deep drawer. Use a purpose-built knife organizer that protects edges and hands.

Materials and cleaning

Plastic bins are light and washable. Bamboo looks warm but needs dry care and can swell if soaked. Coated metal racks are durable when the coating remains intact.

Removable pieces simplify crumb cleanup. Avoid permanent adhesive unless you are certain of the layout and surface compatibility.

Common buying mistakes

  • Measuring the drawer box but not the cabinet opening.
  • Buying shallow utensil trays that waste vertical space.
  • Overloading drawer slides with dishes or cookware.
  • Choosing too many tiny compartments.
  • Hiding daily items at the back of a partial-extension drawer.
  • Using unprotected racks that scratch pans or plates.

Frequently asked questions

What is best for pots and pans?

A sturdy peg system or vertical rack works well when the drawer has enough height and weight capacity.

How do I organize food-container lids?

Store lids vertically by size in an adjustable divider or narrow bin, with matching containers nested nearby.

Do drawer dividers damage cabinets?

Padded, correctly tensioned dividers are designed to reduce marks. Avoid overtightening and inspect the finish periodically.

Is bamboo or plastic better?

Bamboo offers a finished look; plastic is lighter and easier to wash. Fit, adjustability, and cleaning habits matter more than the material alone.

Final winner

The best system for most deep kitchen drawers is a set of adjustable padded dividers combined with removable bins. It preserves usable space, adapts to changing items, and costs less than a custom insert. Choose a pegboard upgrade for heavy dishes and cookware that slide during use.

Continue the kitchen organization project with our pantry organizer guide and small habits that keep counters clear.

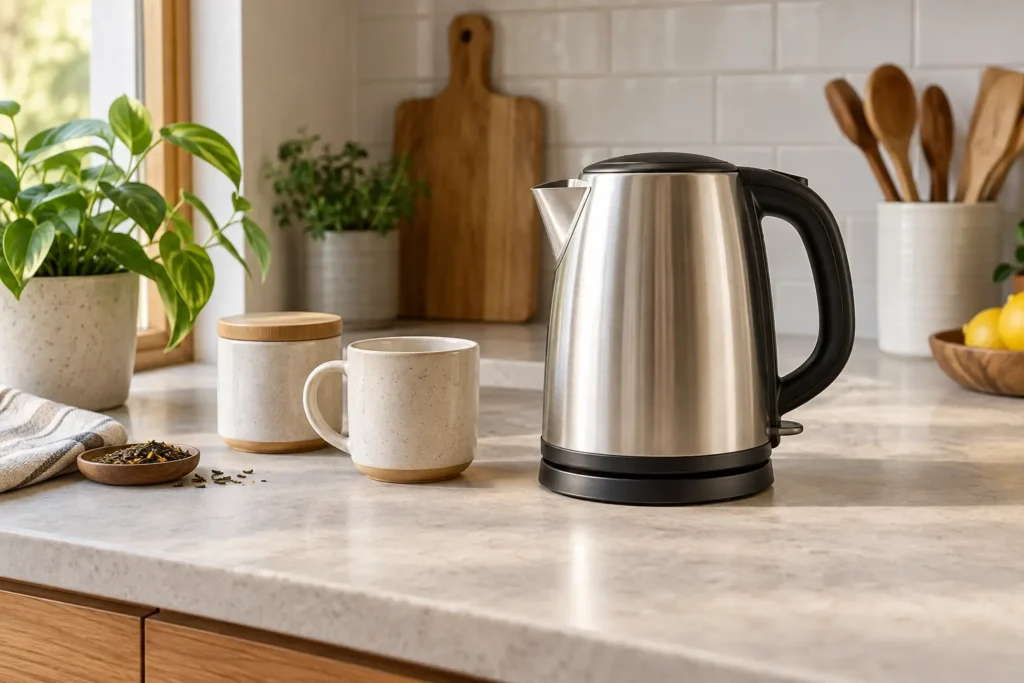
Unbranded stainless steel electric kettle on a bright apartment kitchen counter
Kitchen & Dining

Best Countertop Water Filter

Disclosure: As an Amazon Associate, My Indoor Space may earn from qualifying purchases made through links in this guide, at no extra cost to you.

A countertop water filter can reduce specific substances and improve taste without permanent under-sink installation. The important word is specific: no filter removes everything, and performance depends on independent certification, the water source, correct use, and timely cartridge replacement.

Quick verdict

For most small kitchens, choose a compact gravity dispenser or faucet-connected countertop filter certified for the substances relevant to your local water. Compare the complete replacement-filter cost and usable footprint before paying for extra stages or dramatic claims.

Who it is for—and who should skip it

A countertop unit suits renters, small households, and kitchens where an under-sink system is not practical. It also works for people who want more capacity than a pitcher without changing plumbing.

Skip a general consumer filter when water is under a boil-water or do-not-consume advisory, comes from an untested private source, or has a known problem the product is not certified to address. Follow local public-health guidance and use appropriate treatment.

Compare countertop filter types

Type Best for Main trade-off
Gravity dispenser Simple renter-friendly use Needs filling and counter space
Faucet-connected unit On-demand filtered water Faucet compatibility varies
Countertop reverse osmosis Broad reduction when certified Higher cost, wastewater, and cleaning
Large pitcher Low cost and refrigerator use Smaller capacity and slower refill cycle

Best value: certified gravity dispenser

A gravity dispenser offers the simplest value because it needs no hose, electricity, or permanent connection. A narrow rectangular shape can sit against a wall while leaving working space in front.

Look for a clear certification listing that names the exact model and contaminant-reduction standard. A generic statement that components were “tested” is not the same as whole-system certification.

Upgrade worth it: countertop reverse osmosis

A countertop reverse-osmosis system may be worthwhile when its certified reductions match your water concern and permanent installation is impossible. These machines often include pumps, tanks, displays, and multiple cartridges.

Before upgrading, compare wastewater ratio, refill routine, electrical needs, cleaning steps, cartridge availability, and the price of every replacement stage. More stages do not automatically mean better value.

Start with your water report

Municipal customers can review the local water-quality report and advisories. Private-well users need appropriate testing. Choose filtration to address identified substances rather than buying from fear-based marketing.

Certification standards cover different claims, including aesthetic effects such as chlorine taste and health-related reductions for named substances. Confirm the exact model in the certifier’s database when possible.

Capacity and flow

Advertised capacity may describe total reservoir size rather than the amount available at the tap. Measure how much water your household drinks and uses for coffee or cooking each day.

Gravity filters slow as the upper reservoir empties or the cartridge loads. Faucet-connected systems may reduce flow. A larger unit is convenient but becomes heavy to lift and consumes valuable counter depth.

Filter cost is the real price

Calculate annual cost using the certified or manufacturer-stated cartridge life, your water usage, and local filter price. Water conditions can shorten life, while low use does not eliminate time-based replacement or sanitation requirements.

Check whether replacement cartridges are consistently available in Canada or the United States. A cheap machine can become useless when proprietary filters disappear.

Cleaning and hygiene

Wash reservoirs, spigots, drip trays, and removable parts on the schedule in the manual. Keep hands and utensils away from the clean-water side and do not let filtered water sit beyond the recommended period.

Prime and flush new cartridges exactly as instructed. Replace cracked seals, damaged tanks, and worn tubing rather than improvising repairs.

Common buying mistakes

  • Choosing by the number of stages instead of certified reductions.
  • Assuming filtered water is sterile.
  • Ignoring annual cartridge cost and availability.
  • Buying a faucet unit without checking the aerator and threads.
  • Forgetting the open-lid and refill clearance under cabinets.
  • Using a consumer filter during an advisory it is not approved to address.

Frequently asked questions

Does a countertop filter remove everything?

No. Each system targets specific substances under stated test conditions. Read the performance data sheet and certification listing.

Is reverse osmosis always better?

No. It can reduce a broad range of dissolved substances when properly designed and certified, but costs more, creates wastewater, and requires more maintenance.

How often do filters need changing?

Follow the cartridge’s volume and time limits, whichever comes first, and replace sooner if the manufacturer identifies signs of reduced performance.

Can renters use a faucet-connected model?

Often, if the faucet is compatible and the lease permits it. Keep original aerator parts and inspect temporary connections for leaks.

Final winner

The best countertop water filter for most small kitchens is a certified gravity dispenser with a compact footprint, easy-clean reservoirs, available replacement cartridges, and reduction claims matched to local water. A countertop reverse-osmosis unit wins only when its added performance addresses a real, verified need.

Complete your drink station with our electric kettle buying guide, and keep supplies tidy with our small-kitchen pantry organizer guide.

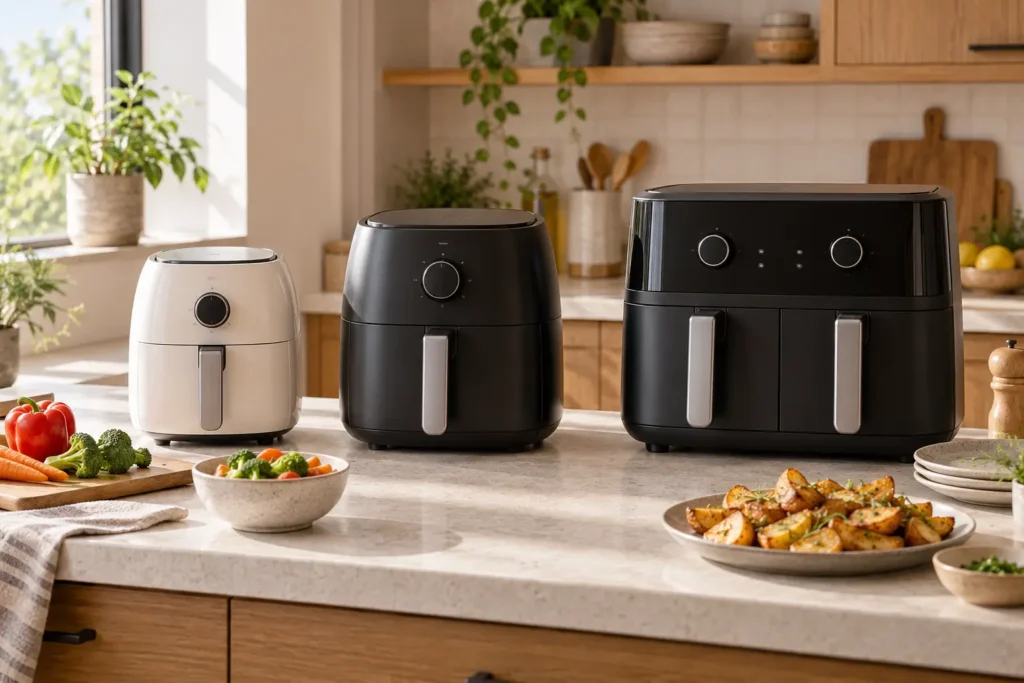
Three unbranded air fryers in compact, medium, and dual-basket sizes on a kitchen counter
Kitchen & Dining

Air Fryer Oven vs Basket Air Fryer

Disclosure: As an Amazon Associate, My Indoor Space may earn from qualifying purchases made through links in this guide, at no extra cost to you.

An air fryer toaster oven handles toast, baking, reheating, and larger flat foods. A basket air fryer is usually faster, easier to shake, and better at concentrating hot airflow around smaller portions. The better choice depends less on the word “air fryer” and more on what you cook most often.

Quick verdict

Choose a basket air fryer for the best combination of speed, compact cooking volume, simple cleanup, and reliable crisping. Choose an air fryer toaster oven when you need toast, open-face foods, wider pans, and one appliance to replace several countertop functions.

Who each style is for

A basket model is ideal for one to four people cooking fries, vegetables, wings, reheated pizza slices, and smaller proteins. It is also the better fit when you want fast preheating and parts that go to the sink easily.

An oven-style model suits someone who makes toast daily, wants to cook on a wider tray, or hopes to replace an older toaster oven. It needs more permanent counter space and more interior wiping.

Side-by-side comparison

Factor Basket air fryer Air fryer oven
Speed Usually faster for small portions Larger cavity can take longer
Crisping Strong concentrated airflow Depends on tray position and load
Food shape Deep basket Wide, flat trays
Toast Not practical Built for it
Cleanup Removable basket and plate More walls, racks, and crumb areas
Counter use Smaller footprint, often taller Wider and deeper

Best value: single-basket air fryer

A well-sized single basket is the value winner for most people. The removable cooking plate and compact chamber make it easier to load, shake, and clean. Straightforward temperature and time controls matter more than dozens of presets.

Choose capacity by usable cooking area, not only litres or quarts. A wider basket can cook food in one layer more effectively than a deeper basket with the same advertised volume.

Upgrade worth it: quality oven with easy-clean interior

An air fryer oven is worth the upgrade when it replaces both an air fryer and toaster oven. Look for a removable crumb tray, accessible interior, clear rack-position guidance, and enough height for the foods you actually make.

Extra rotisserie cages and specialty racks sound impressive but add storage and washing. Pay for even temperature control, useful tray size, and cleanability first.

Cooking performance

Basket air fryers surround a smaller load with fast-moving air. Shaking or turning exposes more surfaces and helps browning. Overfilling blocks circulation and produces softer results.

Oven models spread food across trays. They are useful for flat items but may require tray rotation when cooking on multiple levels. Read the manual’s recommended rack positions rather than treating every shelf as equal.

Real capacity

“Family size” is not a precise measurement. Lay out the chicken pieces, vegetables, or frozen food you normally cook and estimate the single-layer area required. Stacking saves space but can reduce crisping.

For oven styles, measure the baking dish, pizza, or number of toast slices you expect to fit. External dimensions also need room for the door, heat clearance, and ventilation.

Cleanup and coatings

Basket and crisper plates collect rendered fat and crumbs, but they can usually be removed. Check whether parts are dishwasher safe and whether the coating requires non-metal tools.

Oven interiors have more surfaces, heating elements, racks, and corners. A removable crumb tray helps, but grease splatter still needs prompt wiping after the appliance cools.

Controls and daily use

Separate time and temperature controls are faster than scrolling through many menus. A pause function that remembers the cycle when the basket opens is convenient. On an oven, independent toast shade and cooking controls prevent guesswork.

Smartphone control is not essential for an appliance that still requires safe loading, food checks, and hands-on cleanup.

Common buying mistakes

  • Comparing volume without checking usable cooking area.
  • Buying an oven too deep for the counter and wall clearance.
  • Expecting identical crisping from overloaded trays.
  • Ignoring the difficulty of cleaning the oven ceiling and elements.
  • Paying for accessories that will remain in storage.

Frequently asked questions

Which air fryer is easier to clean?

A basket model generally wins because the food-contact parts lift out and the cooking chamber is smaller.

Which is better for toast?

An air fryer toaster oven. Basket models are awkward for toast and do not provide the same broad heating layout.

Does an oven-style air fryer cook more food?

It can hold wider items or multiple trays, but crowded levels may require more time and rotation. Usable capacity matters more than exterior size.

Which is better for a small kitchen?

A basket model uses less counter area if you already own a toaster. An oven model can save space only when it genuinely replaces another appliance.

Final winner

The basket air fryer is the overall winner for speed, crisping, value, and cleanup. The air fryer toaster oven wins for households that make toast, cook wide flat foods, and will remove another countertop appliance rather than adding one more.

Choose the right capacity with our air fryer size guide, then compare other compact appliances in our small-kitchen rice cooker guide.

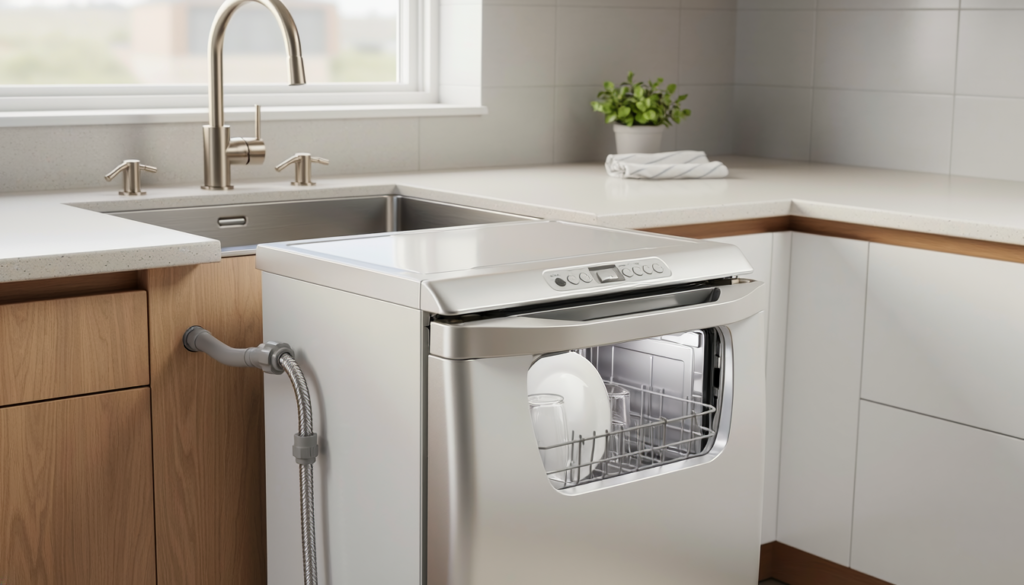
Compact countertop dishwasher in a small apartment kitchen
Kitchen & Dining

Best Compact Dishwasher for an Apartment

Disclosure: As an Amazon Associate, My Indoor Space may earn from qualifying purchases made through links in this guide, at no extra cost to you.

A compact dishwasher can save time in a small kitchen, but only if it fits the counter, accepts your dishes, and connects to the sink without disrupting daily use. Countertop, built-in slimline, and rolling portable models solve different space problems.

Quick verdict

For most renters, the best compact dishwasher is a countertop model with a faucet hookup, stainless interior, removable filter, simple normal and quick cycles, and enough vertical clearance for everyday plates. Choose a built-in 18-inch model only when cabinetry, plumbing, permission, and budget support permanent installation.

Who it is for—and who should skip it

A compact dishwasher suits one- or two-person homes, rental kitchens without a built-in unit, basement suites, and anyone who wants to reduce sink clutter. It works best when small loads are run regularly.

Skip it if the faucet is incompatible, counter space is already scarce, drainage would be unsafe, or your plates and cookware exceed the rack dimensions. Lease and building rules may also limit temporary appliance connections.

Compare the three main types

Type Best for Main trade-off
Countertop faucet-connect Most renters Uses counter and sink access
Countertop tank-fill Incompatible faucets Manual filling and drainage
Rolling portable Larger loads and more storage Needs floor space and movement
18-inch built-in Permanent small kitchens Installation and cabinet work

Best value: faucet-connect countertop model

A standard countertop unit offers the best value when the faucet accepts its quick-connect adapter. It draws and drains automatically during the cycle, avoiding repeated manual filling.

Check the faucet aerator threads before buying. Pull-down, touchless, designer, and non-standard faucets may not accept the supplied adapter. Do not force a connection or use an improvised pressurized fitting.

Upgrade worth it: stainless interior and better rack

A stainless-steel interior is a useful upgrade for durability, stain resistance, and heat retention. Rack design matters just as much: folding tines, a removable cutlery basket, and a sensible spray-arm path can make a compact tub far more usable.

A built-in water tank is worthwhile when faucet connection is impossible. Confirm how many fill pitchers are needed, whether a level indicator is visible, and where the drain hose will empty.

Measure the full operating space

Measure width, depth, height, door-open clearance, and the path for hoses and power. Include upper cabinets and the space needed to load from the front. A machine may fit on the counter but still be impossible to open fully.

Check the unit’s maximum plate diameter and usable rack height. Place settings are standardized estimates and do not guarantee that your dinner plates, mugs, or saucepan will fit together.

Water supply and drainage

A faucet-connected model temporarily takes over the faucet during operation. The adapter, hose, and sink must remain secure and unobstructed. A tank-fill model still needs a stable drain hose positioned exactly as instructed.

Never leave a new setup unattended until you have observed complete fill, wash, drain, and dry cycles without leaks. Keep connections accessible and inspect them regularly.

Noise in a small apartment

In an open-concept apartment, a few decibels can affect conversation and television listening. Compare published noise ratings, but also consider pump tone, drain noise, and end-of-cycle beeps.

Rubber feet and a level, solid counter reduce vibration. Do not place the dishwasher on a weak cart or uneven surface.

Cycles and drying

Normal, quick, and intensive cycles cover most needs. Specialty fruit or baby-item modes are not substitutes for following food-safety or sanitation guidance. A long feature list is less valuable than dependable cleaning and an accessible filter.

Compact machines often use residual heat or airflow rather than a powerful heated dry. Opening the door after the cycle when the manual allows it can help moisture escape.

Running cost and maintenance

Use only dishwasher detergent in the amount recommended for the water and load. Hand dish soap can create excessive foam and leaks. Clean the filter, spray arm, door seal, and interior as directed.

Scrape solid food but do not assume every item is dishwasher safe. Wood, cast iron, sharp knives, insulated drinkware, and delicate finishes may need hand washing.

Common buying mistakes

  • Ordering before checking faucet-thread compatibility.
  • Measuring the closed machine but not the open door.
  • Trusting place-setting capacity instead of rack dimensions.
  • Using hand dish soap.
  • Letting a drain hose move out of the sink.
  • Assuming countertop means lightweight or easy to relocate.

Frequently asked questions

Do countertop dishwashers need plumbing?

Many connect temporarily to a faucet and drain into the sink. Tank-fill models avoid the pressurized faucet connection but still require drainage.

Can I use one with a pull-down faucet?

Often not with the standard adapter. Check the exact faucet and dishwasher compatibility rather than buying an unapproved adapter.

Will full-size plates fit?

Some do and some do not. Compare the stated maximum plate diameter with your own dishes and allow for spray-arm clearance.

Can renters install one?

A temporary countertop model may be acceptable, but the lease, insurer, building rules, and landlord determine what is permitted.

Final winner

The best compact dishwasher for most apartments is a faucet-connect countertop model with verified faucet compatibility, a stainless interior, removable filter, flexible rack, and clear leak-free hose routing. When the faucet will not cooperate, choose a tank-fill model rather than forcing an unsafe connection.

Make the most of a tight kitchen with our small-kitchen pantry organizer guide and food storage container comparison.

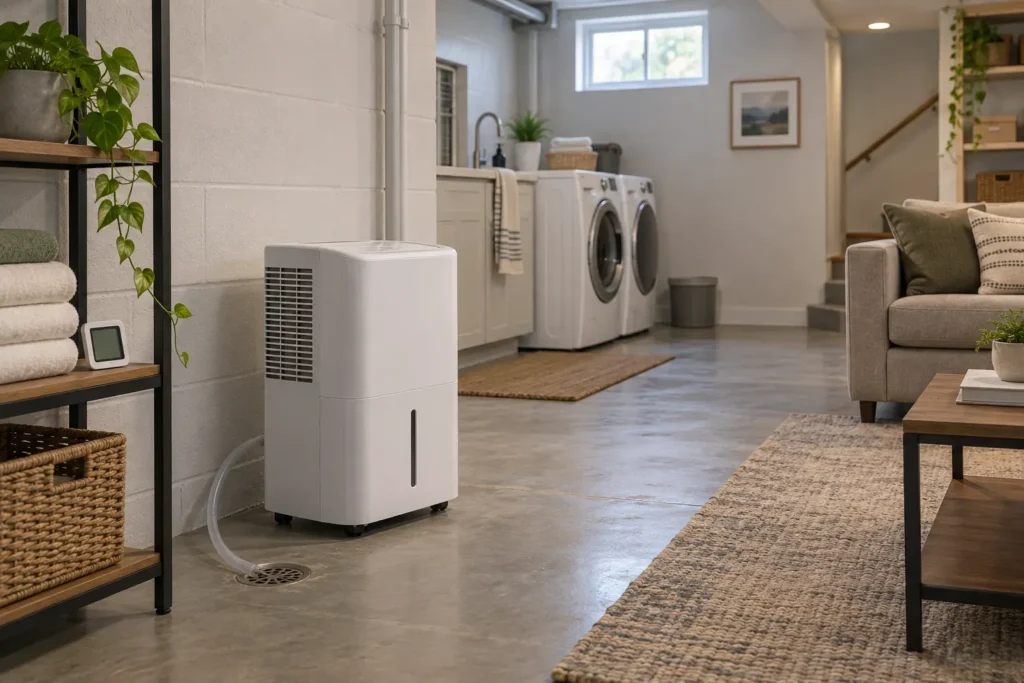
Portable dehumidifier with drain hose in a clean finished basement laundry area
Bedroom & Comfort

Portable AC vs Window AC

Disclosure: As an Amazon Associate, My Indoor Space may earn from qualifying purchases made through links in this guide, at no extra cost to you.

Portable and window air conditioners can both cool one room, but they handle heat very differently. A window unit places most of the hot side outside. A portable unit sits indoors and sends hot air through a hose, making installation easier but usually sacrificing efficiency and floor space.

Quick verdict

A properly sized window air conditioner is the better performer for most compatible windows: it is generally quieter in the room, uses space more efficiently, and removes heat more directly. Choose a dual-hose portable air conditioner when the window, lease, building rules, or room layout makes a window unit impractical.

Who each type is for

A window AC suits homeowners and renters with permission, a compatible opening window, and room to support and seal the unit correctly. It is the first choice when cooling performance and lower indoor noise matter most.

A portable AC suits sliding windows, rooms with building restrictions, temporary setups, and people who cannot safely lift a window unit. It still needs a properly sealed exhaust opening and enough floor clearance.

Portable AC vs window AC at a glance

Factor Portable AC Window AC
Installation Floor unit plus window hose kit Mounted and supported in window
Cooling efficiency Usually lower Usually higher
Indoor noise Compressor stays in room More machinery sits outside
Floor space Uses floor area Keeps floor clear
Drainage May require emptying or a drain hose Condensate managed at window
Mobility Movable, but hose must be reinstalled Seasonal or fixed placement

Best value: a correctly sized window unit

A window model offers the strongest value when installation is allowed and safe. Compare room-size guidance, tested efficiency ratings, sound levels at useful fan speeds, thermostat behaviour, and the included window kit.

Do not buy an oversized unit simply for faster cooling. Short cycles can reduce comfort and moisture removal. Measure the room, account for ceiling height, sun exposure, occupancy, and heat-producing equipment, then follow recognized sizing guidance.

Upgrade worth it: dual-hose portable design

If portable is the only practical choice, a dual-hose or well-designed hose-in-hose model is the upgrade worth considering. One air path brings in outdoor air for the hot side while the other exhausts heat, reducing the negative pressure created by many single-hose machines.

The upgrade still does not eliminate the need for tight window sealing, short unobstructed hose routing, and condensate planning. Compare the current standardized cooling rating rather than an older or larger-looking marketing number.

Cooling performance and ratings

Portable air conditioners may display more than one capacity figure. Use the standardized rating intended for portable units when comparing models, and do not compare unlike rating methods as if they were identical.

Window units also need sensible sizing. A shady bedroom and a sunny top-floor room of the same size may have different cooling loads. Closing gaps and reducing solar heat can improve results before buying a larger machine.

Noise where you sleep

A portable unit keeps its compressor and fans inside, so even a smooth sound can be noticeable. Check published sound levels across multiple modes and read for comments about cycling, rattling, and alert tones.

A window unit places part of the system outside, but vibration can travel through a loose frame. Proper support, weather sealing, and installation are important for both performance and noise.

Installation and security

Window units require an opening of the right type and size, secure support, drainage orientation, and protection against the window being opened from outside. Follow the manual and building rules; heavy units may require professional help.

A portable kit is lighter at the window but still needs a rigid, sealed panel. Lock the window or door appropriately and avoid makeshift cardboard gaps that let hot air, insects, and smoke back inside.

Drainage and maintenance

Some portable units evaporate much of the condensate through the exhaust under moderate conditions, but humid weather can fill an internal tank. Check whether the model supports continuous drainage and whether gravity drainage is possible at your location.

Both types need clean filters and clear airflow. Keep intake and outlet areas unblocked, inspect seals, and store seasonal equipment dry and clean.

Common buying mistakes

  • Comparing portable and window BTU figures from different rating systems.
  • Buying too large instead of sizing the room properly.
  • Using a long, sharply bent portable exhaust hose.
  • Ignoring drainage in humid weather.
  • Installing a window unit without proper support or permission.
  • Running either appliance through an unsuitable extension cord or overloaded circuit.

Frequently asked questions

Does a portable AC cool as well as a window unit?

At comparable real-world room ratings, a window unit generally has an efficiency and noise advantage. Portable models trade some performance for easier placement.

Can I move a portable AC between rooms?

Yes, but each room needs a compatible exhaust setup. The weight, hose, drainage, and window kit make frequent moves less effortless than the wheels suggest.

Is a dual-hose portable AC worth it?

It is often the worthwhile portable upgrade because it reduces the indoor-air penalty associated with many single-hose designs.

Which is better for a bedroom?

A quiet window unit usually wins when safe installation is possible. A well-sized dual-hose portable unit is the practical alternative when it is not.

Final winner

The overall winner is a correctly sized window air conditioner because it offers stronger cooling value, preserves floor space, and keeps more operating noise outside. The best renter-friendly alternative is a dual-hose portable model with a well-sealed kit, manageable drainage, and a rating matched to the room.

Control the room more intelligently with our smart thermostat compatibility guide, and track moisture with our home humidity monitor guide.

Scroll to Top