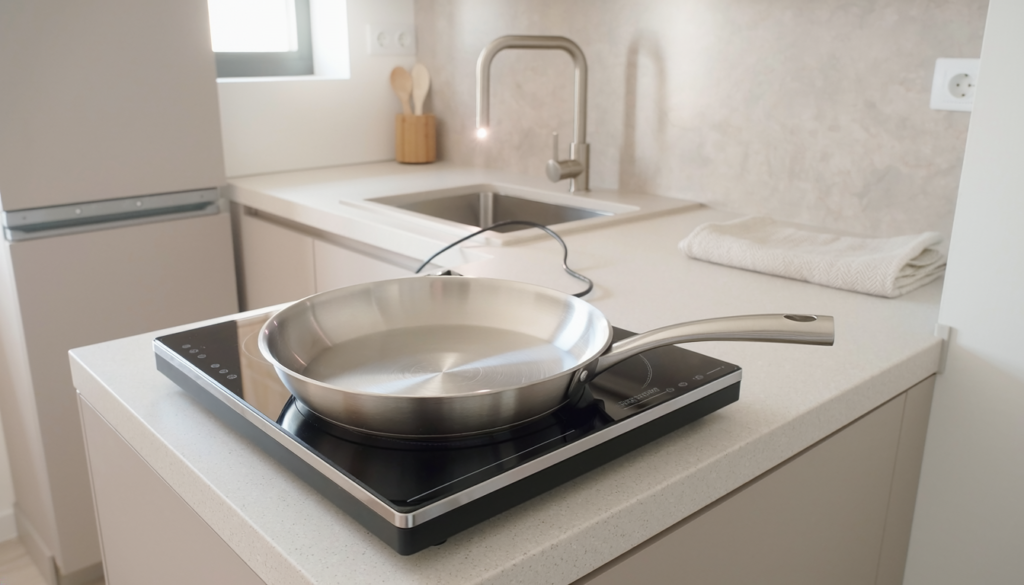
Portable induction cooktop on a small modern kitchen counter
Kitchen & Dining

Best Portable Induction Cooktop for a Small Kitchen

Disclosure: As an Amazon Associate, My Indoor Space may earn from qualifying purchases made through links in this guide, at no extra cost to you.

A portable induction burner can add a cooking zone to a cramped kitchen or keep a pot going when the main stove is busy. It heats compatible cookware through induction, so your favorite pan may decide whether the purchase makes sense. Check the kitchen’s electrical setup and the product manual before buying.

Quick verdict

For most small kitchens, a single-burner unit with clear power controls, a stable surface, a timer, and a cooking zone matched to your usual pan is the best fit. Test cookware with a magnet first. Choose the countertop placement based on ventilation and clearance requirements in the manual.

Who this is for—and when to skip it

Buy it for: A small kitchen that needs one extra cooking zone and already has compatible pans, a suitable outlet, and the required counter clearance.

Skip it when: Your existing stove handles your meals, your pans are incompatible, or the burner cannot be placed and powered according to its manual. Keeping the stove you have is the lower-cost choice when you do not need another cooking zone.

How this guide was made: a research-based buying guide using the Department of Energy explanation linked below and practical compatibility checks. It does not claim hands-on testing of a particular cooktop.

Which type fits your home?

Type Best for Trade-off
Single-burner induction Occasional extra cooking zone Only one pan at a time
Dual-burner induction Regular multi-pan cooking Takes more counter space and demands electrical planning
Portable resistance burner Nonmagnetic cookware Different heat response and surface behavior
Existing stovetop No extra appliance or storage No extra cooking zone

Confirm pan compatibility

Induction relies on cookware with a magnetic base. The U.S. Department of Energy suggests a simple magnet check: if a magnet sticks to the bottom, the pan can generally work. Still compare the pan’s flat base diameter with the cooktop’s specified cooking area; very small or warped pans may not work reliably.

Power controls matter at low heat

Some units offer many numeric settings while cycling power at the lower end. Read the manual or independent owner feedback for how it behaves when simmering sauce, not just when boiling water. A dedicated power setting and separate temperature setting can be useful, but labels alone do not guarantee fine control.

Check the kitchen’s electrical setup

Portable units are designed for a suitable household outlet according to their own rating and instructions. Do not assume an extension cord, shared power strip, or loaded circuit is appropriate. Follow the manufacturer on clearances and never use the burner near hanging fabric or water.

Storage, cleanup, and heat

The glass top wipes more easily after it cools, but the hot pan transfers heat back into the surface. A residual heat warning is useful. Compare full exterior dimensions, fan noise, and the cord route with where the unit will actually sit and be stored.

Best value

A simple single-burner model with a clear display and timer is the best value when you occasionally need one additional cooking zone.

When the upgrade earns its price

Pay for a model with verified finer low-heat control if you cook sauces or simmer regularly; extra advertised power alone is less useful in that situation.

Buying mistakes to avoid

  • Buying before checking the pans with a magnet.
  • Judging suitability only by peak wattage.
  • Running a high-power cooker through an unsuitable power strip.

Common questions

Will all stainless-steel pans work?

No. Stainless cookware varies; check that a magnet sticks firmly to the base and compare the manual’s pan size range.

Does the glass surface stay cool?

The burner heats the pan directly, but the hot pan can warm the glass. Let it cool before cleaning.

Final pick

A well-controlled single burner is the practical starting point for occasional extra cooking. Check your pans, countertop, and outlet before comparing bonus features.

Keep comparing with our basket versus oven air fryer comparison, small-kitchen electric kettle guide.

Further reading: U.S. Department of Energy: Induction Cooktops.

Clear removable window insulation film being applied in an apartment
DIY & Decorating

Best Window Insulation Kit for Renters

Disclosure: As an Amazon Associate, My Indoor Space may earn from qualifying purchases made through links in this guide, at no extra cost to you.

An interior window film kit creates an additional air layer when installed around a window frame. It is a seasonal project with real trade-offs: you may lose easy access to the window, and the supplied tape may affect painted surfaces. For renters, removal matters as much as installation.

Quick verdict

Start with a clear, shrink-to-fit interior film kit sized for the whole frame and a tape that is compatible with the surface. Repair obvious gaps in the weatherstripping through the landlord where appropriate. Do not cover a window you need to open for ventilation or emergency exit.

Who this is for—and when to skip it

Buy it for: A drafty window with a sound frame that can remain closed for the season, provided the tape suits the finish and your rental allows it.

Skip it when: You need to open the window regularly, it serves as an emergency exit, or the frame has leaks or damage that need the landlord’s attention. If the window already seals well, buying film may add little practical value.

How this guide was made: a research-based comparison of window-covering options using the ENERGY STAR guidance linked below. We have not claimed hands-on testing of a particular kit.

Which type fits your home?

Type Best for Trade-off
Shrink-fit film Seasonal interior air barrier Covers window access until removed
Removable weatherstripping Drafty movable sash or frame Must suit how window opens
Thermal curtain Comfort and privacy Does not seal a leaky frame
Interior storm panel Longer-term reusable solution Higher upfront cost and fit effort

Measure the whole frame

The film must attach around the window, not to the moving glass. Measure outer frame height and width, then allow for the tape placement and corner overlaps specified by the kit. ENERGY STAR’s installation guidance says to leave a few inches of film on either side and clean the frame before applying it.

Surface compatibility and removal

Double-sided tape may pull weak paint or leave adhesive. Clean and dry the frame as directed and test a small hidden area before covering the opening. If the trim is damaged or freshly painted, speak with the landlord about the underlying window instead of risking the finish.

Apply the film without shortcuts

Follow the kit’s directions for tape, corner overlaps, film tension, and heat shrinking. A hair dryer held too close can damage film or trim. Smooth wrinkles gradually rather than pulling so hard that the tape releases. Inspect for loose edges after installation.

Know what film will and will not do

The interior layer can help reduce drafts and heat loss at the opening, but it does not repair water infiltration, broken glazing, or structural damage. Condensation trapped at a damaged window deserves investigation. Keep any required exit and regularly used ventilation route usable.

Best value

A standard clear interior film kit from a reputable supplier is the sensible low-cost choice when the frame is sound and seasonal window access is not essential.

When the upgrade earns its price

A reusable interior storm panel can be worth the higher price for a window you treat every winter, provided it fits and the installation is allowed in your rental.

Buying mistakes to avoid

  • Ordering film to match glass dimensions instead of the outer frame.
  • Applying adhesive without testing the paint or trim.
  • Sealing a window needed for ventilation or exit.

Common questions

Can window film be removed in spring?

Seasonal kits are designed to come down, but the tape may leave residue or lift weak paint. Test first and remove as directed.

Does film fix condensation between double panes?

No. Moisture trapped between sealed panes indicates a different window problem that film does not repair.

Final pick

A removable film kit is a sensible seasonal option for a sound frame and a window you will not need to open. Test the tape and preserve access to ventilation and exits.

Keep comparing with our blackout curtains guide, apartment draft stopper guide.

Further reading: ENERGY STAR: Applying Plastic Over Windows.

Draft stopper fitted along the bottom of an apartment entry door
Bedroom & Comfort

Best Door Draft Stopper for an Apartment

Disclosure: As an Amazon Associate, My Indoor Space may earn from qualifying purchases made through links in this guide, at no extra cost to you.

A draft at the bottom of a door can make a room feel colder even when the thermostat says otherwise. The first step is to locate the gap and measure it with the door both open and closed. A stopper that catches on carpet or prevents the door from latching is the wrong fix.

Quick verdict

For an interior door with a modest gap, a removable slide-on or double-sided fabric stopper is an easy first try. For an exterior entry, choose a weather seal suited to the door and threshold, and keep the latch, fire rating, and building rules in mind. A loose weighted draft snake is easiest to remove but has to be reset after opening.

Who this is for—and when to skip it

Buy it for: A confirmed gap under an interior door where a removable stopper clears the floor throughout the door’s swing.

Skip it when: The draft comes from the side of the frame, the door already seals well, or a stopper makes it harder to latch. For an apartment entry door that needs repair, ask building maintenance to assess the seal before buying an accessory.

How this guide was made: a comparison of draft-stopper types and fit requirements, with ENERGY STAR’s air-leak guidance linked below. It does not claim hands-on testing of individual products.

Which type fits your home?

Type Best for Trade-off
Weighted fabric snake Occasional use without adhesive Needs repositioning
Slide-on double-sided Interior doors opened regularly Can rub on thick carpet
Adhesive sweep A consistent door-bottom gap Adhesive can mark a rental door
Replacement threshold seal Purpose-built exterior door repair May require landlord or building maintenance

Find the real leak

Feel around the bottom and sides on a windy day, or use a small strip of tissue to identify airflow. A bottom stopper will not fix a gap along the jamb or around a poorly aligned frame. ENERGY STAR recommends identifying air leaks before choosing an air-sealing method.

Measure the sweep path

With the door moving, note the smallest clearance over carpet, tile transitions, and uneven floors. A thick seal that drags may wear quickly or make the door hard to operate. Choose a product whose stated gap range matches the largest opening without creating friction at the tightest point.

Renter-friendly installation

A removable fabric piece or slide-on foam may be preferable in a rental. Test any adhesive on an inconspicuous area and check the tenancy rules before modifying a door. Exterior or fire-rated entry doors may require maintenance approval; do not alter the door in a way that compromises closure or safety.

Plan for cleaning and movement

Fabric stoppers collect dust and pet hair, so a washable cover helps. Plastic and silicone sweeps wipe clean, but some adhesive versions peel near damp floors. Recheck the seal after the first week of use and make sure the door still shuts fully.

Best value

A washable, removable slide-on stopper is the best low-cost first choice for a regularly used interior door with a predictable gap.

When the upgrade earns its price

For a leaky exterior door, the right door sweep or threshold repair is more effective than piling fabric against the gap, but involve building maintenance when needed.

Buying mistakes to avoid

  • Buying a stopper before measuring the gap through the full swing.
  • Sealing the bottom when the air actually enters at the side jamb.
  • Adding a thick sweep that prevents a rated door from closing.

Common questions

Will a draft snake stay in place?

A loose weighted one usually has to be moved after opening the door. Double-sided designs travel with the door if they clear the floor.

Can I put adhesive on an apartment entry door?

Check with building management, especially if it is a fire-rated door, and test finish compatibility first.

Final pick

For an interior door, try a removable stopper sized to the gap and floor. Ask building maintenance to assess an exterior or rated entry door when the seal or threshold needs repair.

Keep comparing with our blackout curtains guide, humidity monitor guide.

Further reading: ENERGY STAR: Locating Air Leaks.

Cable management box organizing a power strip and cords on a home office desk
Smart Home

Best Cable Management Box for a Home Office

Disclosure: As an Amazon Associate, My Indoor Space may earn from qualifying purchases made through links in this guide, at no extra cost to you.

A cable box can make the floor under a desk look calmer, but hiding cords is not the same as making them safe. The useful box has enough room for the actual power strip and bulky adapters, keeps ventilation and inspection possible, and does not turn plug changes into a chore.

Quick verdict

A roomy, ventilated box with smooth cable exits and an easy-open lid is a better choice than the smallest box that barely closes. Measure the power strip with its plugs inserted and keep the strip accessible according to its manufacturer’s instructions. Do not conceal damaged or overloaded electrical gear.

Who this is for—and when to skip it

Buy it for: A fixed desk where visible adapters are the clutter problem and the equipment instructions permit enclosure with adequate ventilation.

Skip it when: You only need to gather a few loose cords, frequently swap plugs, or the adapters must remain uncovered. Reusable ties or an accessible under-desk tray may solve the problem with less bulk.

How this guide was made: a comparison of organizer types, space requirements, and access trade-offs. No individual cable box is presented as hands-on tested or as making an electrical setup safe.

Which type fits your home?

Type Best for Trade-off
Lidded cable box One power strip and a few adapters Check ventilation and internal height
Under-desk cable tray Keeping outlets off the floor May require drilling and safe mounting
Adhesive cable raceway One or two visible cable runs Does not house a power strip
Reusable cable ties Organizing individual cords Does not hide chargers or adapters

Measure with everything plugged in

A power strip’s listed length does not include angled plugs, transformer blocks, or bend room for cords. Assemble the real setup and measure its tallest and widest points. If the lid presses against plugs or forces a cable into a tight bend, use a larger box or a different setup.

Ventilation and accessibility

Chargers and electrical devices may generate heat. Follow the instructions for the strip and power adapters, including any requirement to remain uncovered. Keep switches, plugs, and cords reachable so you can disconnect equipment quickly. A box with simple openings and a removable lid makes inspection easier.

Route cords without creating a trip point

Choose rounded openings that do not abrade insulation. Route the main power lead away from chair wheels, doors, and water. Reusable ties make future changes less wasteful than tight one-use bundles. Keep enough slack for monitor arms or height-adjustable desks to travel through their full range.

Clean the system, not just the floor

Dust still collects inside a box. Unplug equipment before routine cleaning and check for wear, loose plugs, and unusual warmth. A tidy enclosure cannot increase the strip’s electrical rating or make daisy-chaining safe.

Best value

A simple ventilated box sized for your real plug arrangement is the best value for a fixed desk.

When the upgrade earns its price

A mounted tray is worth considering if you frequently move a sit-stand desk and need cables and the strip to travel together; confirm the mounting method suits the desktop.

Buying mistakes to avoid

  • Measuring an empty power strip instead of one with adapters attached.
  • Blocking ventilation or covering equipment against its instructions.
  • Running cords where chair wheels can crush them.

Common questions

Can a power strip go inside any cable box?

Follow the strip and adapter manufacturers’ instructions. Choose adequate ventilation and access; some equipment should remain uncovered.

Will a box solve overloaded outlets?

No. It only organizes cables. Check ratings and reduce loads rather than hiding an unsafe setup.

Final pick

The right cable box accommodates the live setup with room for plugs, airflow, and inspection. Its clean appearance is useful only when the electrical arrangement remains sound.

Keep comparing with our smart power strip guide, small-desk monitor arm guide.

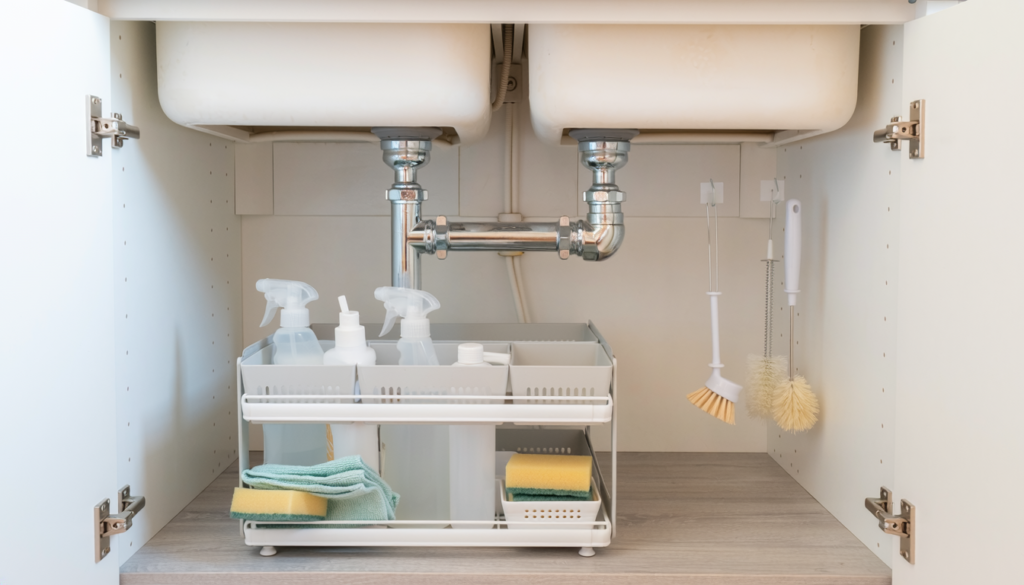
Under-sink organizer arranged around plumbing in a small kitchen cabinet
Home Organization

Best Under-Sink Organizer for a Small Cabinet

Disclosure: As an Amazon Associate, My Indoor Space may earn from qualifying purchases made through links in this guide, at no extra cost to you.

The cabinet beneath a sink looks spacious until the pipes, shutoff valves, and garbage disposal claim the middle. The best organizer follows the usable space around that plumbing and lets you reach everyday supplies without unloading the entire cabinet.

Quick verdict

For most small cabinets, two narrow pull-out bins or an adjustable shelf that straddles the pipes beats one large fixed rack. Measure the lowest pipe, door opening, and valve access before ordering. Keep a leak detector on the cabinet floor if water damage is a concern.

Who this is for—and when to skip it

Buy it for: A cabinet where reaching bottles behind the plumbing is awkward and a measured bin or sliding tray can improve access.

Skip it when: Your existing containers already keep supplies reachable, or the cabinet has an unresolved leak. Clear out unused supplies and deal with plumbing problems before adding storage.

How this guide was made: a practical comparison of storage layouts, access, and cleaning requirements. The recommendations concern organizer types; they are not claims of hands-on testing of a specific model.

Which type fits your home?

Type Best for Trade-off
Pull-out bins Fast access to cleaning bottles Rails and handles need clearance
Adjustable pipe shelf Making use of both sides of plumbing Requires careful setup and support
Stackable bins Simple low-cost grouping Upper bin must be moved to reach lower one
Over-door caddy Small brushes and gloves Can collide with shelf or pipes

Map the cabinet’s obstacles

Measure width inside the door frame, depth to the rear wall, and height below the lowest pipe. An organizer that fits the outer cabinet may not pass through a narrower door opening. Leave clear access to shutoff valves and connections so maintenance or a leak response is not blocked.

Access matters more than maximum capacity

If you use a bottle every day, a sliding tray can pay off because nothing has to be lifted from behind it. For supplies used rarely, labeled open bins may be simpler. A two-tier rack is useful only when the upper tier clears the trap and bottles can be removed without striking a pipe.

Choose materials for a wet cabinet

Plastic bins are easy to lift out and wash after a spill. Metal wire shelves need a coating that stays intact in a humid space; wood-based shelves can swell if they sit in water. Keep absorbent paper goods and electronics away from plumbing connections.

Do not bury warning signs

A lined floor can make cleanup easier, but it should not hide recurring drips. Periodically check the cabinet base and connections. A battery leak alarm can alert you to a fresh puddle, yet it does not fix the plumbing or replace regular inspection.

Best value

A pair of removable, narrow plastic bins is the most forgiving inexpensive option in an irregular cabinet.

When the upgrade earns its price

Pay for smooth pull-out hardware when the cabinet is deep enough and daily access is the actual problem.

Buying mistakes to avoid

  • Measuring outside width but not the narrow door opening.
  • Blocking a shutoff valve with a fixed shelf.
  • Stacking paper towels directly under a potential drip.

Common questions

Should I use a two-tier shelf?

Yes if the pipe layout and bottle heights leave usable space on both levels. Otherwise narrow bins often work better.

Will an organizer prevent water damage?

No. It improves access and may make inspection easier; a leak alarm and prompt plumbing repair address the risk.

Final pick

Let the plumbing define the organizer, not the product photo. Removable bins preserve access, while a pull-out tray earns its price in a deeper cabinet used daily.

Keep comparing with our apartment water-leak detector guide, small-kitchen pantry organizer guide.

Fabric shaver being used on a sweater in a cozy apartment
Laundry & Cleaning

Best Fabric Shaver for Sweaters and Upholstery

Disclosure: As an Amazon Associate, My Indoor Space may earn from qualifying purchases made through links in this guide, at no extra cost to you.

Pilling can make a good sweater look worn before the fabric itself is finished. A fabric shaver removes raised pills with a rotating blade behind a perforated guard. The useful question is not how powerful it sounds, but whether you can control it gently on the fabrics you own.

Quick verdict

Choose a compact shaver with a protective guard, a removable lint bin, a head you can clean, and a grip that lets you keep the fabric flat. A rechargeable model is convenient for frequent use; replaceable batteries can be simpler for occasional use and long storage.

Who this is for—and when to skip it

Buy it for: Removing attached pills from otherwise usable garments, when both the fabric care instructions and the shaver’s manual permit it.

Skip it when: The problem is loose lint or pet hair, or the fabric has loose threads and delicate raised details. A lint brush or roller is the simpler choice for surface debris.

How this guide was made: a comparison of shaver types and garment-care trade-offs, without hands-on testing claims. For an example of the controls and care information to check, see the Philips GC026 support and manuals; follow the instructions for the model you buy.

Which type fits your home?

Type Best for Trade-off
Rechargeable electric Frequent sweater and couch touch-ups Requires charging and battery care
Battery-powered electric Occasional use Replacement batteries add cost
Manual sweater comb Careful work on suitable knits Slower and requires a light touch
Lint roller Loose hair and surface lint Does not trim anchored fabric pills

Guard design matters more than speed

The mesh guard should keep fingers away from the blades and create a consistent distance from the cloth. On raised seams, embroidery, delicate knits, and loose threads, even a guarded shaver can snag material. Try a hidden area before using it on an expensive garment.

Lay fabric flat and let the tool do the work

Smooth the garment on a firm surface. Make light passes without pushing the head into the cloth. Empty the lint bin before it packs full, and stop if the motor sounds strained. Never shave clothing while someone is wearing it or near skin.

Choose power for your routine

A rechargeable shaver makes sense if you use it weekly on sweaters, throws, or upholstery. Battery-powered versions can sit in a drawer without waiting for a charge. Check the manual for blade replacement availability and whether you can clean the head without awkward tools.

Know when not to shave

A surface with loops, textured embroidery, or loose yarn may pull into the blade. Some fabrics pill because fibers are breaking down; repeated shaving can thin the material. Read the fabric care label and use a brush or roller for loose lint and pet hair instead of trimming sound fibers.

Best value

A basic guarded electric shaver with an easy-to-empty container is enough for most everyday knits.

When the upgrade earns its price

Pay for a better head and replaceable blades when you use it often across large upholstery areas, rather than paying for a display or unnecessary modes.

Buying mistakes to avoid

  • Pressing hard on delicate fabric or raised seams.
  • Using a lint roller as if it could remove attached pills.
  • Buying a sealed head that is difficult to clear when clogged.

Common questions

Will a fabric shaver damage a sweater?

It can if used with pressure, on loose threads, or on delicate textures. Test an inconspicuous spot and work gently.

Does it remove pet hair?

It trims pills; a lint brush or roller is a better first tool for loose pet hair.

Final pick

A guarded, easy-to-clean shaver can refresh everyday knits. Work lightly and treat delicate or loose fabrics as exceptions rather than testing the blade on them.

Keep comparing with our clothes steamer buying guide, laundry hamper guide.

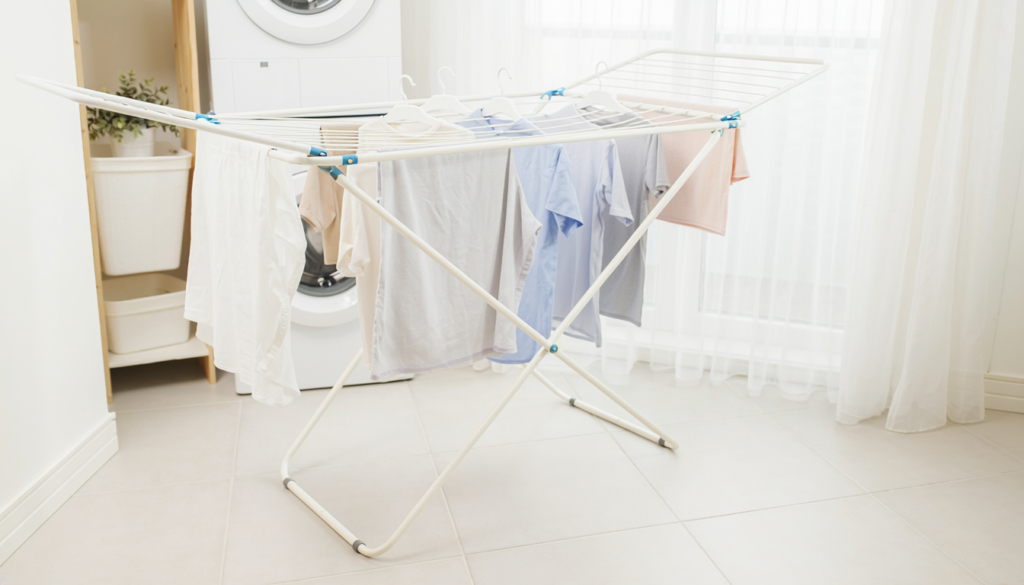
Foldable drying rack with clothes in a bright apartment laundry area
Laundry & Cleaning

Best Foldable Drying Rack for an Apartment

Disclosure: As an Amazon Associate, My Indoor Space may earn from qualifying purchases made through links in this guide, at no extra cost to you.

A drying rack is a good small-space purchase only if it fits both the laundry and the room. A rack that folds nearly flat but cannot hold a shirt without bunching is frustrating; a large one that blocks the hallway is just as bad. Measure the space where it will stand fully opened.

Quick verdict

For most apartments, a sturdy folding wing rack with a wide enough central section for shirts and a stable base offers the best balance of drying space and storage. A tower style is useful when floor width is scarce, provided there is room for air to circulate around it.

Who this is for—and when to skip it

Buy it for: Regular air-drying when you have a ventilated spot that fits the open rack and a place to store it folded.

Skip it when: Your current rack already holds the load comfortably, or a larger rack would block a walkway. A tall tower is also a poor fit when most of your laundry consists of long items that overlap its lower shelves.

How this guide was made: a comparison of rack layouts, usable drying space, and storage trade-offs. No specific rack is presented as personally tested; check its dimensions and load limit before ordering.

Which type fits your home?

Type Best for Trade-off
Wing rack Mixed daily clothing and towels Uses a broad floor footprint
Vertical tower Narrow rooms and many small items Long garments can overlap
Wall-mounted rack A consistent laundry corner Needs appropriate mounting and permission
Over-door rack Very occasional light loads Door clearance and weight can be limiting

Look at open size and folded size

Retail photos often emphasize how slim the rack looks in storage. Note the full width with wings extended, the distance needed to walk around it, and where the folded frame will live. Measure folded thickness if it must slide beside a washing machine or behind a door.

Bar spacing affects drying

Clothes packed close together stay damp longer. Wider spacing helps air circulate and leaves room for thick seams or towels. A tower offers lots of nominal bar length, but overlapping clothes may reduce useful capacity. Spread heavier items across several rails to avoid bending the frame.

Stability and load

Check published weight limits and the hinge construction. A rack standing on level flooring should not sway when one damp towel is placed at the edge. Locking wings and nonslip feet are useful on smooth apartment floors. Keep it out of traffic paths where someone might catch a foot on its base.

Control moisture indoors

Air-drying adds water to indoor air. Use ventilation or a dehumidifier when needed, especially in a small closed room. A humidity monitor helps reveal whether damp clothes are sitting too long. Do not place a rack so close to a heater that fabric can touch it.

Best value

A plain folding wing rack with strong hinges and enough rail spacing is the best starting point for occasional indoor laundry.

When the upgrade earns its price

A stable tower is worth paying for if limited floor width is the recurring problem and you routinely dry many small garments.

Buying mistakes to avoid

  • Measuring only the folded rack.
  • Treating every rail as usable with bulky towels.
  • Ignoring ventilation while drying laundry indoors.

Common questions

Which rack works best for sheets?

A large wing rack or two separated supports allow more airflow than a tightly folded sheet on a narrow tower.

Can I place a rack above a heater?

Follow the heater’s clearance instructions and keep fabrics away from hot surfaces and vents.

Final pick

A stable wing rack fits most mixed apartment loads. Give the clothes room to breathe and make sure both the opened rack and the folded one have a place in your home.

Keep comparing with our humidity monitor guide, small-space laundry hamper guide.

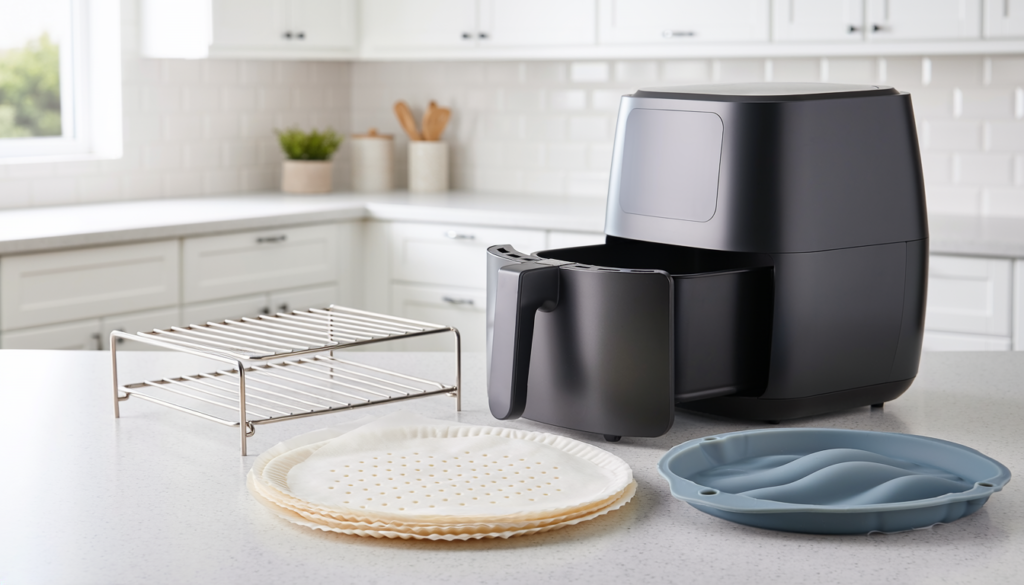
Useful air fryer accessories arranged beside a basket air fryer
Kitchen & Dining

Best Air Fryer Accessories Worth Buying

Disclosure: As an Amazon Associate, My Indoor Space may earn from qualifying purchases made through links in this guide, at no extra cost to you.

Accessory bundles promise to turn an air fryer into a kitchen toolkit, but a drawer full of ill-fitting inserts is easy to accumulate. Start with the size and shape of your actual basket or oven. Then buy only the piece that makes a dish easier to cook, lift, or clean.

Quick verdict

For most owners, silicone-tipped tongs and a food-safe rack or heat-safe pan matched to the specific cooker are more useful than a large bundle. Perforated parchment can reduce cleanup for messy foods, but it must be weighed down by food and used only as the manufacturer’s directions permit.

Who this is for—and when to skip it

Buy it for: A recurring cooking task the supplied basket does not handle conveniently, after checking accessory fit and the cooker’s instructions.

Skip it when: You are still learning a new fryer or already own suitable tongs and cookware. A large bundle is poor value if most pieces will stay in the drawer.

How this guide was made: a comparison of accessory functions, fit, and cleaning trade-offs, without hands-on testing claims. Compatibility is model-specific; consult your cooker’s manual. Ninja owners can find model guides in the official Ninja manual library.

Which type fits your home?

Type Best for Trade-off
Silicone-tipped tongs Turning and lifting food Choose heat rating and grip carefully
Perforated parchment Messy foods and easier cleanup Can restrict airflow or blow toward the heater
Silicone liner Sticky recipes Adds a surface that needs washing
Cooking rack Keeping food above drippings May reduce headroom and need more attention

Fit before features

Interior width and depth matter more than the air fryer’s advertised capacity. Measure the basket at its narrowest usable point and leave room to remove the accessory without touching hot walls. In oven-style cookers, check rack height and the space below the heating element. Accessories advertised as universal often fit only some shapes.

Keep air moving

A solid liner can catch drippings but also change how air reaches the underside of food. Perforated parchment and raised racks preserve more airflow, though neither fixes an overloaded basket. Never preheat loose parchment without food on top; moving air can lift it toward a heating element.

Materials and temperature ratings

Choose food-contact materials whose stated temperature limit exceeds the cooking temperatures you use. Avoid coatings that scratch easily against a metal basket. Handles and tabs must remain reachable with oven mitts; an accessory that cannot be removed safely is not a good fit.

Cleanup and real use

A pan that saves the original basket but adds a second greasy dish may not save time. Prioritize an accessory you can easily wash, dry, and store. If you mostly cook frozen snacks, the included basket and a pair of tongs may already be enough.

Best value

A sturdy pair of silicone-tipped tongs is the best first purchase because it works across many recipes and does not block airflow.

When the upgrade earns its price

A properly sized rack or pan makes sense when you repeatedly cook a recipe that benefits from elevation or needs containment.

Buying mistakes to avoid

  • Buying a bundle before measuring the actual basket.
  • Preheating unsecured parchment near a fan and heater.
  • Using an accessory that blocks airflow or sits too close to the element.

Common questions

Are silicone liners always better than parchment?

No. Silicone is reusable but needs cleaning and can change airflow. Parchment is disposable but must be properly fitted and weighted down.

Do I need accessories for a new air fryer?

Try the included basket first; cooking habits reveal which accessory, if any, solves a real problem.

Final pick

Use the included basket for a few weeks before buying extras. When a specific recipe reveals a problem, choose one well-fitting accessory that fixes it safely.

Keep comparing with our basket versus oven air fryer comparison, air fryer size guide.

Digital kitchen scale with mixing bowl and ingredients on a kitchen counter
Kitchen & Dining

Best Digital Kitchen Scale for Everyday Cooking

Disclosure: As an Amazon Associate, My Indoor Space may earn from qualifying purchases made through links in this guide, at no extra cost to you.

A scale earns its space when it makes cooking simpler: set down a bowl, zero it, pour, and stop at the target weight. The most expensive model is rarely necessary. A clear display, reliable tare function, sensible capacity, and a platform you can wipe clean do more for everyday cooking than an app full of rarely used features.

Quick verdict

Buy a compact digital scale that measures in grams, has a responsive tare button, remains readable with your largest bowl in place, and supports the combined weight of that bowl and your ingredients. A flat stainless-steel platform is a practical default if it is easy to wipe around the edges.

Who this is for—and when to skip it

Buy it for: Recipes written by weight, repeated baking batches, or meal preparation where measuring into one bowl makes the work easier.

Skip the upgrade when: Your existing scale gives stable readings, holds your usual bowl, and remains easy to read. App features and a higher capacity add little if you will not use them; tiny ingredient quantities may need a separate precision scale.

How this guide was made: a comparison of scale features and practical kitchen fit, without measured accuracy tests or hands-on product rankings. Check the chosen model’s capacity and minimum load in its manual.

Which type fits your home?

Type Best for Trade-off
Flat platform Baking and meal prep Large bowls can hide the screen
Raised platform Reading the screen behind a bowl Takes more storage space
High-capacity scale Big batches and heavy pots May be less convenient for tiny quantities
Pocket scale Small precise amounts Too small for mixing bowls

Capacity includes the bowl

A stated maximum includes the container, not just what you add to it. Weigh your typical mixing bowl or heavy saucepan before choosing a scale. A compact model can be perfect for baking ingredients but frustrating when a large pot consumes most of the available range.

Check display placement and timeout

Place the bowl you actually use on a similar platform and imagine adding ingredients. If it would hide the digits, seek a forward-facing or detachable display. Auto-off saves batteries, but a very short timeout can interrupt slow measuring or dough work. A hold function is useful when a wide tray covers the readout.

Tare should be quick and predictable

Tare resets the displayed weight to zero so you can add the next ingredient to the same bowl. Try to find a clearly labeled, responsive control with enough separation from the unit-switch button. Switching accidentally from grams to ounces in the middle of a recipe creates avoidable errors.

Accuracy in the kitchen is about repeatability

For ordinary baking, stable readings on a level counter are more helpful than a marketing claim about ultra-fine precision. Small seasoning quantities may call for a dedicated precision scale. Check the minimum measurable weight in the manual and keep the scale away from a hot pan or wet sink.

Best value

A basic flat scale with grams, ounces, tare, and an easy-to-read display covers most home recipes.

When the upgrade earns its price

Pay extra for a remote display or larger platform if big bowls routinely obscure the screen; pay for higher capacity only if you use heavy vessels.

Buying mistakes to avoid

  • Ignoring the weight of the bowl when checking capacity.
  • Choosing a platform that hides its display under a large tray.
  • Confusing a small increment claim with proven accuracy at every load.

Common questions

Do I need a special scale for coffee?

A timer and faster response can help with pour-over coffee, but a regular kitchen scale is enough for many cooking tasks.

Can I wash a digital kitchen scale?

Unless the manufacturer explicitly rates it for immersion, wipe it with a damp cloth and keep water out of the controls.

Final pick

Start with an easy-to-read gram scale and a useful tare button. Add specialty precision or a remote display only when your cooking routine gives you a reason.

Keep comparing with our rice cooker size guide, food storage containers comparison.

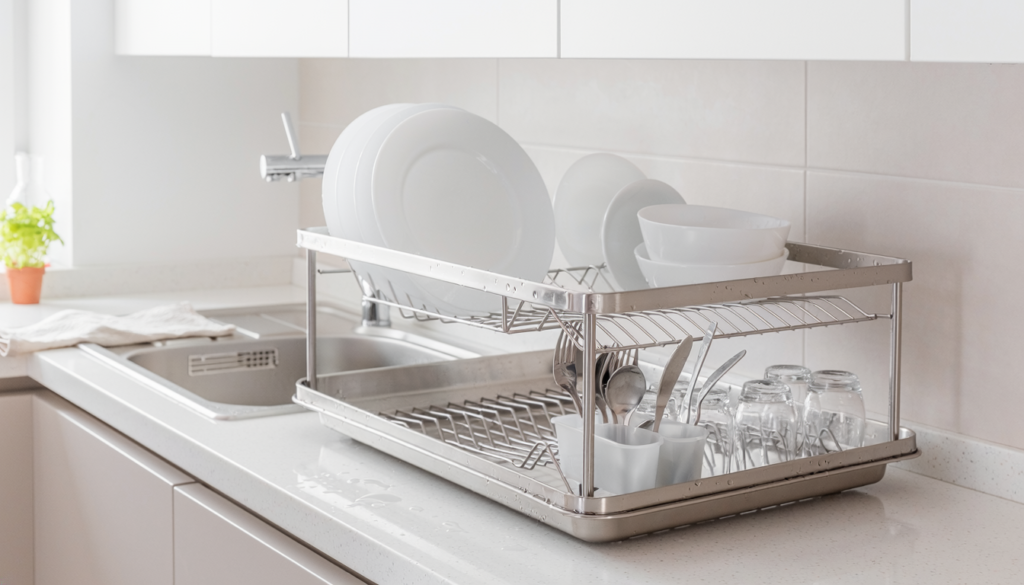
Compact dish drying rack beside a small apartment kitchen sink
Kitchen & Dining

Best Dish Drying Rack for a Small Kitchen

Disclosure: As an Amazon Associate, My Indoor Space may earn from qualifying purchases made through links in this guide, at no extra cost to you.

A dish rack can occupy more useful counter space than the dishes themselves. Before buying one for a small kitchen, decide where water will go and whether the rack can handle your largest pan, not just a few plates. The right shape matters more than a long list of accessories.

Quick verdict

For most small kitchens, a compact, open rack with a removable cutlery cup and a drain tray that directs water into the sink is the best everyday choice. Choose an over-sink model only if the sink and faucet leave enough clearance; choose a foldable mat if you wash very few items at a time.

Who this is for—and when to skip it

Buy it for: Daily hand-washing when a measured rack can hold your plates and pans while draining where you need it to.

Skip the larger rack when: A dishwasher handles most dishes and only a few items need air-drying. A mat or roll-up rack may be enough. Keep your current rack if it already drains properly and leaves adequate preparation space.

How this guide was made: a comparison of rack layouts, drainage, and small-kitchen fit. It does not claim hands-on product testing; measure your sink area and check the chosen rack’s dimensions before buying.

Which type fits your home?

Type Best for Trade-off
Countertop rack Daily dishes for one or two people Takes permanent counter space
Over-sink rack Freeing the counter completely Needs careful width and faucet measurements
Roll-up mat Occasional loads and easy storage Limited capacity for upright plates
Two-tier rack More dishes in a narrow footprint May block a window or cabinet

Measure the usable counter, not the whole counter

Measure the uninterrupted run beside the sink, then leave space for a soap bottle, food prep, and cabinet doors. A rack that technically fits may still be awkward if a plate overhangs the edge. For over-sink styles, measure the sink’s inside width, faucet height, and any ledge the rack will rest on.

Drainage decides whether the rack stays pleasant

A tray with a movable spout is useful only if its outlet reaches the basin at the angle your kitchen allows. A solid tray without a spout must be emptied and washed; a roll-up rack drains through to the sink but occupies part of the basin. Avoid designs that leave water trapped under dense wire joints.

Think about what you actually hand-wash

Wide plates need secure dividers. Cutting boards and skillets need taller, stronger support. A removable cup makes utensils easier to unload and clean, while a separate glass section protects fragile rims. If you use a dishwasher, a mat may be plenty for the few items that cannot go in it.

Materials and cleaning

Stainless steel can resist rust when properly made, but joints and lower-grade components still need drying. Coated steel can chip; plastic can hold residue in narrow channels. Look for accessible surfaces, removable parts, and feet that lift the rack above standing water. Wash the tray rather than just wiping its top.

Best value

A single-tier rack with a removable draining tray offers the best mix of capacity, cleanup, and price for a compact sink area.

When the upgrade earns its price

An adjustable over-sink system is worth the extra cost only if your measurements confirm that it fits around the faucet and does not block cabinets or a window.

Buying mistakes to avoid

  • Buying by advertised capacity without measuring pans and plates.
  • Assuming the drainage spout will line up with the sink.
  • Choosing a tall rack under a low wall cabinet.

Common questions

Are roll-up racks good for everyday use?

They work well for light loads and clear away quickly. Daily piles of dishes are easier to manage on a rigid rack.

Will a rack dry dishes faster?

Open airflow helps, but crowded items and pooled water slow drying. Leave gaps and empty the tray.

Final pick

The small-kitchen winner is the rack that fits beside your sink, drains into it, and holds the dishes you actually wash. Measure first, then buy the least complicated design that meets those needs.

Keep comparing with our compact dishwasher guide, deep drawer organizer guide.

Scroll to Top