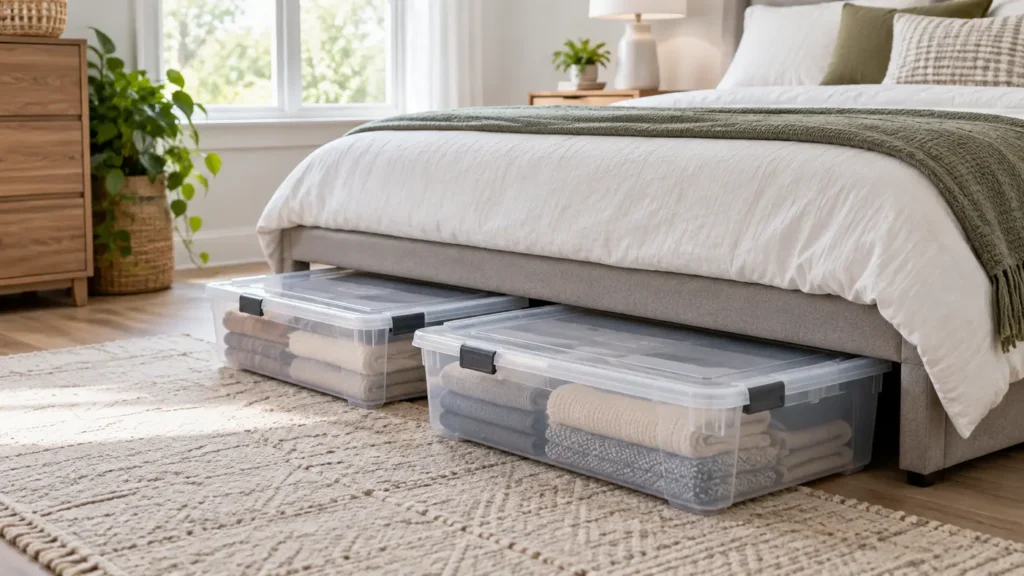
Clear lidded storage containers under a neatly made bed
Home Organization

Best Shoe Storage for a Small Entryway

Disclosure: As an Amazon Associate, My Indoor Space may earn from qualifying purchases made through links in this guide, at no extra cost to you.

Shoe storage works only when it fits the entryway and the household’s real habits. A narrow cabinet can hide clutter beautifully, but an open rack is faster for wet boots and everyday shoes. The best solution often combines quick-access space with overflow storage elsewhere.

Quick verdict

For most small entryways, choose a stable two- or three-tier open rack with adjustable shelf height, a washable boot tray, and enough clearance for the door to swing fully. Choose a tilt-out cabinet when visual calm matters more and shoes are normally dry.

Who it is for—and who should skip it

Entryway storage is useful for apartments, busy families, and homes where shoes collect beside the door. It creates a clear landing zone and keeps pairs together.

Skip a large “all shoes” unit if it blocks circulation. A small rack for current footwear plus seasonal storage in a closet or under the bed is often more effective.

Compare the main types

Type Best for Main trade-off
Open tiered rack Daily shoes and airflow Footwear remains visible
Tilt-out cabinet Narrow, tidy entryways Boots and large sizes may not fit
Bench with shelves Sitting while putting on shoes Needs more depth
Over-door organizer No floor space Door and shoe-size limits
Stacking boxes Protected collection storage Slower everyday access

Best value: adjustable open rack

An open metal or easy-clean composite rack gives the best value. Adjustable shelves can create a taller bay for ankle boots while keeping flats and sneakers in lower rows.

Look for level feet, smooth edges, and a width that holds complete pairs without forcing shoes sideways. A rack that expands may fit the wall exactly, but the extended centre should remain rigid.

Upgrade worth it: narrow tilt-out cabinet

A tilt-out cabinet is worth paying for when the entryway opens directly into the living area and visible footwear makes the room feel cluttered. Its shallow depth can preserve walking space.

Measure the internal compartment, not only the outside dimensions. Large shoes, high-tops, and boots may need to sit sideways or may not fit. Tall narrow furniture also needs appropriate anti-tip restraint where permitted.

Measure the complete traffic path

Open the entrance door fully and measure the remaining floor area. Include baseboards, door stops, heating vents, outlets, intercoms, and the space a person needs to stand with bags.

Use painter’s tape to mark the proposed footprint. Walk through the entry several times before ordering. A few extra centimetres of depth can make a surprising difference in a narrow path.

Capacity claims can be misleading

A “12-pair” rack may reach that number only with narrow shoes placed closely together. Measure the widest and longest shoes used by the household, then calculate realistic pairs per shelf.

Leave room for the shoes worn most often rather than filling every slot. Easy placement is what keeps the system working.

Wet boots need drainage and airflow

Place wet footwear on a tray with a raised edge, not directly on wood or carpet. Open storage lets moisture escape, while closed cabinets should receive only dry shoes and need ventilation.

Shake off snow and outdoor debris before bringing boots inside. Empty and wash the tray regularly so salt and dirt do not spread across the entry.

Stability and cleaning

A rack should not tip when shoes are removed from one side. Connect stacking units exactly as directed and do not exceed height or load limits. Benches must be specifically rated for sitting.

Smooth shelves and removable liners are easiest to clean. Fabric cubbies can hold dust and moisture, so they are better for dry indoor shoes than winter boots.

Common buying mistakes

  • Measuring the wall but not the door swing.
  • Trusting pair capacity without measuring actual shoes.
  • Putting wet boots inside an unventilated cabinet.
  • Buying a bench that is not rated to support a seated person.
  • Trying to store every seasonal pair at the entrance.

Frequently asked questions

Is open or closed shoe storage better?

Open storage offers airflow and quick access. Closed storage looks tidier but works best for dry shoes and needs suitable ventilation.

How deep is a narrow shoe cabinet?

Depth varies widely. Compare the outer footprint and internal shoe orientation with your largest footwear before buying.

Where should winter boots go?

Use a washable boot tray with enough height and airflow for drying. Move fully dry off-season boots to longer-term storage.

How many pairs should stay at the door?

Keep the pairs currently used by the household. Rotating seasonal and occasional footwear prevents the entry rack from becoming permanent overflow.

Final winner

The best shoe storage for most small entryways is a stable adjustable open rack paired with a washable boot tray. It handles mixed shoe heights, wet-weather footwear, and hurried daily use. A slim tilt-out cabinet wins only when shoes fit and concealed storage is the top priority.

Continue organizing with our guide to the entryway change that stopped daily clutter and our under-bed storage buying guide.

Peaceful quiet corner with a comfortable chair and soft lighting
Bedroom & Comfort

Best Desk Lamp for a Home Office

Disclosure: As an Amazon Associate, My Indoor Space may earn from qualifying purchases made through links in this guide, at no extra cost to you.

A desk lamp should make papers and objects easier to see without reflecting in your monitor or shining directly into your eyes. Brightness matters, but positioning, diffusion, reach, and control determine whether the light feels comfortable for hours.

Quick verdict

For most home offices, choose an adjustable LED task lamp with a wide diffused head, several brightness levels, neutral and warm colour settings, and enough reach to place the light beside or slightly behind the monitor. A clamp base is best when desk space is tight.

Who it is for—and who should skip it

A task lamp helps people who read documents, write, draw, repair small items, or work when room lighting is uneven. It also lets you light the desk without turning on a harsh ceiling fixture.

Skip an oversized lamp if the head will appear in your screen or camera view. If the entire room is dark, one small task light may create uncomfortable contrast; improve the background or ambient lighting too.

Compare lamp styles

Style Best for Main trade-off
Adjustable base lamp Flexible placement Uses desk surface
Clamp lamp Small desks Needs a compatible edge
Monitor light bar Keyboard and documents Fit varies by monitor
Architect arm lamp Wide reach and detailed work Larger visual footprint

Best value: dimmable adjustable LED lamp

A simple folding lamp with a diffused head and separate brightness and colour buttons gives the best value. It should remember the last setting only if that behaviour is convenient rather than surprising.

A weighted base prevents tipping when the arm is extended. If the base includes USB charging, check the power rating; do not assume it will fast-charge every phone.

Upgrade worth it: quality clamp arm

A clamp-mounted arm is worth paying for when the desk is narrow or shared with camera, audio, or computer gear. It can position the light over papers while leaving the work surface open.

Check the clamp opening, desk thickness, underside clearance, and whether the edge is strong enough. A protective pad reduces marks, but overtightening can still damage thin or hollow furniture.

Control glare before adding brightness

The light source should not be directly visible from your normal seated position. Aim it across the work area rather than toward the eyes or screen. Right-handed writers often place the lamp on the left, and left-handed writers on the right, to reduce hand shadows.

Glossy screens, glass desktops, and white paper reflect light differently. A wide diffuser and adjustable head make it easier to find a comfortable angle.

Brightness and colour settings

Multiple brightness steps are more practical than a single very high output. Daylight from a window changes through the day, so the lamp should adapt without forcing you into one level.

Neutral light can make detail and paper contrast clear during work. Warmer light often feels calmer later in the evening. Colour accuracy matters more for photography, art, fabric, and design work than for ordinary email.

Base, arm, and controls

  • A stable base or firm clamp that does not wobble while typing.
  • Joints that hold position without slowly dropping.
  • Controls you can find without looking away from work.
  • A cord long enough to reach safely without crossing leg space.
  • A power adapter sized so it does not block nearby outlets.

Lighting for video calls

A desk lamp can help a call, but side lighting alone may create uneven shadows. Bounce a diffused light from slightly above and in front of the face, while keeping glare off glasses and the monitor.

Do not depend on a bare high-output bulb aimed directly at your face. A dedicated soft video light is a better upgrade if calls are a major part of your work.

Common buying mistakes

  • Buying by maximum brightness while ignoring diffusion.
  • Choosing a clamp before measuring the desk edge.
  • Placing the lamp where it reflects in the monitor.
  • Using bright task lighting in an otherwise dark room.
  • Paying for wireless charging that does not match the phone or case.

Frequently asked questions

Is warm or cool light better for working?

Neutral light is a flexible daytime choice; warmer light can feel more comfortable in the evening. Adjustability is more useful than one fixed colour.

How bright should a desk lamp be?

The right level depends on the task, room light, age and preference. Choose several usable levels and position the lamp to control glare.

Are monitor light bars good?

They can light the keyboard and desk with little footprint. Confirm monitor thickness, curvature, webcam position, and whether the bar prevents screen reflections.

Should the lamp be opposite my writing hand?

That placement often reduces hand shadows on paper, but screen reflections and desk layout still need testing.

Final winner

The best desk lamp for most home offices is a wide, diffused LED task lamp with smooth positioning, several brightness levels, warm-to-neutral colour control, and a compact clamp or stable base. Comfortable light placement beats a flashy feature list.

Finish the workstation with our home-office smart power strip guide and these ideas for using more natural light during the day.

Video doorbell beside a modern front door with a local storage hub
Smart Home

Best Smart Lock for Renters

Disclosure: As an Amazon Associate, My Indoor Space may earn from qualifying purchases made through links in this guide, at no extra cost to you.

Renters can add keyless convenience without replacing the outside lock, but compatibility and permission come first. Retrofit smart locks usually turn the existing deadbolt from inside while leaving the original exterior keyway visible.

Quick verdict

For most renters, choose an interior retrofit lock that works with the existing single-cylinder deadbolt, preserves keyed entry, warns clearly before batteries die, and can be removed without marks. Confirm landlord approval and exact deadbolt compatibility before buying.

Who it is for—and who should skip it

A retrofit lock suits a renter who has an ordinary deadbolt, wants temporary codes or phone-based access, and must keep the original exterior hardware. It can be useful for trusted family, pet care, or deliveries when managed carefully.

Skip it if the lease forbids lock changes, the door uses a mortise lock, interconnected handle, multipoint mechanism, rim lock, or an incompatible thumbturn. A sticking or misaligned deadbolt needs repair before automation.

Compare renter-friendly options

Option What changes Main trade-off
Interior retrofit lock Replaces or covers inside thumbturn Compatibility varies by deadbolt
Removable thumbturn adapter Fits over existing interior hardware Can be bulkier
Smart lockbox Stores a physical key Visible and must be authorized
Full replacement lock Changes interior and exterior hardware Usually less renter-friendly

Best value: Bluetooth retrofit lock

A Bluetooth retrofit model offers phone unlocking, activity records, and virtual access without requiring a separate hub. Keeping remote internet access off can also reduce complexity.

Look for reliable auto-unlock settings you can disable, manual operation from inside, and a clear method for granting time-limited access. The physical key should continue to work from outside.

Upgrade worth it: keypad plus bridge

A separate keypad is worth the cost when household members do not want to depend on phones. Individual codes are easier to revoke than shared physical keys, provided the keypad can be mounted with permission.

A Wi-Fi bridge adds remote status and control. It also adds another account, device, and network dependency, so pay for it only if remote access solves a real need.

Check deadbolt compatibility carefully

Remove the interior cover only as instructed and compare your deadbolt brand, tailpiece, thumbturn shape, backset, door thickness, and clearance with the manufacturer’s compatibility guide. Do not rely on appearance alone.

The deadbolt should turn smoothly by hand with the door open and closed. A motorized lock is not a fix for sagging hinges, weather stripping pressure, or a misaligned strike plate.

Security and privacy questions

  • Does the maker explain encryption and account protection?
  • Can you require multi-factor authentication?
  • How long does the company provide security updates?
  • Can lost phones and old users be removed quickly?
  • What functions remain when internet service fails?
  • Is event history stored locally, in the cloud, or both?

Battery life and lockout planning

Battery estimates vary with weather, door alignment, connection type, and frequency of use. Choose clear low-battery warnings and use the recommended battery chemistry.

Keep a physical key accessible rather than locked inside the apartment. Know the manual override and emergency power procedure before you need it.

Renter-safe installation

Get written approval if required. Photograph the original hardware, label every screw and adapter, and store all parts together. Protect the door finish and avoid drilling unless explicitly authorized.

After installation, test manual unlocking, app access, guest codes, the physical key, and operation with the door closed. Restore the original lock when moving unless the landlord agrees otherwise.

Common buying mistakes

  • Buying before checking the exact deadbolt model.
  • Automating a bolt that already sticks.
  • Assuming “no drill” means no landlord permission.
  • Relying on a phone without carrying backup access.
  • Leaving old guest codes active.

Frequently asked questions

Can a landlord still use the original key?

With a compatible interior retrofit lock, the exterior cylinder remains in place, so the original key normally continues to work. Confirm with the specific model.

Does a smart lock work without Wi-Fi?

Many models support local Bluetooth, keypad, key, or manual access without Wi-Fi. Remote control usually requires a bridge or built-in Wi-Fi.

What happens when the batteries die?

Backup entry depends on the model. Preserved keyed access is one of the strongest reasons to choose a renter-friendly retrofit design.

Are smart locks more secure?

They add access controls and logs but also introduce software, accounts, and batteries. Physical door strength, correct installation, updates, and account security all matter.

Final winner

The best smart lock for most renters is an approved interior retrofit model that preserves the exterior key, fits the exact deadbolt, works locally without internet, and provides strong battery warnings. Add a keypad only when code access will be used regularly.

Build a practical entry system with our no-subscription video doorbell guide and indoor security camera guide.

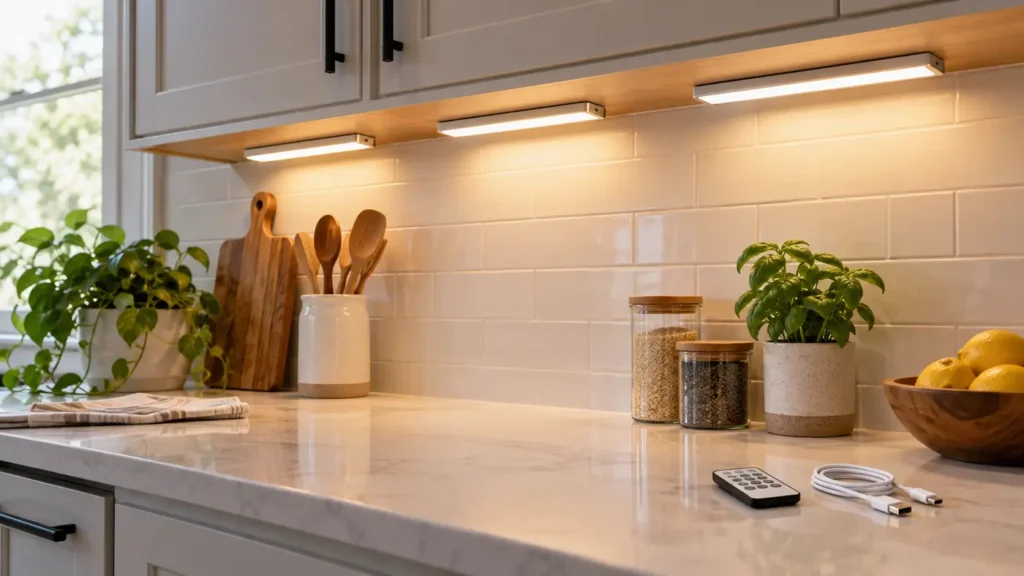
Adhesive under-cabinet lights illuminating a clean kitchen counter
Smart Home

Best Hallway Motion-Sensor Night Light

Disclosure: As an Amazon Associate, My Indoor Space may earn from qualifying purchases made through links in this guide, at no extra cost to you.

A hallway night light should reveal the floor and doorway without blasting sleepy eyes or staying on all night. Motion sensing is useful when the detection zone, brightness, colour, and shutoff delay match the space.

Quick verdict

For most hallways, choose a warm, dimmable plug-in light with dusk sensing, a motion range that reaches the normal walking path, and a short automatic shutoff. Rechargeable magnetic lights are better where outlets are missing, but they need regular charging.

Who it is for—and who should skip it

Motion night lights suit hallways, stair approaches, bathrooms, and routes between bedrooms and kitchens. They are especially helpful where a main ceiling light feels too bright at night.

Skip a motion-only model in a location where pets, curtains, heating vents, or movement in another room will trigger it constantly. A manual low-level light may be calmer in that situation.

Plug-in vs rechargeable vs battery

Power type Best for Main trade-off
Plug-in Daily hallway use Occupies an outlet
Rechargeable Outlet-free placement Requires charging routine
Replaceable battery Low-use locations Ongoing battery cost
Hardwired Permanent renovation Installation cost and commitment

Best value: warm dimmable plug-in light

A plug-in model offers consistent power and little maintenance. Look for brightness adjustment so the same light can work in a narrow hallway or larger landing. An offset plug or compact housing should leave the second receptacle usable.

Dusk sensing prevents daytime activation. Some models offer an always-on low mode plus brighter motion mode, but a simple off-auto-on switch is easier to understand.

Upgrade worth it: rechargeable magnetic light bar

A magnetic light bar is worth the upgrade when outlets are poorly located. The bar lifts off its mount for charging, while a thin adhesive or screw-mounted plate stays in place.

Choose a model with a clear battery indicator and a replaceable mounting adhesive option. Confirm that the light can be removed without damaging the wall if you rent.

Choose warm light and modest brightness

Warm white light generally feels less harsh at night than cool blue-white light. The goal is visibility, not daytime illumination. A downward-facing diffuser helps keep light on the floor and out of bedrooms.

Very dim output may fail to show clutter or a floor transition, while excessive brightness creates glare. Adjustable output is more dependable than choosing by lumen claims alone.

Detection range and angle

A wide sensor can see someone approaching from the side, but it may also detect movement inside a nearby room. A long forward range is useful in a straight corridor. Consider the actual path before choosing a sensor specification.

Place the light where the body enters the sensor zone before reaching an obstacle or stair. Test the position at night rather than assuming daytime placement will work.

Shutoff delay and repeat triggering

A delay of several seconds after movement stops is usually enough for a short hallway. Longer delays reduce on-off cycling but use more energy and may spill light into bedrooms.

The light should retrigger smoothly while movement continues. Models that go dark before they can sense motion again create an annoying gap.

Safe placement

  • Keep the light clear of rugs, doors, and vacuum paths.
  • Do not cover ventilation openings on plug-in units.
  • Use indoor-rated products indoors and follow electrical ratings.
  • Avoid placing adhesive lights where falling could cause injury.
  • Do not rely on a small night light as the only illumination for hazardous stairs.

Common buying mistakes

  • Choosing cool, bright light that wakes the household.
  • Blocking the second outlet with an oversized body.
  • Ignoring pets and cross-traffic in the sensor zone.
  • Mounting rechargeable lights where removal is awkward.
  • Using adhesive on dirty, textured, or fragile paint.

Frequently asked questions

What colour temperature is best at night?

A warm tone is generally more comfortable and less visually harsh. Personal preference and the surrounding finishes also matter.

Will pets trigger the light?

Many motion sensors will detect pets. Higher placement, a narrower angle, or a different location may reduce unnecessary triggers.

How high should I mount it?

Low placement can illuminate the floor well, while higher placement may improve detection. Follow the model’s sensor guidance and test before permanent mounting.

Are rechargeable lights cheaper?

They avoid disposable batteries but cost more upfront and need charging. Plug-in models are usually simplest for frequent use near an outlet.

Final winner

The best motion-sensor night light for most hallways is a compact warm-white plug-in model with adjustable brightness, dusk sensing, a useful side-to-side detection angle, and a short retriggerable delay. It delivers dependable light without charging or excessive glare.

For other simple automations, see our smart plugs for beginners and renter-friendly under-cabinet lighting guide.

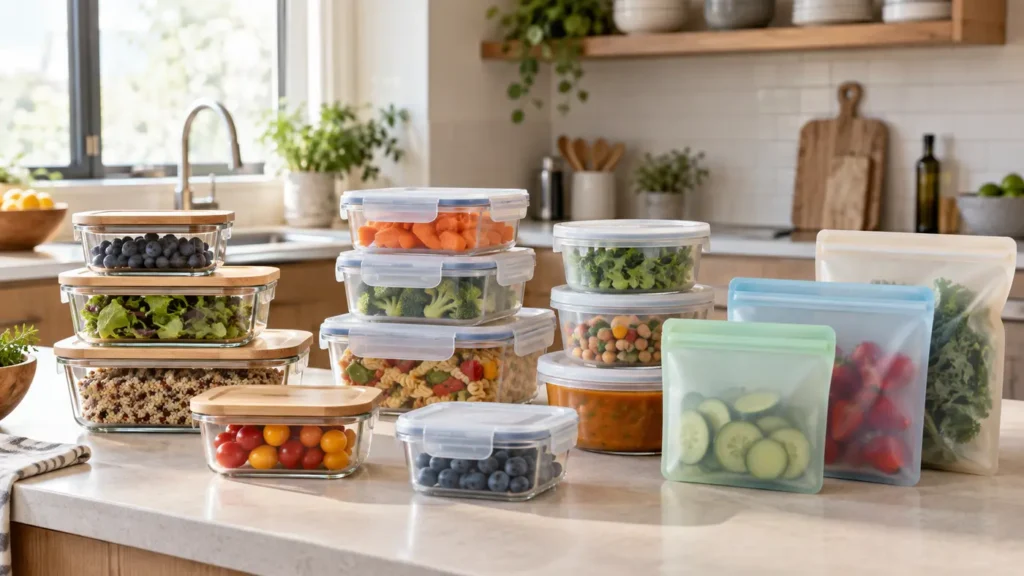
Glass, plastic and silicone food storage containers arranged in a bright kitchen
Kitchen & Dining

Best Vacuum Sealer for Home Food Storage

Disclosure: As an Amazon Associate, My Indoor Space may earn from qualifying purchases made through links in this guide, at no extra cost to you.

A vacuum sealer can reduce freezer bulk, help protect food quality, and simplify portioning, but the machine is only half the purchase. Bag cost, sealing consistency, moisture handling, and counter space determine whether it becomes useful or stays in a cupboard.

Quick verdict

For most homes, choose a compact external suction sealer with pulse control, separate vacuum-and-seal functions, a removable drip tray, and widely available textured bags. Built-in roll storage is convenient but not worth a much larger footprint in a small kitchen.

Who it is for—and who should skip it

A vacuum sealer suits people who buy meat in larger packs, freeze garden produce, batch-cook, fish, or portion ingredients. It can also organize non-food items approved by the manufacturer.

Skip it if you rarely freeze food, dislike buying specialty bags, or expect vacuum sealing to make unsafe food safe. It does not replace refrigeration, freezing, proper cooking, or food-safety guidance.

Compare sealer types

Type Best for Main trade-off
External suction Most home users Needs textured channel bags
Handheld Reusable zipper bags and containers Less versatile for long freezer storage
Chamber sealer Frequent sealing and liquids Large, heavy, and expensive
Compact bar sealer Small kitchens May omit cutter and roll storage

Best value: compact external sealer

A compact external model covers the needs of most households. Look for a full-width sealing strip, clear bag-position markings, and positive latches that do not require excessive hand pressure.

Pulse mode is valuable for bread, berries, and softer foods because you can stop before crushing. A manual seal button lets you make bags from rolls and stop suction when moisture approaches the sealing area.

Upgrade worth it: double seal and accessory port

A double-seal option adds reassurance for long freezer storage or foods with small amounts of moisture. An accessory port is useful if you will vacuum compatible containers or jar attachments.

A chamber machine is a genuine performance upgrade for frequent liquid-rich foods, but it occupies significant space. For occasional home use, the cost and weight are hard to justify.

Bag compatibility controls long-term cost

External suction machines generally need embossed or channel bags that let air escape. Check whether third-party rolls are permitted and whether using them affects warranty coverage.

Compare price per metre or foot, not only the box price. Precut bags save time; rolls reduce waste because you choose the length. Very narrow rolls are handy for single portions.

Moist foods need preparation

Liquid pulled into the seal area can weaken the seam and contaminate the machine. Chill moist food thoroughly, pat surfaces when appropriate, or briefly pre-freeze items before sealing. Leave enough clean bag material above the food.

Use a removable drip tray and clean it after contact with food. Do not vacuum-package foods for storage methods that conflict with recognized food-safety guidance.

Seal quality matters more than maximum suction

A reliable seam should be continuous and free of wrinkles, grease, crumbs, and moisture. Wider or double sealing can help, but careful bag preparation is still essential.

Allow the machine to cool between repeated seals according to the manual. Overheating can reduce consistency and shorten appliance life.

Counter space and storage

Measure the appliance with its lid open and confirm where the cord exits. A machine that stores vertically may fit a narrow cabinet, while an all-in-one model with a cutter needs more depth.

If you plan to store it away, lighter weight and quick access are more valuable than a few premium presets. Appliances used weekly deserve reachable storage.

Common buying mistakes

  • Ignoring the recurring price of compatible bags.
  • Trying to seal wet edges or overfilled bags.
  • Buying a chamber sealer without measuring its permanent footprint.
  • Assuming vacuum sealing eliminates normal food-safety rules.
  • Choosing many presets instead of pulse and manual seal controls.

Frequently asked questions

Can I use any bag with a vacuum sealer?

External suction models usually require compatible channel bags. Chamber units can often use smooth bags. Follow the machine’s specifications.

Can vacuum-sealed food still spoil?

Yes. Vacuum packaging does not sterilize food. Store and handle it at safe temperatures and follow reliable storage guidance.

Is a built-in cutter worth it?

It is convenient if you mostly use rolls. In a tiny kitchen, a separate cutter or scissors may be worth the smaller machine.

Should I freeze food before sealing?

Pre-freezing helps delicate, juicy, or liquid-rich foods keep their shape and stay out of the seal area.

Final winner

The best vacuum sealer for most homes is a compact external suction model with pulse control, a manual seal function, a removable drip tray, and flexible bag compatibility. It delivers the features that affect results without turning a useful food-storage tool into a large countertop commitment.

Complete your storage system with our glass vs plastic vs silicone container guide and small-kitchen pantry organizer guide.

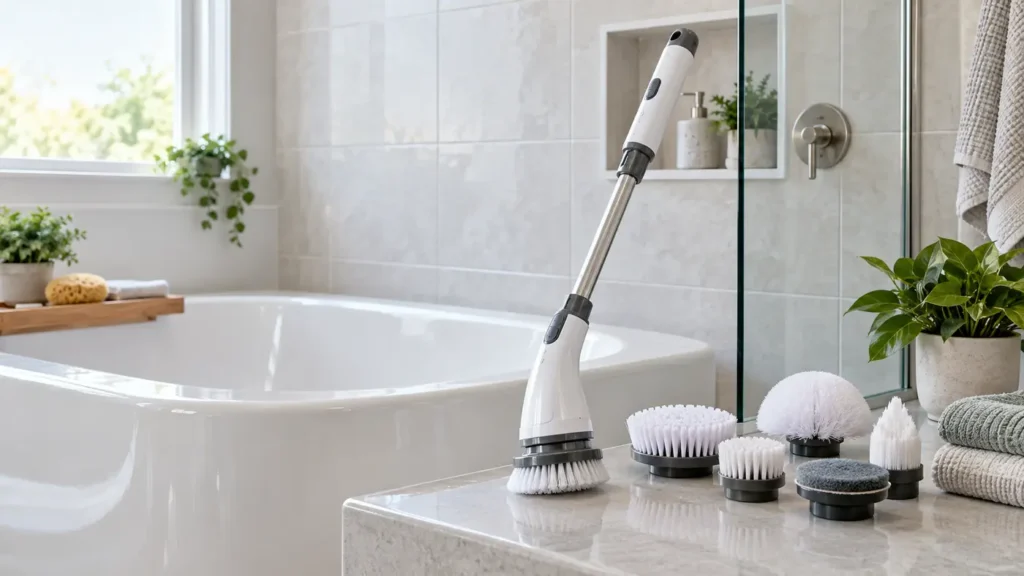
Cordless electric spin scrubber with brush heads beside a clean bathtub
Laundry & Cleaning

Best Steam Mop for Sealed Floors

Disclosure: As an Amazon Associate, My Indoor Space may earn from qualifying purchases made through links in this guide, at no extra cost to you.

A steam mop can loosen stuck-on soil without carrying a traditional mop bucket, but it is not suitable for every hard floor. Heat and moisture can damage unsealed wood, some laminates, waxed surfaces, and floors whose manufacturer specifically prohibits steam.

Quick verdict

The best steam mop has adjustable steam, a low-profile swivel head, washable pads, a stable parking position, and a tank that can be filled without laying the machine down. Floor approval matters more than maximum heat or a long accessory list.

Who it is for—and who should skip it

Steam mops suit approved sealed tile and other heat-safe sealed floors where sticky kitchen soil is common. They are convenient for quick wet cleaning after dry debris has been removed.

Skip steam if your flooring warranty or care guide says not to use it, if seams or grout are damaged, or if the surface is unsealed, waxed, peeling, or moisture-sensitive. Use the floor maker’s recommended cleaning method instead.

Features that matter most

Feature Why it matters Look for
Steam control Limits excess heat and moisture At least two usable levels
Mop head Controls edge and furniture access Low profile with smooth swivel
Pad attachment Affects cleanup Hands-free or easy-release design
Tank Shapes weight and runtime Removable or simple refill opening
Cord Determines room reach Useful length with secure wrap

Best value: adjustable upright steam mop

A straightforward corded upright with two or three steam levels offers the best value. It maintains heat without battery concerns and gives enough control for different approved surfaces and soil levels.

Choose a model that stands securely or includes a heat-resistant parking tray. The handle should feel balanced with a full tank, and the head should remain flat when pushed under cabinet edges.

Upgrade worth it: dual-sided head and lift-away tools

A dual-sided pad can extend a cleaning session before you change cloths. A lift-away handheld unit may help on approved fixtures or grout, but extra hoses and nozzles add storage and cleaning work.

Pay for the upgrade only if you will use those attachments. A lighter dedicated floor mop is usually easier for routine cleaning.

Check the floor, not the marketing

“Sealed floor” is a broad phrase. Consult the care instructions for your exact flooring brand and finish. Even sealed wood can have worn areas or open joints where moisture enters.

Test a hidden spot, use the lowest effective steam setting, and keep the mop moving. Do not hold a steaming pad over one location to attack a stain.

Pad design affects the result

Microfibre pads should make full contact without bunching. A textured strip can help with stuck-on residue, while a soft pad is useful for lighter cleaning. Owning several pads prevents spreading grime from one room to another.

Wash pads according to instructions and avoid fabric softener if it reduces absorbency. Replace pads that remain rough, warped, or heavily stained.

Tank size and water guidance

A large tank offers longer runtime but adds weight to the handle or body. For a small home, a moderate tank is easier to steer and usually enough for one cleaning session.

Follow the manual’s water recommendation. Mineral buildup can shorten performance, but never add descaler, fragrance, detergent, or essential oil unless the maker explicitly allows it.

Safe cleaning routine

  1. Vacuum or sweep loose grit first.
  2. Confirm the floor is approved for steam.
  3. Install a clean pad and fill as directed.
  4. Begin at the lowest useful setting.
  5. Keep the head moving in controlled passes.
  6. Unplug, cool, empty if required, and dry the pad and unit.

Common buying mistakes

  • Using steam on a floor based only on the mop’s label.
  • Leaving the hot mop stationary on the surface.
  • Adding scented products to a water-only tank.
  • Skipping dry vacuuming and scratching the floor with grit.
  • Buying a heavy convertible model for features rarely used.

Frequently asked questions

Can I use a steam mop on laminate?

Only if the flooring manufacturer specifically permits it. Many laminate makers warn against steam because moisture and heat can affect joints and layers.

Can I use it on hardwood?

Check the exact finish and manufacturer guidance. “Sealed” does not guarantee that steam is approved, especially on worn or gapped boards.

Does steam replace cleaner?

It can loosen ordinary soil on compatible surfaces, but it does not make every cleaning product or method unnecessary. Follow surface-care instructions.

How many pads do I need?

At least two makes it easier to switch when one becomes dirty. Larger homes benefit from one clean pad per major area.

Final winner

The best choice for most approved sealed floors is a light corded steam mop with adjustable output, a low swivel head, multiple washable pads, and a parking tray. The winning feature is control: enough steam to clean without unnecessary heat, moisture, or weight.

Remove dry debris first with the right machine from our cordless vacuum guide. For targeted wet messes, see the portable carpet cleaner guide.

Slim cordless vacuum stored in a bright small apartment living room
Laundry & Cleaning

Best Portable Carpet Cleaner for Pets

Disclosure: As an Amazon Associate, My Indoor Space may earn from qualifying purchases made through links in this guide, at no extra cost to you.

A portable carpet cleaner is designed for spills, pet accidents, stairs, car seats, and upholstery—not whole-room carpet cleaning. The best models combine strong liquid recovery with tanks and hoses that can be rinsed thoroughly after a messy job.

Quick verdict

Choose a compact extractor with separate clean and dirty tanks, a transparent stain tool, at least enough hose to reach a full stair flight in stages, and removable parts you can rinse. For pet homes, easy cleanup matters as much as suction because trapped residue quickly causes odors.

Who it is for—and who should skip it

This machine is useful for households with pets, children, fabric furniture, carpeted stairs, or vehicle upholstery. It lets you treat a small area quickly without renting or storing a full-size extractor.

Skip it for routine dry debris, large rooms, delicate fabrics, or materials whose care label prohibits wet cleaning. A vacuum handles crumbs and hair; a professional may be safer for valuable rugs, persistent odor, or widespread contamination.

What to compare first

Feature Why it matters Practical target
Liquid recovery Leaves fabric less wet Strong suction with visible pickup
Tank access Controls odors Wide openings and removable seals
Hose reach Improves stair and vehicle use Enough reach without moving constantly
Tool design Affects scrubbing and rinsing Clear, removable nozzle
Storage Determines whether it stays handy Secure hose and cord wrap

Best value: corded compact extractor

A corded unit usually offers the best value because it can maintain suction through repeated passes without battery limits. Compact tanks are fine for isolated spots and easier to carry to stairs or a vehicle.

Look for a stable base that will not tip when the hose is pulled. A long power cord is useful, but the hose and cord must store securely or the machine becomes awkward in a closet.

Upgrade worth it: self-rinsing hose and powered brush

A hose-rinse feature is worth paying for in a pet home. It helps flush residue before storage, though you still need to empty and dry every part. A powered brush can reduce hand scrubbing on durable carpet, but adds weight and more parts to clean.

The upgrade is less useful for delicate upholstery, where controlled manual agitation is safer. Always test an inconspicuous area and follow the fabric or carpet maker’s care instructions.

Suction is more useful than a large solution spray

More water does not automatically mean better cleaning. Oversaturating padding or upholstery slows drying and can spread the stain. Apply only enough solution to loosen the soil, agitate as directed, then make several slow recovery passes without spraying.

A clear nozzle lets you see when liquid pickup decreases. That feedback helps you stop before unnecessary extra wet passes.

Tank design controls the after-job mess

Separate tanks prevent collected soil from mixing with fresh solution. Inspect the dirty-water tank opening: corners, fixed tubes, and narrow necks can trap hair and residue.

Removable gaskets, floats, and nozzle covers simplify cleaning, but they must reinstall correctly to maintain suction. Let tanks and tools dry fully before closing the machine for storage.

Pet stains need prompt, compatible treatment

Remove solid material first and blot fresh liquid without grinding it deeper. Use only solutions approved for the machine and surface. Mixing cleaning chemicals can damage materials and create dangerous fumes.

An extractor can remove soil and moisture, but a stain that has reached carpet backing or subfloor may need deeper remediation. Repeatedly soaking the top fibres will not necessarily reach the source safely.

Common buying mistakes

  • Buying a large tank while ignoring machine weight.
  • Choosing a hose that cannot be rinsed or accessed.
  • Using too much solution and leaving the area saturated.
  • Storing the machine wet and sealed.
  • Assuming every upholstery fabric is wet-cleanable.

Frequently asked questions

Will a portable carpet cleaner remove pet urine odor?

It can remove some contaminated liquid and residue, especially when treated promptly. Odor that has penetrated backing, padding, wood, or seams may require specialized treatment or replacement.

Can I use it on a sofa?

Only when the sofa’s care instructions allow water-based extraction. Test first and avoid oversaturation.

Do I vacuum before using it?

Yes. Remove loose hair and dry debris first so the extractor can focus on the stain and its filters and nozzles clog less quickly.

How long should carpet dry?

Drying varies with material, humidity, airflow, and how much liquid was recovered. Improve ventilation and keep people and pets off the area until fully dry.

Final winner

The best portable carpet cleaner for most pet homes is a stable corded extractor with strong liquid recovery, two easy-clean tanks, a transparent removable nozzle, and a hose-rinse feature. It wins by making both the stain and the machine easier to clean.

For everyday dry debris, compare our cordless vacuums for small apartments and robot-vacuum buying guide.

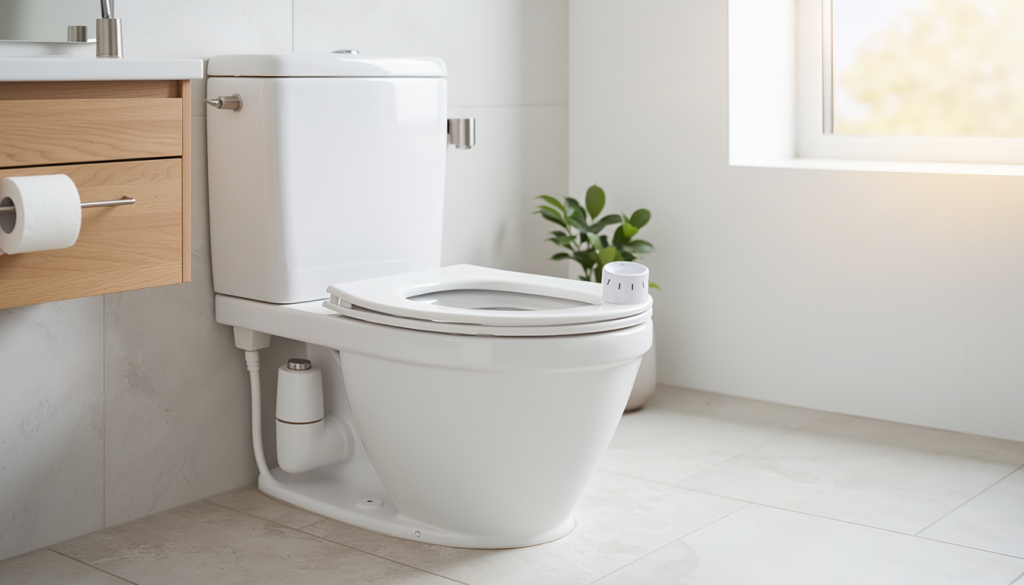
Renter-friendly bidet attachment installed on a modern apartment toilet
Bedroom & Comfort

Best Bidet Attachment for Renters

Disclosure: As an Amazon Associate, My Indoor Space may earn from qualifying purchases made through links in this guide, at no extra cost to you.

A bidet attachment can add a useful wash function without replacing the toilet, but “easy installation” does not mean every model fits every bathroom. Renters need to confirm toilet shape, seat clearance, water-supply access, lease rules, and a clean way to restore the original setup.

Quick verdict

For most renters, the best choice is a slim, non-electric cold-water attachment with a metal T-adapter, adjustable pressure, a self-cleaning nozzle shield, and clear fit measurements. It offers useful control without an outlet or permanent modification.

Who it is for—and who should skip it

A non-electric attachment works well for someone who wants a low-cost upgrade, has a conventional toilet, and can reach the shutoff valve and tank connection. It is also easy to remove when moving.

Skip a do-it-yourself installation if the valve is corroded, the supply line is rigid or damaged, the toilet uses an unusual concealed connection, or the landlord prohibits plumbing changes. In those cases, ask the property manager or a qualified plumber.

Compare the main bidet styles

Style Best feature Main trade-off
Non-electric attachment Affordable and compact Usually cold water only
Handheld sprayer Flexible aim and cleaning use Requires careful pressure control
Bidet seat Integrated fit and comfort Higher cost; electric models need an outlet
Travel bidet No plumbing change Manual filling and limited capacity

Best value: slim non-electric attachment

A slim attachment sits between the bowl and existing seat. Low-profile construction reduces the chance of lifting the rear of the seat and creating an uncomfortable slope. Adjustable mounting plates make it easier to align with common bolt spacing.

Choose a smooth control knob with a definite off position and gradual pressure adjustment. Very aggressive pressure at the start of the dial is harder to use comfortably.

Upgrade worth it: a well-fitted bidet seat

A non-electric bidet seat can be worth the upgrade because the spray hardware and seat are designed as one unit. That can improve alignment and eliminate the seat gap created by some attachments.

An electric seat adds warm water, a heated seat, and other controls, but it needs a correctly located electrical outlet and raises the purchase price. Never run an unsafe extension cord across a bathroom.

Confirm toilet compatibility first

Measure the distance between the seat bolts, the bowl length from bolt holes to front edge, and the available space between the bolts and tank. Also identify whether the bowl is round or elongated.

One-piece toilets, skirted toilets, French-curve tanks, and concealed connections may limit access. Product diagrams are more dependable than a generic “universal fit” claim.

Inspect the water connection

Most attachments connect at the toilet tank with a T-adapter. Turn off the valve, flush to empty the tank, and have a towel and shallow container ready. Connections should thread smoothly by hand before final tightening.

Do not overtighten plastic threads. Use only the washers and thread-sealing method specified in the manual. After installation, open the valve slowly and inspect every joint, then check again after several uses.

Renter-friendly installation rules

  • Get permission when the lease requires it.
  • Photograph the original setup before removing parts.
  • Keep the original hose, seat hardware, and caps together.
  • Use a leak detector or check the floor regularly during the first week.
  • Restore the toilet before moving and test for leaks again.

Pressure control and cleaning

Household water pressure varies, so a gentle and progressive control is important. Begin at the lowest setting. A nozzle guard helps keep the sprayer away from the bowl, and a self-rinse setting simplifies routine care.

Clean the attachment with products approved by the manufacturer. Strong chemicals can damage seals, plastic, or coatings. The device still requires normal toilet cleaning.

Common buying mistakes

  • Ordering without measuring seat and tank clearance.
  • Assuming every “universal” model fits a one-piece toilet.
  • Using old or damaged supply hardware.
  • Overtightening fittings and cracking plastic parts.
  • Leaving the original components behind when moving.

Frequently asked questions

Can a renter install a bidet attachment?

Often yes, but the lease and local requirements control. Obtain permission if required and avoid permanent alterations.

Will it raise the toilet seat?

Some attachments do. A slim design and compatible seat reduce the gap. Small seat bumpers may be recommended by the maker.

Do I need a plumber?

A straightforward connection may be manageable, but damaged valves, unusual fittings, inaccessible plumbing, or uncertainty are reasons to use a qualified professional.

Can it leak?

Any added water connection can leak if parts are incompatible, damaged, cross-threaded, or installed incorrectly. Test slowly and inspect all connections.

Final winner

The best bidet attachment for most renters is a low-profile, non-electric model with adjustable mounting, gradual pressure control, a shielded nozzle, and durable connection hardware. Its real value comes from verified fit and a careful, reversible installation—not the longest feature list.

Organize the rest of the room with our small-bathroom shower caddy guide, then compare electric spin scrubbers for bathroom cleaning.

Compact clothes steamer beside freshly steamed shirts in a bright bedroom
Bedroom & Comfort

Best Towel Warmer: Bucket vs Rack

Disclosure: As an Amazon Associate, My Indoor Space may earn from qualifying purchases made through links in this guide, at no extra cost to you.

A towel warmer is a comfort purchase, but choosing the wrong style can turn it into a bulky appliance you rarely use. Bucket warmers heat thick towels quickly and evenly. Heated racks look cleaner, keep towels dry between uses, and can become a permanent part of the bathroom.

Quick verdict

Choose a freestanding bucket warmer if you want deeply warmed towels without installation. Choose a heated rack if you value everyday drying, a tidy look, and permanent bathroom placement. For most households trying a warmer for the first time, a lidded bucket with an automatic shutoff is the better value.

Who it is for—and who should skip it

A towel warmer suits cold bathrooms, chilly mornings, basement suites, and anyone who enjoys a spa-like finish to a shower. A rack can also help damp towels dry more comfortably in a bathroom with limited airflow.

Skip it if floor and outlet space are already tight or if the warmer would require an extension cord. It is a luxury appliance, not a substitute for ventilation, laundering, or proper moisture control.

Bucket vs rack at a glance

Feature Bucket warmer Heated rack
Warmth Deep, all-around warmth Warmest where fabric touches bars
Installation Plug in and use Freestanding, plug-in, or hardwired
Daily drying Not its main purpose Better suited to ongoing drying
Storage Needs floor or counter space Uses wall or vertical space
Best user Comfort-first buyer Permanent bathroom upgrade

Best value: a medium lidded bucket

A medium bucket that fits one oversized bath towel or two standard towels is enough for most couples. Look for a stable base, insulated exterior, clear timer lights, automatic shutoff, and a lid that opens without placing your hand over rising heat.

Oversized buckets cost more and take longer to store. Buy the capacity you will actually fill, and check interior dimensions rather than relying on a vague “large” label.

Upgrade worth it: a wall-mounted rack

A wall-mounted rack is worth the higher price when you want a permanent, low-clutter solution. It keeps towels off hooks, can improve drying between showers, and does not consume floor space.

Hardwired installation looks the cleanest but belongs with a qualified electrician and local electrical rules. A plug-in rack is simpler, though the cord and outlet location need careful planning.

Capacity and heat distribution

Bucket warmers perform best when towels are loosely folded rather than compressed into a solid bundle. A heating element that surrounds more of the chamber generally produces more even results than heat from one small area.

On racks, bar spacing matters. More contact points can warm and dry more fabric, but tightly bunched towels block airflow. Wide racks are useful for bath sheets; narrow ones suit hand towels and small bathrooms.

Controls that matter

  • Automatic shutoff to prevent accidental all-day operation.
  • Simple 15-, 30-, 45-, or 60-minute timer choices.
  • A clear power indicator visible without bending down.
  • Memory only if you genuinely want the same cycle each day.
  • A child-resistant or recessed control if placement is low.

Wi-Fi and app control are rarely essential. A dependable timer is easier and removes the temptation to leave fabric heating longer than intended.

Safety and placement

Use the warmer exactly as its manual directs. Keep it away from splashing water, never operate it with a damaged cord, and plug it into a suitable bathroom outlet with required ground-fault protection. Do not use an extension cord unless the manufacturer expressly permits it.

Only warm clean, dry or appropriately damp textiles approved by the maker. Oils, lotions, heating pads, electronics, and other unsupported items can create stains, odors, or hazards.

Running cost and maintenance

Energy use depends on wattage and cycle length. Because bucket warmers run for short periods, the cost per use is usually modest, but a rack left on for many hours uses more. Compare rated power and use the timer.

Wipe a cooled bucket with a soft damp cloth and keep the chamber free of lint. Clean rack bars according to the finish instructions. Never immerse the appliance or let water enter controls.

Common buying mistakes

  • Choosing a bucket without checking bath-sheet dimensions.
  • Assuming a rack warms every part of a folded towel equally.
  • Planning to use an extension cord in a bathroom.
  • Ignoring the lid clearance under a counter.
  • Paying for app features instead of better safety controls.

Frequently asked questions

How long does a towel warmer take?

Many bucket warmers need roughly one short cycle, but the exact time varies with wattage, towel thickness, room temperature, and load. Follow the specific manual.

Can I put a blanket in a bucket warmer?

Only if the manufacturer lists that textile and it fits loosely without obstructing safe operation. Never force an oversized item inside.

Does a heated rack prevent mildew?

It may help towels dry faster, but it cannot correct poor ventilation or high room humidity. Launder towels regularly and control bathroom moisture.

Is a hardwired rack better?

It offers the cleanest installation. Performance depends more on size, wattage, bar layout, and controls than on the power connection alone.

Final winner

For most first-time buyers, a medium lidded bucket warmer with an insulated shell, simple timer, and automatic shutoff is the winner. It delivers the most noticeable warmth with no permanent installation. Choose a rack when drying and a built-in appearance matter more than deep heat.

For more cold-weather comfort, see our heated blanket buying guide. For bathroom cleanup, compare the best electric spin scrubbers.

Laundry hampers in a bright laundry room
Home Organization

Best Shower Caddy for a Small Bathroom

Disclosure: As an Amazon Associate, My Indoor Space may earn from qualifying purchases made through links in this guide, at no extra cost to you.

A good shower caddy turns a crowded tub or shower into usable storage without making the space feel tighter. The best choice depends on where it mounts, how much weight it must hold, whether you rent, and how quickly water can drain away.

For most small bathrooms, a compact adhesive or over-the-showerhead caddy offers the best balance of capacity and simplicity. Tension-pole models hold more, but they take up visual space and need a stable floor-to-ceiling fit.

Quick verdict

Choose a caddy with open drainage, rust-resistant materials, enough vertical clearance for pump bottles, and a mounting system suited to your wall. Avoid buying by shelf count alone: secure mounting and useful spacing matter more than squeezing in one extra basket.

Who it is for—and who should skip it

A shower caddy is ideal for renters, shared bathrooms, small tubs, and showers with little or no built-in shelving. It also helps keep bottles off the floor, where they collect soap residue and become harder to reach.

Skip a large hanging unit if your showerhead pipe is loose, your handheld hose needs that space, or the caddy would interfere with controls. A recessed niche or stable existing shelf may already be the cleaner solution.

Compare the main types

Type Best for Main trade-off
Adhesive wall caddy Renters and compact showers Needs smooth, properly prepared tile
Over-showerhead caddy Fast installation Can slide or crowd the showerhead
Tension-pole caddy Maximum family storage Larger visual footprint
Corner suction caddy Light bottles and temporary use Suction can weaken over time
Over-door caddy Glass shower enclosures Must protect glass and clear the door

Best value: a two-tier adhesive caddy

For many small bathrooms, a two-tier adhesive model is the value sweet spot. It uses empty wall space, keeps the floor clear, and usually offers enough room for everyday shampoo, conditioner, body wash, and razors.

Look for replaceable adhesive pads, generous drainage slots, rounded edges, and a rail tall enough to keep pump bottles from tipping. Confirm that the adhesive is approved for your exact surface; textured tile, grout lines, painted drywall, and damp walls can reduce its grip.

Upgrade worth paying for: modular removable baskets

A modular system with removable baskets costs more but is easier to clean and rearrange. Separate baskets also let each person keep a small group of products together rather than creating one overloaded shelf.

The upgrade is worthwhile for a shared bathroom or anyone who buys tall pump bottles. It is less important if you only store two or three lightweight containers.

Measure bottle height, not just shelf width

Measure your tallest bottle with the pump fully raised. Then allow room above it for your hand. A shelf may look spacious in a product photo yet become awkward when a pump cannot be pressed naturally.

Also check basket depth. Very shallow rails let rounded bottles tip, while overly deep baskets can make small items hard to reach. A mixed layout with one tall tier and one shallow tray is often more useful than identical shelves.

Mounting strength matters

Adhesive mounts work best on clean, smooth, non-porous surfaces. Remove soap film, let the wall dry fully, and follow the curing time before adding weight. Do not assume “no-drill” means suitable for every rental wall.

Hanging caddies need a non-slip collar or stabilizing suction cups so they do not swing. Tension poles need firm contact at both ends and periodic checks, especially where temperature and humidity change.

Choose materials that handle constant moisture

Stainless steel, coated aluminum, and quality plastic are practical choices. Painted steel can perform well, but chips expose the metal underneath. Product claims such as “rustproof” are most useful when the construction and coating are clearly identified.

Open wire or slotted baskets dry faster than solid trays. Smooth joints and removable parts also make it easier to scrub away soap residue before it becomes stubborn.

Small details that improve daily use

  • Hooks for razors, washcloths, or a shower squeegee.
  • An inverted-bottle opening for dispensing without removal.
  • Rounded corners in a tight shower.
  • Enough clearance around controls and a handheld hose.
  • Baskets that lift off for cleaning.
  • A load rating that covers full bottles, not empty ones.

Common buying mistakes

  • Mounting adhesive across grout lines.
  • Loading the caddy before the adhesive has cured.
  • Choosing too many small tiers instead of useful bottle clearance.
  • Ignoring the showerhead, hose, door, and control layout.
  • Buying a coated metal model without checking for exposed welds or chipped finish.

Frequently asked questions

Are adhesive shower caddies safe for renters?

They can be, but removal risk depends on the wall surface and adhesive. Check the lease, use the maker’s removal method, and avoid fragile paint, loose tile, or damaged grout.

Do suction-cup caddies stay up?

They work best on very smooth, clean surfaces and with light loads. For multiple full bottles, quality adhesive or mechanical support is usually more dependable.

How do I stop a hanging caddy from sliding?

Choose a model with a locking collar, grippy hanger, or stabilizing cups. Keep the load balanced between the two sides.

How often should I clean it?

Rinse it regularly and deep-clean when soap film appears. Removable baskets make this much easier and help you inspect coatings and mounts.

Final winner

For most small bathrooms, the winner is a compact two-tier adhesive caddy with removable, fast-draining baskets and replaceable mounting pads. It uses wall space efficiently without crowding the showerhead. Choose a tension-pole model only when you genuinely need family-size capacity.

Build out the rest of your cleaning setup with our electric spin scrubber guide and small-space laundry hamper guide.

Scroll to Top