

Black and red canister vacuum cleaner on carpet
Laundry & Cleaning

Bagged vs Bagless Canister Vacuum: Which Suits an Apartment?

Disclosure: As an Amazon Associate, My Indoor Space earns from qualifying purchases through links in this article, at no extra cost to you.

Quick verdict

Choose bagged if you prefer collecting dirt in a replaceable bag and can keep the correct supplies available. Choose bagless if you prefer a reusable bin and accept emptying and filter maintenance. Floor-head suitability and the complete filtration design matter more than the bag label alone.

Research-based buying guide. Product information checked October 16, 2026. We have not tested these products hands-on; recommendations distinguish published features from our buying judgments.

bagged canister vacuums

bagless canister vacuums
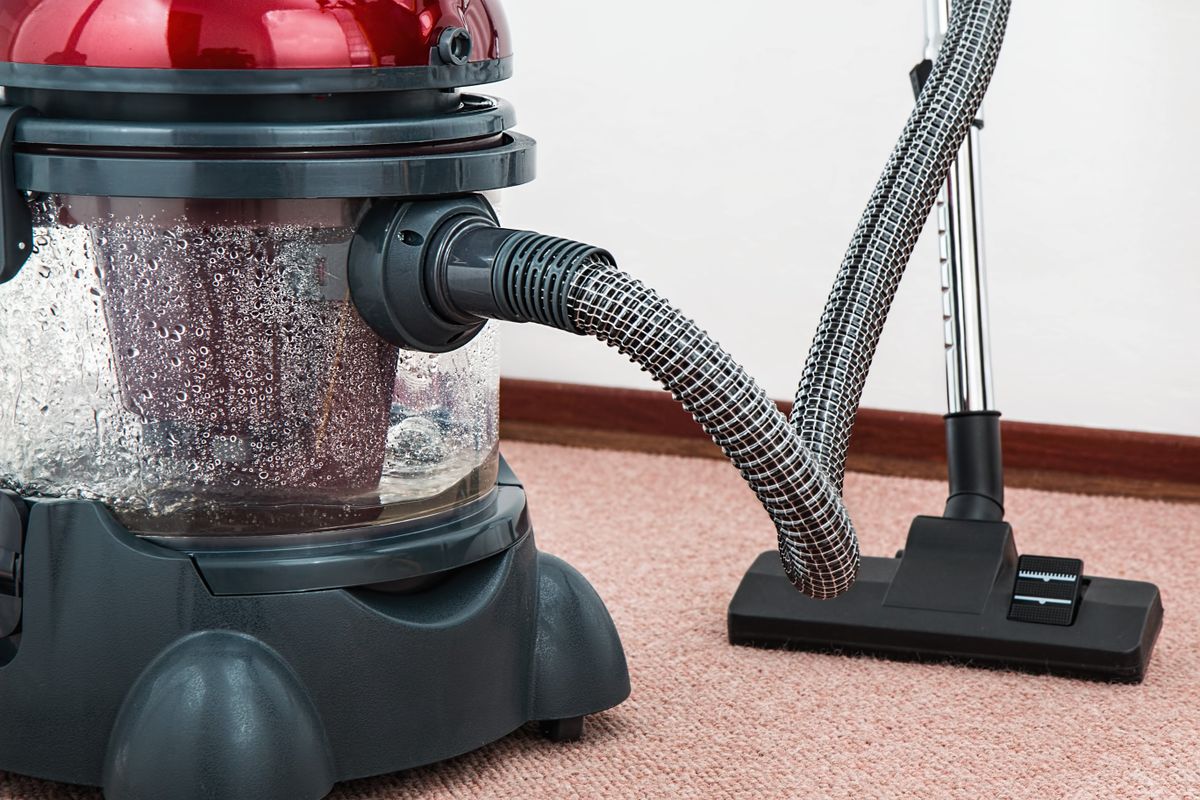
Black and red canister vacuum cleaner on carpet
Illustrative canister vacuum; this pictured model is not one of our tested products. Photo: Pexels.

In an apartment, a canister vacuum has to clean your floors, fit in a cupboard and be manageable when you dispose of the dirt. Bagged and bagless designs change that last step. They do not, by themselves, tell you how well a particular floor head handles your rug or how easily the machine moves around furniture.

Compare the ownership routine

Question Bagged Bagless
Dirt collection Replaceable bag Reusable dust bin
Supplies Correct bags plus specified filters Specified filters and bin care
Disposal Remove and replace bag as instructed Empty bin and clean components as instructed

When bagged is the better fit

A bag can make disposal convenient if you prefer handling a contained load rather than pouring loose dirt into a bin. Check how the particular bag closes and is removed; not every bagged vacuum has the same sealing arrangement. Plan somewhere to keep the correct replacement bags.

Maintenance still matters. Miele’s support guidance explains that a full bag or clogged filters can reduce cleaning performance. A bag is not a reason to ignore the filter schedule or keep vacuuming beyond the indicated fill condition. Verify local availability and the cost of the correct supplies before committing to a discounted machine.

When bagless makes sense

A reusable bin avoids buying collection bags and makes its fill level easy to inspect on transparent designs. But “no bags” does not mean no maintenance or ongoing expense. Read the model’s filter replacement and cleaning requirements, and check how the bin opens over your household rubbish container.

If a filter is washable, follow its cleaning and drying instructions before reinstalling it. Do not assume all filters or motor components can be rinsed. Choose a bin arrangement you can empty without repeatedly making a mess in the small space available. The convenience is partly about your disposal routine, not only the machine’s specifications.

Choose for the floors first

Check the included floor head for your mix of hard flooring, low rugs and thicker carpet. A brand may sell similar canisters with different heads, accessories and filters. A low price on a basic package can stop being a saving if you need an expensive compatible head afterward.

Assess hose and wand storage, cord reach, carrying weight and the turning space around furniture. Measure the storage arrangement with the hose attached or detached as intended. A compact body still needs room for the full set of accessories.

Where to spend the upgrade money

Pay for a suitable head, manageable handling and clearly documented filtration. Neither bagged nor bagless automatically establishes a HEPA filter or a sealed whole-machine system. Compare the exact package rather than assuming an allergy claim applies to every model. Keep a working vacuum if it already suits the floors and its maintenance is practical; changing the collection system alone may not improve cleaning.

Compare current listings in your country

These buttons open matching Amazon search listings rather than a guaranteed in-stock offer. Confirm the exact model, seller, included parts, delivered price and return terms. Offers can differ between the United States and Canada.

bagged canister vacuums

bagless canister vacuums

Related guides on My Indoor Space

Sources and research

Organized shoe storage beside a clothing area
Home Organization

Shoe Cabinet vs Open Shoe Rack: Which Fits a Small Entryway?

Disclosure: As an Amazon Associate, My Indoor Space earns from qualifying purchases through links in this article, at no extra cost to you.

Quick verdict

Choose a cabinet when concealed storage and a shallow footprint justify installation. Choose an open rack for quick access and a simpler daily shoe rotation. Measure the actual shoes and moving clearances; advertised pair counts are only a starting point.

Research-based buying guide. Product information checked October 16, 2026. We have not tested these products hands-on; recommendations distinguish published features from our buying judgments.

slim shoe cabinets

open shoe racks

Organized shoe storage beside a clothing area
Illustrative shoe storage; not a verified example of either IKEA product. Photo: Pexels.

A narrow entryway needs space for people as well as shoes. A closed cabinet can make the area look tidier, while an open rack keeps everyday pairs visible. The best purchase is the one that fits your door movement and the shoes you really wear, including bulky winter footwear.

The practical comparison

Priority Shoe cabinet Open rack
Appearance Conceals stored footwear Keeps pairs visible
Access Needs door or tilt-out clearance Direct access to shelves
Installation Check required wall securing Check assembly and stacking rules

Measure the opening space too

A cabinet’s closed depth is not its whole operating footprint. Check how far doors or tilt-out compartments project when open. Leave room for a person to stand and use them without blocking the entrance. Skirting boards, nearby handles and outlets can also affect mounting or placement.

IKEA’s TRONES is one shallow example, listed at 52 cm wide, 18 cm deep and 39 cm high per cabinet. IKEA says these cabinets must be secured to the wall. Include suitable fasteners and rental permission in the plan. A lightweight plastic construction does not remove the anchoring requirement.

Capacity depends on your footwear

A manufacturer pair count cannot predict every shoe collection. Large trainers, high heels and tall boots occupy different shapes. Check compartment height and usable depth, then prioritize the pairs that need a home beside the door. Seasonal storage elsewhere may be more practical than an oversized entryway unit.

For comparison, IKEA’s cited GREJIG rack is 58 cm wide, 27 cm deep and 17 cm high, and lists three pairs per rack with up to three racks stacked. Those limits apply to that model; they are not permission to build an unlimited tower from any similar-looking rack. Taller boots may need a separate location.

Plan for damp and dirty shoes

A rack leaves footwear accessible while a cabinet hides it, but neither is a shoe dryer. Follow footwear care guidance and let damp items dry appropriately before closed storage. A tray or mat may help manage drips where suitable for the floor, but check whether it fits without creating a trip point.

Think about cleaning behind and beneath the unit. A cabinet with removable components may simplify access; TRONES specifies an easily removable door for interior cleaning. Open racks still need wiping and floor care, especially during muddy weather. A tidier appearance should not hide a maintenance problem.

When the cabinet upgrade is worth it

Pay for concealed storage if visible shoes are the issue and the mounted arrangement fits. Choose a basic rack when you rotate a few pairs and want immediate access. Keep an existing working system if the real problem is too many seasonal pairs in the entrance; changing furniture without reducing the load may simply move the clutter.

Compare current listings in your country

These buttons open matching Amazon search listings rather than a guaranteed in-stock offer. Confirm the exact model, seller, included parts, delivered price and return terms. Offers can differ between the United States and Canada.

slim shoe cabinets

open shoe racks

Related guides on My Indoor Space

Sources and research

Full-length mirror in a bright room
DIY & Decorating

Leaning vs Wall-Mounted Full-Length Mirror: A Renter’s Buying Guide

Disclosure: As an Amazon Associate, My Indoor Space earns from qualifying purchases through links in this article, at no extra cost to you.

Quick verdict

Choose wall mounting when the product and wall support it and you want to preserve floor space. Choose a mirror approved for leaning when its footprint works and you can install its required anti-tip restraint. A leaning mirror should not be assumed to be a no-drill rental solution.

Research-based buying guide. Product information checked October 16, 2026. We have not tested these products hands-on; recommendations distinguish published features from our buying judgments.

leaning full-length mirrors

wall-mounted full-length mirrors

Full-length mirror in a bright room
Illustrative mirror placement; follow the selected product’s anchoring instructions. Photo: Pexels.

A full-length mirror can make dressing easier without occupying a large room. But a leaning design uses floor depth, while a mounted design depends on the wall and fixing method. For renters, installation requirements should be checked before ordering a large, fragile item.

Compare the space and installation

Question Leaning mirror Wall-mounted mirror
Floor area Needs its specified lean and stable footprint Can keep the floor below clear
Fixings May still require anti-tip attachment Needs suitable mounting hardware
Placement Floor, wall and restraint must suit the design Wall type and viewing height must suit the design

Leaning does not mean unsecured

Umbra’s Hub Leaning Mirror is an example approved for vertical leaning or wall mounting, with anti-tip hardware included for the leaning arrangement. That is a product-specific instruction, not evidence that any wall mirror can be placed on the floor. Check the actual manual for your chosen mirror.

In a rental, confirm whether the required restraint or brackets can be installed. Permission and suitable fixings matter for either arrangement. If you cannot use the specified method, choose another product explicitly designed for your permitted installation rather than improvising with adhesive or omitting the restraint.

Check the route through the room

Mark the mirror’s width and floor projection with removable tape. Open nearby doors and drawers, walk through the usual route and consider vacuuming access. A slim frame can still create an obstruction at floor level, especially behind a door or at the end of a bed.

For wall mounting, mark the full outline and check the viewing position from where you will stand. Consider switches, outlets and furniture. Follow the installation instructions for the wall material, mirror weight and required mounting points. Do not assume hardware supplied for one wall type suits another.

Buy the right orientation and size

A product described as vertical-only must be used that way. Umbra explicitly distinguishes the approved orientation for its cited Hub mirror. Check hanging-point placement rather than deciding to rotate a large mirror after delivery. “Full length” also does not mean the same dimensions across brands.

Read the actual height and width, then assess the viewing distance available in your room. A photograph taken in a large studio does not establish how the mirror will work in a narrow hallway. A smaller product in the right position may be more useful than an oversized one you cannot install correctly.

What makes an upgrade worthwhile?

Pay for a suitable construction, clear installation documentation and a size that fits the room. Include necessary fixings and any installation assistance in the total price. Keep an existing mirror if it provides the view you need and is installed as intended. Changing from mounted to leaning solely for appearance adds little value if the new footprint makes daily movement harder.

Compare current listings in your country

These buttons open matching Amazon search listings rather than a guaranteed in-stock offer. Confirm the exact model, seller, included parts, delivered price and return terms. Offers can differ between the United States and Canada.

leaning full-length mirrors

wall-mounted full-length mirrors

Related guides on My Indoor Space

Sources and research

White bedding and pillows on a bed
Bedroom & Comfort

Duvet vs Comforter: Which Bedding Setup Is Easier to Keep?

Disclosure: As an Amazon Associate, My Indoor Space earns from qualifying purchases through links in this article, at no extra cost to you.

Quick verdict

Choose an insert with a removable duvet cover if a separately washable outer layer suits your routine. Choose a standalone comforter if you prefer fewer components and can care for the whole item. Product names overlap, so check construction and included pieces.

Research-based buying guide. Product information checked October 16, 2026. We have not tested these products hands-on; recommendations distinguish published features from our buying judgments.

duvet inserts and covers

standalone comforters

White bedding and pillows on a bed
Illustrative bedding; fill, warmth and cover construction are not established. Photo: Pexels.

The word “comforter” does not always mean a finished top layer used without a cover. Some brands use it for an insert intended to sit inside one. Before comparing prices, identify whether you are buying a complete standalone item, a filled insert, an empty cover or a bundle.

Compare the complete setup

Decision Insert plus duvet cover Standalone comforter
Components Filled insert and separate outer cover One finished filled item
Routine laundry Cover care and insert care are separate Follow the whole item’s care label
Changing appearance Can replace a compatible cover Appearance is part of the item

Start with your laundry equipment

Check both the bedding care instructions and your washer’s guidance for bulky items. Physical space inside the drum is not the only consideration; the item needs the washing and drying conditions its maker specifies. If the comforter requires equipment you do not have, include outside laundry costs in the decision.

A removable cover can reduce how often the insert needs cleaning, but it does not remove that requirement. Read each component’s care label. A large cover can also be a bulky load, so do not assume any cover fits comfortably in any machine just because it resembles a sheet.

Do you want to manage the cover?

Look at the closure and internal attachment points. Ties and compatible insert loops can help keep the pieces aligned, but check their placement rather than assuming every cover and insert pair connects. An awkward opening or mismatched size can make changing the bed frustrating.

A standalone comforter removes the cover-changing step and may be easier when you want one finished piece. That simplicity can be worth more than seasonal color changes. If you already own a comfortable insert, however, purchasing a suitable cover may be enough instead of replacing the entire setup.

Warmth is a separate choice

Both arrangements can use different fills and weights. Compare the actual product description and your room conditions; “duvet” is not inherently warmer than “comforter.” A heavy decorative appearance is also not a reliable measure of insulation. Check whether the selected listing is the lightweight, all-season or warmer version.

Measure the mattress and the drop you want on each side. Size names can cover different dimensions between brands. Match a cover to the insert measurements and manufacturer guidance, then think about shared-bed coverage. A bargain set that exposes the mattress sides or bunches badly is not good value.

When to spend more

Pay for a system whose cleaning and assembly routine you will actually maintain. Compare insert-plus-cover cost with the complete standalone option, including necessary extras. Keep serviceable bedding if a different name is the only attraction. The right purchase should fix a concrete issue with warmth, fit, laundry or appearance.

Compare current listings in your country

These buttons open matching Amazon search listings rather than a guaranteed in-stock offer. Confirm the exact model, seller, included parts, delivered price and return terms. Offers can differ between the United States and Canada.

duvet inserts and covers

standalone comforters

Related guides on My Indoor Space

Sources and research

Close view of white bedding and a pillow
Bedroom & Comfort

Cotton Percale vs Sateen Sheets: Which Feel Is Worth Buying?

Disclosure: As an Amazon Associate, My Indoor Space earns from qualifying purchases through links in this article, at no extra cost to you.

Quick verdict

Start with percale if you prefer a crisp, matte feel; start with sateen if you prefer a smoother surface and drape. Compare actual fabric content, mattress fit and care. Neither weave name guarantees the same temperature or comfort for every sleeper.

Research-based buying guide. Product information checked October 16, 2026. We have not tested these products hands-on; recommendations distinguish published features from our buying judgments.

cotton percale sheets

cotton sateen sheets

Close view of white bedding and a pillow
Illustrative bedding; its weave and brand are not verified. Photo: Pexels.

Two cotton sheet sets can feel noticeably different even before the first wash. Percale and sateen describe weave structures rather than two different cotton species. Choosing between them is mainly a texture and construction decision, with fit and care determining whether the set works on your bed.

Compare the feel you want

Priority Percale Sateen
Typical surface Crisper, more matte Smoother with more sheen
Starting preference People who like a light, crisp sheet People who like smoothness and drape
Quality check Read fiber, finishing and care details Read fiber, finishing and care details

Use weave as a starting point

Brooklinen describes its Classic Percale as one-over-one-under cotton construction with a crisp surface, and its Luxe Sateen as a different weave producing a smoother finish. Its own products also differ in thread count. Those published specifications help distinguish the collections; they are not our hands-on comparison of their feel.

The weave name does not identify every finish. Washed percale can feel different from a newly finished crisp set, and sateen products can vary in weight and softness. If your main reason for replacing sheets is texture, a fabric sample or a clear return policy may be more valuable than a heavily discounted bundle.

Be careful with cooling promises

Percale is often marketed to people who prefer a cooler-feeling bed, while sateen is associated with a smoother, more enveloping feel. Treat that as a shopping direction, not a guarantee. Your room, mattress protector, duvet, clothing and personal preference all contribute to the result.

Changing sheets alone may not solve an overly warm bedding setup. Before buying, consider whether a thick top layer or protector is the feature you most want to change. Avoid paying extra for broad cooling language when the listing gives little information about the actual fiber and fabric.

Fit matters more than a large thread-count number

Measure the mattress including any topper. Compare the fitted sheet’s stated depth and allowed fit rather than relying only on “queen” or “king.” Check whether the bundle includes a flat sheet, how many pillowcases come with your size and whether their dimensions match your pillows.

Thread count alone does not tell you which set you will prefer or how long it will last. Compare like materials and look for clear construction information. Cotton sateen is not the same claim as a generic “satin” sheet, which may use a different fiber. Read the composition field rather than a headline.

Who should upgrade?

Buy the weave that addresses a specific dislike in your existing sheets: too crisp, too slippery, too heavy or simply the wrong fit. Check washing and drying instructions before choosing, especially if you share laundry facilities. Keep a comfortable, correctly fitting set until it needs replacement; a higher thread count is not an automatic comfort upgrade.

Compare current listings in your country

These buttons open matching Amazon search listings rather than a guaranteed in-stock offer. Confirm the exact model, seller, included parts, delivered price and return terms. Offers can differ between the United States and Canada.

cotton percale sheets

cotton sateen sheets

Related guides on My Indoor Space

Sources and research

Glass electric kettle containing water
Kitchen & Dining

Glass vs Stainless Steel Electric Kettle: Which Is Easier to Live With?

Disclosure: As an Amazon Associate, My Indoor Space earns from qualifying purchases through links in this article, at no extra cost to you.

Quick verdict

Choose glass if seeing the water and interior condition matters most. Choose stainless steel if you prefer an opaque metal body and its handling suits you. Buy for the complete kettle’s controls, access and specifications; the body material alone does not establish faster boiling or better water.

Research-based buying guide. Product information checked October 16, 2026. We have not tested these products hands-on; recommendations distinguish published features from our buying judgments.

glass electric kettles

stainless steel kettles

Glass electric kettle containing water
Illustrative kettle; not a verified Breville model or a boiling-speed test. Photo: Pexels.

A glass kettle shows what is happening inside; a stainless steel kettle gives a different look and feel on the counter. Those are useful differences, but they do not answer every buying question. Capacity, power, lid access and pouring control can matter more than the exterior material.

What the materials tell you

Question Glass body Stainless steel body
Seeing the interior Water and deposits are easier to inspect May rely on a window or opening the lid
Surface care Visible marks may prompt more wiping Finish and water windows still need care
Boiling performance Check model power and capacity Check model power and capacity

Do not mistake a material comparison for a speed test

Breville’s Canadian Crystal Clear page lists a glass kettle with 1800W heating, while its Soft Top Pure page lists a stainless steel model with a 1500W concealed element. A difference between those products would not isolate the effect of glass versus steel. Regional versions can also differ, so compare the model intended for your electrical supply.

We have not timed either kettle. For a useful comparison, check rated power, minimum and maximum fill, and the amount you normally heat. A larger capacity is only useful when you regularly need it. For one cup, a kettle with a practical low minimum fill can be more convenient than one bought primarily for maximum capacity.

Visibility and cleaning are daily concerns

Glass makes the water and visible mineral buildup easy to inspect. An opaque kettle may include a viewing window; Breville’s Soft Top Pure specifies dual water windows and a removable scale filter. A metal body therefore does not necessarily mean there are no other materials in the water path.

Check the lid opening and descaling instructions. You should be able to maintain the kettle using the maker’s recommended method without forcing a hand or tool into a restricted opening. Do not assume a clear-looking vessel needs no cleaning, or that deposits are evidence the kettle itself is defective.

Handle the full kettle, not the empty photograph

Consider the combined weight of the kettle and your usual water fill. Look at the handle clearance, lid release and spout position. A kettle you can fill comfortably at your sink and set down securely may be a better choice than a more decorative model. Check the base footprint and cord route too.

Neither glass nor a single-wall metal body should be assumed cool to touch. If exterior-temperature control is important, look for a specifically described insulated design and follow its instructions. A glass kettle described as thermal-shock-resistant still needs the handling and care prescribed for that model.

Where to spend more

Pay for temperature selection or holding functions only if your drinks routine needs them. Keep a basic boiling kettle if it already pours well and is easy to maintain. Between two suitable options, choose the body you prefer after checking the complete construction, rather than treating one material as universally superior.

Compare current listings in your country

These buttons open matching Amazon search listings rather than a guaranteed in-stock offer. Confirm the exact model, seller, included parts, delivered price and return terms. Offers can differ between the United States and Canada.

glass electric kettles

stainless steel kettles

Related guides on My Indoor Space

Sources and research

Wooden and metal utensils in a kitchen container
Kitchen & Dining

Silicone vs Wooden Kitchen Utensils: Which Should You Buy First?

Disclosure: As an Amazon Associate, My Indoor Space earns from qualifying purchases through links in this article, at no extra cost to you.

Quick verdict

Choose a flexible silicone tool for scraping bowls and following pan curves. Choose a suitable wooden spoon or turner when you prefer a rigid stirring tool and accept its care routine. A small mixed collection often earns its space better than a large matching set.

Research-based buying guide. Product information checked October 16, 2026. We have not tested these products hands-on; recommendations distinguish published features from our buying judgments.

silicone cooking utensils

wooden cooking utensils

Wooden and metal utensils in a kitchen container
Illustrative utensil photo; not a comparison of the products’ heat ratings. Photo: Pexels.

Material matters, but the tool’s shape decides whether it can reach a bowl corner, turn an egg or stir a deep pot. Compare the task first. Replacing every utensil with one material is rarely necessary when a few well-chosen pieces can cover the work.

Match the tool to the task

Task Useful starting point Check
Scraping a mixing bowl Flexible silicone spatula Edge flexibility and handle support
Stirring a substantial mixture Rigid wooden spoon or suitably reinforced tool Length, grip and stiffness
Turning delicate food Thin, suitably shaped turner Leading edge and pan compatibility

Where silicone makes sense

Flexible edges can follow curves and help remove sauce or batter. OXO describes that feature on its Silicone Spoon and lists that model as dishwasher-safe. A spatula designed mainly for scraping, however, may be too flexible for lifting a heavier portion. Look for the exact function rather than assuming all silicone tools perform alike.

Construction affects cleaning. Check whether the head detaches and whether seams can be cleaned as instructed. A utensil with a wooden handle and silicone head may have different care requirements from a one-piece silicone-covered design. Do not transfer the dishwasher rating from one product to an entire material category.

Where wood earns its place

A rigid wooden spoon or turner can be pleasant for stirring and working along a pan’s edge. OXO’s cited Wooden Turner uses one-piece beechwood with an oil finish and is specified for hand washing. That example demonstrates a real maintenance difference from its dishwasher-safe silicone spoon.

Check the edge profile and surface condition. A thick wooden turner may not slide under delicate food as easily as a thinner tool, even though it works well for another job. Follow the maker’s cleaning and drying instructions, and assess worn or damaged utensils rather than expecting them to last indefinitely without care.

Heat ratings and cookware need exact checks

Read the maximum operating guidance for the specific tool and its handle. “Heat resistant” is not permission to leave it against a heating element or resting in a hot pan indefinitely. The lowest-rated component may govern how the complete utensil can be used. Avoid generic temperature promises copied from a different brand or product.

Follow your cookware manufacturer’s recommendations, especially for coated surfaces. A tool advertised as suitable for nonstick cookware still needs appropriate handling and a clean, undamaged edge. Material labels do not make forceful scraping harmless, and a trapped hard particle can change what contacts the pan.

What should you buy first?

Start with the shape you currently lack: perhaps a flexible scraper, a practical stirring spoon and a suitable turner. Compare individual prices with the useful pieces in a set. Pay more for a handle you like and construction you can maintain; skip duplicate shapes that will crowd the drawer. Keep serviceable utensils when new material would not improve a task.

Compare current listings in your country

These buttons open matching Amazon search listings rather than a guaranteed in-stock offer. Confirm the exact model, seller, included parts, delivered price and return terms. Offers can differ between the United States and Canada.

silicone cooking utensils

wooden cooking utensils

Related guides on My Indoor Space

Sources and research

Wooden pepper mill on a light surface
Kitchen & Dining

Manual vs Electric Pepper Grinder: Is One-Handed Grinding Worth It?

Disclosure: As an Amazon Associate, My Indoor Space earns from qualifying purchases through links in this article, at no extra cost to you.

Quick verdict

Choose manual for a straightforward mill without batteries when its grip and turning action suit you. Choose electric when the controls and one-handed operation make seasoning easier. Motor power alone is not evidence of better pepper texture.

Research-based buying guide. Product information checked October 16, 2026. We have not tested these products hands-on; recommendations distinguish published features from our buying judgments.

manual pepper mills

electric pepper mills

Wooden pepper mill on a light surface
Illustrative manual mill; not a verified Peugeot model. Photo: Pexels.

A pepper grinder is a small purchase you may use every day. Its value depends on how comfortably you can season the amount you need, refill it and choose a useful grind. An electric motor changes the action; it does not remove the need for a good grinding mechanism and sensible controls.

Compare everyday operation

Priority Manual mill Electric mill
Power source Your turning or cranking action Battery or rechargeable system, depending on model
Hands during cooking Often a two-handed task Some models permit one-handed activation
Maintenance No battery routine Check cells, charging and access

Choose the action you can use comfortably

Look at the mill’s diameter, surface texture and control position. A tall smooth mill can be awkward even if it looks attractive on a dining table. A crank-style manual design and a twist-top design also feel different. Where possible, assess the grip before ordering or choose return terms that allow a practical fit check.

An electric model can be convenient while the other hand steadies a pan or holds food. Check whether it uses a button or another activation method and whether the control is easy to press. “Electric” does not guarantee that the whole sequence, including refilling and adjusting, is effortless for every user.

Grind control deserves the upgrade money

Fine pepper for a sauce and coarse pepper for finishing need different settings. Look for a clearly explained adjustment system and how it returns to a previous setting. Peugeot offers mills with its u’Select adjustment system, but its full range does not consist of identical mechanisms and controls.

Manufacturer descriptions can establish the available settings; they do not prove an untested mill’s speed or particle consistency against a rival. Avoid buying a premium model solely because its listing uses professional imagery. A basic adjustable mill that produces the texture you want may be sufficient.

Refilling and power affect convenience

Check the opening size, capacity and how many parts must be removed to refill. A transparent chamber makes the remaining quantity easier to see, while an opaque mill may need an occasional check. Capacity should match use: an oversized table mill is unnecessary if you season small meals infrequently.

For electric designs, verify whether the supplied power system is rechargeable or uses replaceable cells, whether charging equipment is included and whether the battery compartment is easy to reach. Follow the exact instructions for suitable peppercorns and cleaning. A pepper mechanism is not automatically suitable for salt, moist seasonings or every whole spice.

Buy, upgrade or keep?

Pay for electric operation if the activation method solves a daily handling problem. Choose manual if its action works well and you prefer fewer maintenance steps. Keep an existing mill when it adjusts reliably and is comfortable to use; changing the power source alone is not a reason to expect better flavor.

Compare current listings in your country

These buttons open matching Amazon search listings rather than a guaranteed in-stock offer. Confirm the exact model, seller, included parts, delivered price and return terms. Offers can differ between the United States and Canada.

manual pepper mills

electric pepper mills

Related guides on My Indoor Space

Sources and research

Kitchen knives and peelers on a wooden board
Kitchen & Dining

Magnetic Knife Strip vs In-Drawer Knife Block: Which Saves Space?

Disclosure: As an Amazon Associate, My Indoor Space earns from qualifying purchases through links in this article, at no extra cost to you.

Quick verdict

Choose a drawer organizer when you have measured space and want the knives out of sight without wall mounting. Choose a magnetic strip when you have a suitable secure mounting location and compatible knives. Both can free counter space; neither should be selected on knife count alone.

Research-based buying guide. Product information checked October 16, 2026. We have not tested these products hands-on; recommendations distinguish published features from our buying judgments.

magnetic knife strips

in-drawer knife organizers

Kitchen knives and peelers on a wooden board
Illustrative kitchen tools; not a demonstration of either storage product. Photo: Pexels.

A countertop block is not the only way to organize cooking knives. Moving storage into a drawer or onto a wall can recover valuable preparation space. The better option depends on the knives, the available surface and who needs access—not simply how many slots appear in a product photograph.

The main trade-offs

Question Magnetic strip Drawer organizer
Space used Suitable wall area and clearance Measured drawer footprint and height
Installation Secure mounting required Usually placed inside a compatible drawer
Compatibility Blade must attach as intended Blade length, handle shape and slots must fit

Check the complete drawer opening

Measure usable width, depth and clearance when the drawer closes. Joseph Joseph’s cited large bamboo two-tier organizer specifies a minimum drawer height of 8.5 cm and blades up to 23 cm. Its external dimensions and raised knife handles still need to work with your particular drawer. Check the selected model’s measurements rather than copying a size from another DrawerStore version.

A stated capacity is a maximum under suitable conditions. Wide handles, thick blades and unusually shaped knives may reduce the useful count. Plan space for your everyday chef’s knife and bread knife first, then add smaller pieces. Avoid an arrangement in which you must move several exposed blades to reach one tool.

A magnetic strip needs more than a clear wall

IKEA’s KUNGSFORS example is a 56 cm magnetic rack that can mount directly to the wall or use the compatible rail system. The manufacturer requires secure anchoring and says wall screws are separate. Include suitable fixings and permission to mount in a rental before comparing its cost with a drawer tray.

Confirm that each knife is compatible with magnetic storage. The word “stainless” does not establish how securely a particular blade will attach, and ceramic blades need a different solution. Follow the rack and knife manufacturers’ guidance; do not assume a long strip can support any arrangement or weight.

Position and cleaning matter

Think about the route your hands take when removing and returning a knife. A strip beside a busy doorway, behind a hot cooking surface or within easy reach of children can be an unsuitable choice. A drawer organizer is also not a lock: decide whether additional access control is needed for the household.

Store knives clean and dry according to their care instructions. Check the organizer’s cleaning method as well. Joseph Joseph specifies wiping and hand drying its bamboo model, avoiding soaking, and maintaining it with food-safe oil. That is different from putting a plastic cutlery tray in a dishwasher.

The value decision

Buy the drawer option when the measured fit is good and sacrificing drawer space is acceptable. Buy the strip when wall access solves a real storage problem and mounting is appropriate. Keep a well-fitting existing block if neither option improves access enough to justify the cost and installation.

Compare current listings in your country

These buttons open matching Amazon search listings rather than a guaranteed in-stock offer. Confirm the exact model, seller, included parts, delivered price and return terms. Offers can differ between the United States and Canada.

magnetic knife strips

in-drawer knife organizers

Related guides on My Indoor Space

Sources and research

Dish rack holding glassware and dishes
Kitchen & Dining

simplehuman Steel Frame vs OXO Aluminum Dish Rack: Which Fits?

Disclosure: As an Amazon Associate, My Indoor Space earns from qualifying purchases through links in this article, at no extra cost to you.

Quick verdict

Choose the standard simplehuman Steel Frame if its drainage arrangement and wine-glass storage solve a daily problem. Choose the OXO Aluminum for its open platform and adjustable drainboard when it fits your counter better. Measure both before treating either as an upgrade.

Research-based buying guide. Product information checked October 16, 2026. We have not tested these products hands-on; recommendations distinguish published features from our buying judgments.

simplehuman standard dish racks

OXO Aluminum dish racks

Dish rack holding glassware and dishes
Illustrative dish rack; neither compared model is identified. Photo: Pexels.

A dish rack has to fit the dishes you wash and deliver water back to the sink. A premium frame cannot compensate for a spout that stops short of the basin. This comparison covers simplehuman’s standard Steel Frame model and OXO’s Aluminum Dish Rack, not every compact or foldaway product sold by those brands.

Compare the actual models

Feature simplehuman standard OXO Aluminum
Identifying model Steel Frame, KT1181 on the cited page SKU 13229100
Drainage design Swiveling spout Adjustable drainboard
Layout emphasis Dedicated storage including wine-glass holder Open platform and removable utensil cup

When simplehuman is worth considering

The standard model’s swiveling outlet can be useful when the rack needs a particular orientation beside the sink. Check the full footprint with its accessories deployed, plus whether the outlet reaches over the sink edge. A raised rim or an awkward counter corner can defeat an otherwise convenient design.

Its glass-storage feature matters most if you regularly wash stemware by hand. It is less valuable if nearly everything goes in a dishwasher and the rack mainly holds a mug and a saucepan. Do not transfer the standard model’s accessories to a compact listing: compare the exact product page and included pieces.

When OXO is the sensible choice

OXO lists an aluminum-and-plastic construction, open center, adjustable drainboard and removable utensil cup. Its published dimensions are 17.9 by 14.9 by 6.6 inches. Mark that rectangle on the counter, then leave additional clearance for protruding dishes and the drainage position.

An open layout can suit a changing mixture of bowls, plates and cookware, but no manufacturer’s capacity description guarantees your largest pan will sit securely. Consider the items that cause trouble now. A wider rack is not automatically better if it takes over the only food-preparation area.

Cleaning access can outweigh extra holders

Look at which components lift out and how you will reach the tray and outlet. simplehuman describes a removable drain component for cleaning; OXO’s removable cup can also make access easier. Follow each product’s care instructions and check whether any part is dishwasher-safe instead of assuming the complete rack can go in the machine.

Water marks and residue still depend on water conditions and maintenance. Manufacturer drainage and finish claims are useful design information, but they are not our hands-on evidence that either rack stays spotless. Leave room to move the rack for cleaning the counter underneath.

Who should buy or skip the upgrade?

Pay more when a specific holder or drainage adjustment fixes your current problem. Choose the less expensive suitable option when both fit and you only need basic drying space. Keep an existing rack that drains properly and holds your dishes securely; changing its frame material alone is not a compelling reason to replace it.

Compare current listings in your country

These buttons open matching Amazon search listings rather than a guaranteed in-stock offer. Confirm the exact model, seller, included parts, delivered price and return terms. Offers can differ between the United States and Canada.

simplehuman standard dish racks

OXO Aluminum dish racks

Related guides on My Indoor Space

Sources and research

Scroll to Top